-
Halloween T-shirt Designs :: Jack-o-Lantern Stencil Pattern
Every year at my girls’ dance studio, the kids perform a short Halloween dance in every class. This means that all week long, leading up to Halloween they dress up. They like to have a…
-
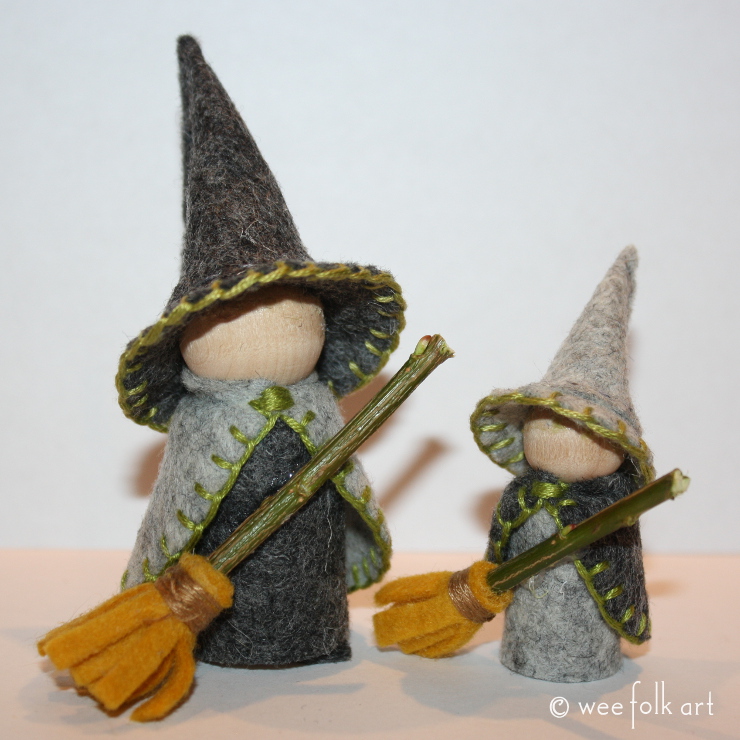
Peg Doll Witch Pattern :: Gnome Witch Costume
Whether your Gnomes have been invited to a Harvest Celebration or plan to go out for Trick or Treats, they are sure to be the friendliest witches around in their Gnome Witch Costume! The peg doll…
-
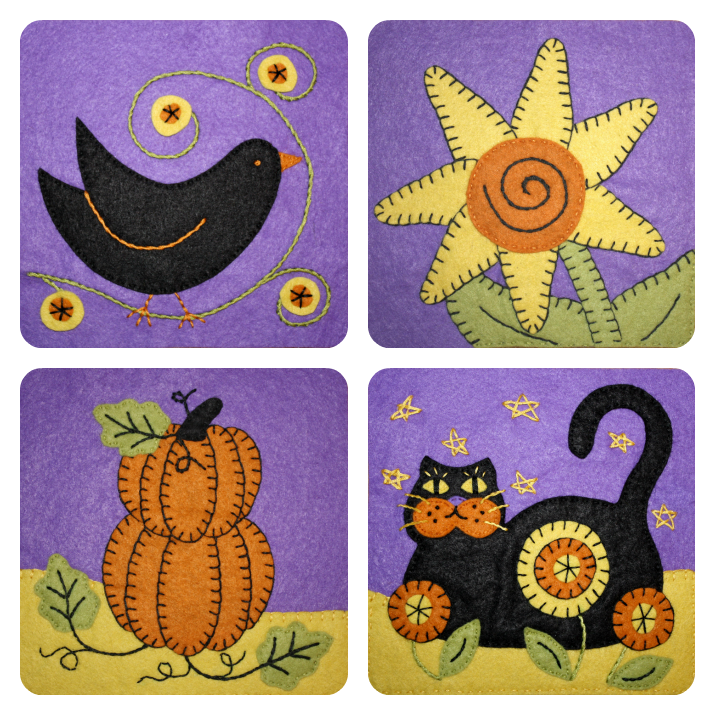
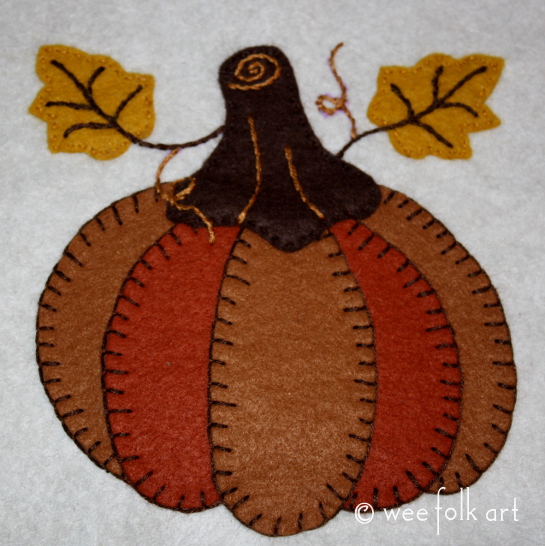
October Applique Blocks
Here’s a collection of October Appliques… more cheery than scary… but just right for Halloween! In previous years we have shared the Black Bird and the Black Cat Applique Blocks. Over the next two weeks…
-
Halloween Desktop Wallpaper Gourd Ghost Sculpture
To get your Wee Folk Art Halloween Desktop Wallpaper: Choose your screen size. Click on the link. When the whole images loads, right click on the image and set as desktop background. Enjoy! Gourd Ghost…
-
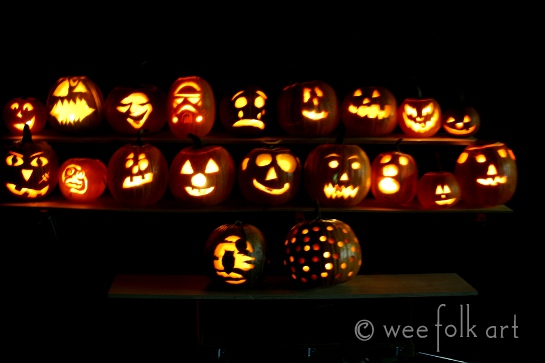
21st Annual Pumpkin Carving Party
Saturday, our family hosted our 21st Annual Pumpkin Carving Party. Truth be known, it began as a ploy, to give 12 year old Missy (our nickname for Wee Folk Art’s very own Michelle) a chance…
-
Harvest Time Week Nine: Biggest Pumpkin Ever
This week we are working on Week Nine of our Harvest Time unit. I will be posting a weekly update to give everyone a space to chat about…
-
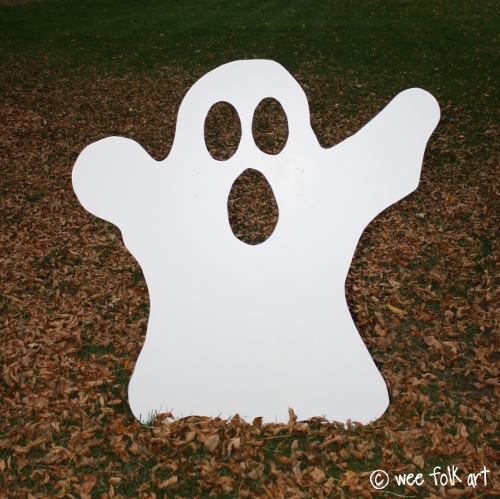
Halloween Ghost Bean Bag Toss Yard Game
Are you having a gathering at your house for Halloween? Why not take one of our Ghostie Applique Blocks and practice enlarging a pattern? We took one of our 6 inch ghost applique blocks and turned…
-
Peg People Ghost Pattern :: Ghosties in the Thicket
Use the Peg People Ghost Pattern to make your own ghostie for your pretend play. The gnome’s lives are rich with stories and folklore, and there has never been a story teller in The Thicket that could…
-
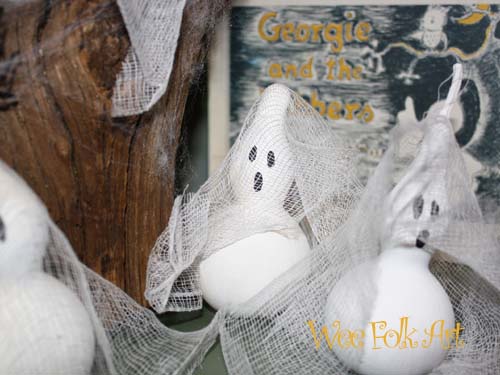
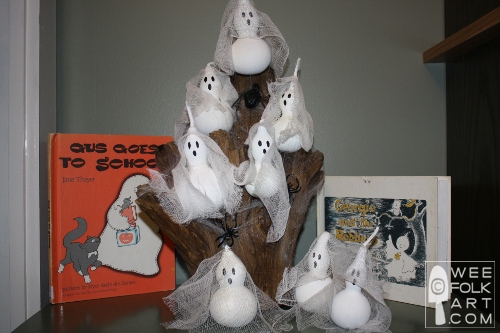
Gourd Ghost Sculpture Halloween Decoration
Saturday night is our 19th Annual Pumpkin Carving Party… I’ll tell you more about that later. But when the decorations were unpacked, a devastating discovery was made. Mice had gotten into one of the boxes and…
-
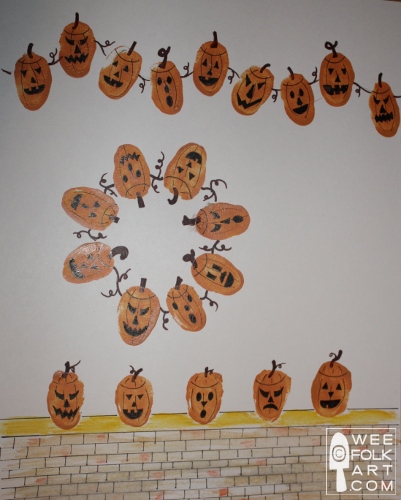
Thumbprint Pumpkins Art Project
What happens when you combine a compulsive doodler, orange paint and an hour long phone conversation? A gaggle of pumpkins, of course! Seriously, I’m on the phone and there was my cheese box of paints…
-
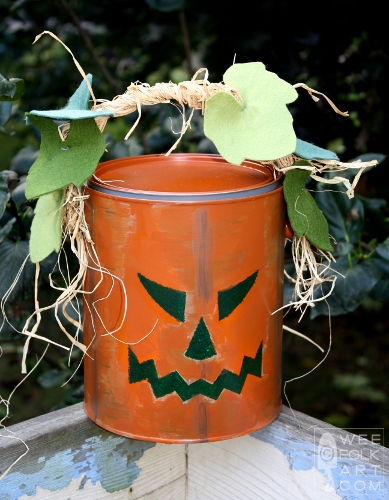
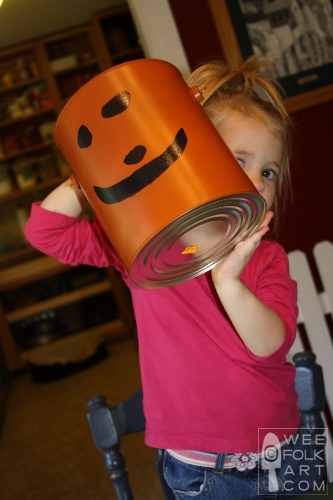
Paint Bucket Jack-O-Lantern Pattern
Turn a new paint can (available at hardware stores) or a used paint can that has been thoroughly cleaned, into a festive Paint Bucket Jack-O-Lantern. Click here to see our wee folks making their own…
-
Jack-o-Lantern Buckets
My mom came up with the idea for these Jack-o-Lantern Buckets. She was planning to make a couple for herself (see hers at Wee Folk Art) and thought that the kids would like to make…
-
You Say Harvest Pumpkin, I Say Jack-O-Lantern!
You have heard us often talk about the many uses for our applique blocks… that’s why we create so many of them. We’ve talked about enlarging them, reducing them, turning them into wood, stuffies, stencils…
-
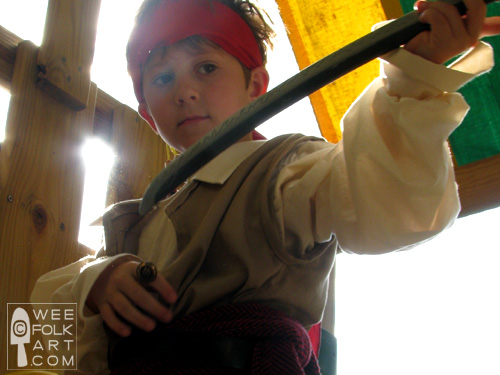
Dress Up Vest
I got a chance to make Bug a darker vest for his pirate costume (check out the pirate shirt un-pattern here) and took a bunch of pictures along the way. Here is the Dress Up…
-
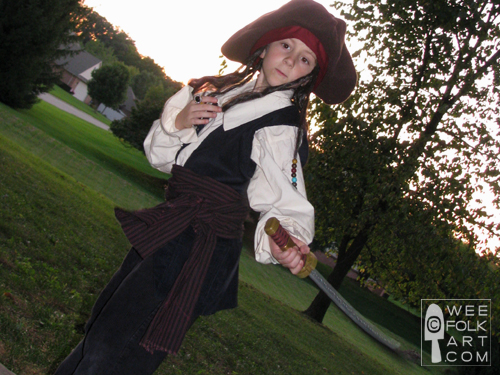
Pirate Shirt Tutorial UN-Pattern
We are calling this the Pirate Shirt Tutorial UN-PATTERN. I totally winged this pattern and don’t have the normal step-by-step photos you have come to love about WeeFolkArt (although there are still a good handful).…
-
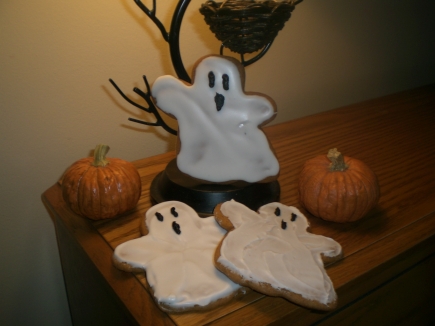
Butterscotch Gingerbread Cookie Recipe :: Halloween Ghosts
Today we are sharing our family’s favorite Butterscotch Gingerbread Cookie Recipe. Although it is pictured here as ghosts, it makes a wonderful traditional Gingerbread man cookie at Christmas. This year is our family’s 18th Annual…
-
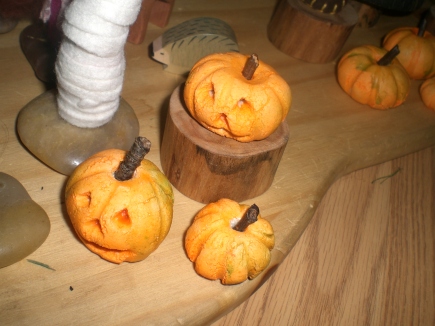
Salt Dough Pumpkins
A few weeks ago Michelle made salt dough veggies with her children. They have a knit play mat that she made (and must share with everyone soon) and they wanted veggies to plant in their…
-
Hanging Fabric Ghosts Halloween Decorations
For fun Halloween decorations, make these Hanging Fabric Ghosts to haunt your home. We created these Hanging Fabric Ghosts to go along with this week’s Unplugged Challenge theme: white. I’m sure I’m not the only…
-
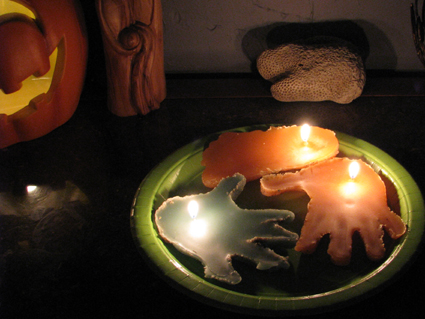
Handprint Sand Candles Handprint Craft
Here is a fun, quick handprint craft project that can add to your spooky Halloween decor. Make your own recycled wax handprint sand candles. This afternoon we made handprint sand candles using the kids…

Patterns & Crafts