
Handkerchief Bandana Pattern – Plain or Embroidered
Use our handkerchief bandana pattern to make a simple bandana for keeping your hair out of your eyes or add embroidery to make it extra special.

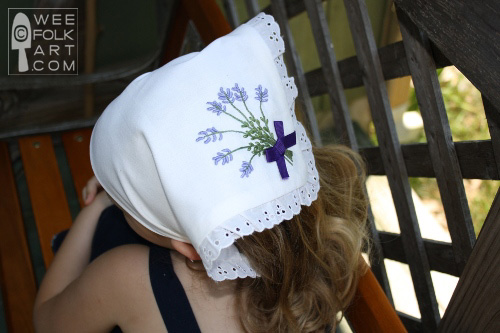
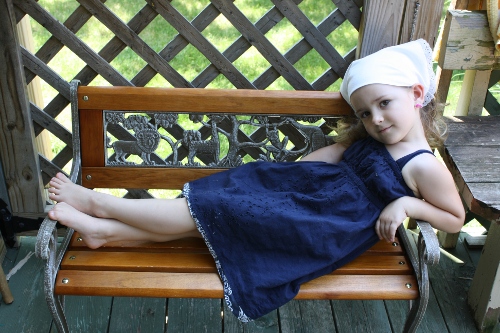
The directions below are for a plain handkerchief bandana pattern, but options are given for making the handkerchief bandana featured above.
A note about sizing: We found using the 16″ square works for children and adults, but you’ll need to change the elastic size and band size. To get a good fit, using a tape measure, measure your head where the bandana will lie. To cut your elastic take your measurement, minus 16. (Example: Fairy’s head was 19 inches, so 19 – 16 = 3. I cut the elastic 3″. My head is 22 inches, so 22 – 16 = 6. I cut elastic for me 6″. For the band that goes under the bandana: the height with always be 4″ but to determine the length, add 3 inches to the elastic size. (Example: Fairy’s elastic was 3″ so I cut the band 4″ x 6″. (3 + 3). My elastic was 6 inches so I cut the band 4″ x 9″ (6 + 3)
Handkerchief Bandana Pattern
Materials to make Fairy’s bandana: (19″ head) See note above for sizing.
16” fabric square
4” x 6” fabric
1/2″ elastic to size
1” Lace (optional)
embroidery floss (optional)
12″ of 1/4″ grosgrain ribbon (optional)
lavender bunch embroidery pattern (optional) (Directions for the Bullion Stitch used in this embroidery pattern are available HERE.)
1] Cut out 1 piece of fabric 16” x 16” and 1 piece 4” x 6”.
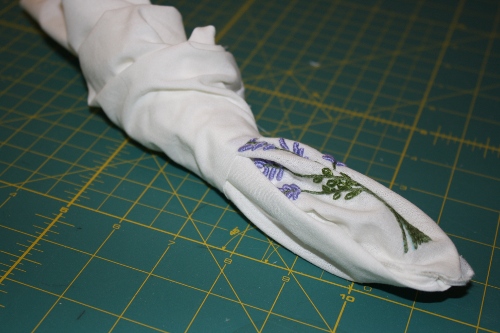
2] If you want to embellish your scarf do so before you sew it together. This will hide all your work on the inside. Ideas for embellishments are embroidery, appliques, rick-rack, beads, etc. NOTE: When placing embellishments remember you will be sewing the scarf together using a 1/2″ seam. When placing designs, taking into account the loss of fabric due to the seam. I included the bunch of lavender embroidery I did on my scarf. Also, the scarf will be folded in half diagonally, with half the triangle being the front, and half being the backside. Keep your design on the front triangle. (I will comment later on making the bandana reversible.)

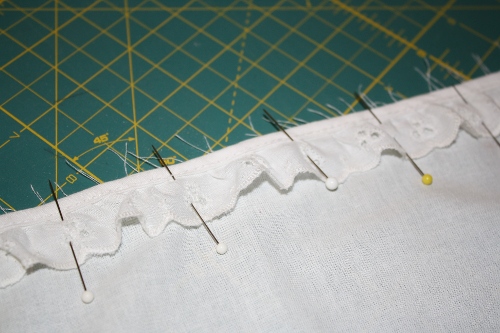
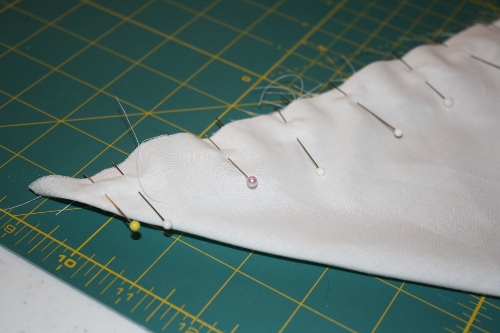
3] Optional lace. If you would like to sew lace into your seam, begin pinning the lace to 2 sides of the square that will be the front of your scarf. Pin the lace along the edge. REMEMBER, there will be a 1/2″ seam. You will lose 1/2″ of the lace. Your lace must be wide enough to be able to “hide” 1/2″ in the seam.
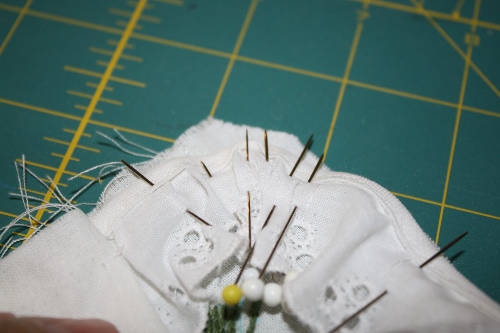
When you get to the corner, you need to make a slight curve while pinning on the lace. I found I placed a lot of pins so the lace laid flat. You do not need to take the lace all the way to the point but remember, there is a 1/2″ seam, so make sure your lace stays within the seams so it will be caught when sewing the seam.
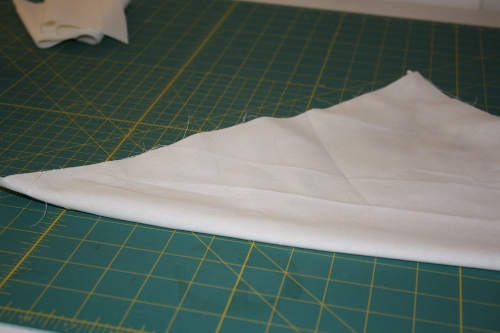
4] Fold the bandana diagonally with right sides together. Pin in place. Sew using a 1/2″ seam.
Optional lace. If you are sewing a piece of lace on, fold the bandana diagonally with right sides together. You will be covering the lace you pinned on. Pin in place. Sew until you are within 1” of the corner. Instead of sewing a right angle, sew a slight curve making sure the lace edge below has been caught. Continue down the other seam.
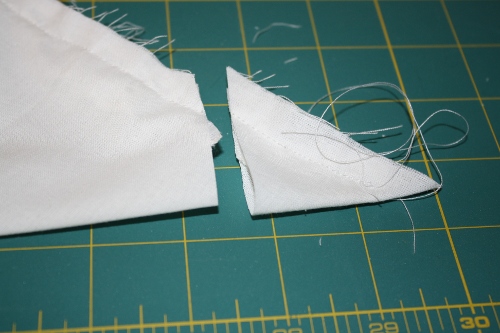
5] Cut off 2” from either end of the long diagonal fold.
6] Turn the scarf right side out and press.
Optional lace. If you added lace, there are a ton of pins on the inside holding the lace in place. I found I was able to undo the pins before turning the scarf, and let them slip out of an open end. It would be very hard to turn the scarf if you leave the pins in!
7] Turn each unfinished edge 1/2″ to the inside of the scarf and press.
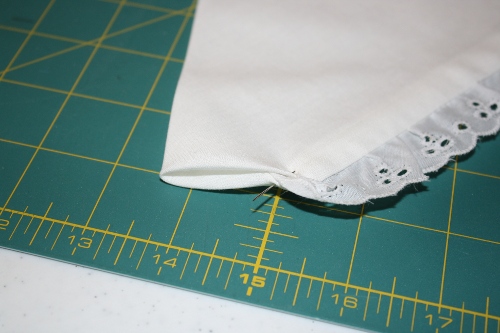
Optional lace. Make sure the unfinished edge of the lace is tucked inside. You may need to fold it over a bit to make sure it is neatly tucked inside so it will be caught in the seam when you attach the headband.
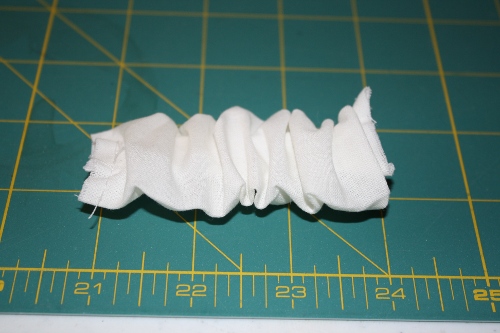
8] To make the headband, fold the right sides of the 4” x 6” together, creating a 2” x 6” rectangle. Sew a 1/2″ seam along the unfinished 6” side. Turn and press.
9] Cut the elastic a little longer than you think you need. Pull it through the inside of the headband and attach at either end with safety pins. This will tucked into the scarf 1/2”. To check for sizing, pin this to the bandana overlapping the scarf by 1/2″. Try it on for size. Shorten the elastic until you have a good fit.
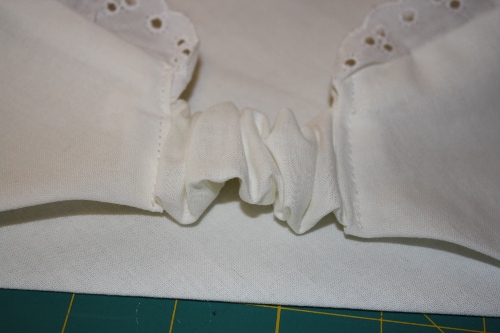
10] Slide the ends of the headband into the scarf 1/2″ and pin in place. Sew the headband on 1/4″ from the turned up fold making sure you are sewing through the front, headband and back of the scarf.
11] Optional: If you embroidered the lavender bunch, make a small bow out of the grosgrain ribbon and tack in on to the shafts of the lavender. You should be able to tack it on so your stitches only go through the top layer and are not visible on the back of the bandana.
Slide it on and go have fun!
Directions for making a REVERSIBLE bandana.
If you would like to use 2 different fabrics and make your bandana reversible, it is easy to do! Start by cutting out 2 right triangles, with 16 1/2″ sides. (Basically, cut a 16 1/2″ square in half diagonally. (It needs to be 1/2″ bigger because you will be sewing it together along the diagonal.) Make the headscarf as explained above, embroidering or adding lace to one side. When step 4 instructs you fold the square in half diagonally, instead, you will pin the 2 separate triangles together with right sides touching. Sew all the way around the 3 sides, using a 1/2″ seam allowance. Proceed with step 5.


2 Comments
Janet MacDonald
Your handkerchief bandanna is adorable! What a good idea for a head band. Thanks so much for sharing your idea! ~Janet in Canada
Kimara
You are very welcome. After I posted this she requested I make her a few more with other flower’s on them. What fun! ~Kimara~