Nubbie Dolls

We created the Nubbie Doll with babies and mommies in mind. Nubbies have everything a baby loves; satin blanket binding to rub between their fingers, nubbie hands that are perfect for chewing on, and soft cotton flannel body for snuggling and they are small enough to carry everywhere! For moms we made them machine washable and dryer safe, and attached a loop to attach to stroller, high chair or baby sling. Our 2 – 5 year olds have a basket full of them, and they still enjoy playing with them. They also look great when used instead of a bow on baby gifts.
Material List:
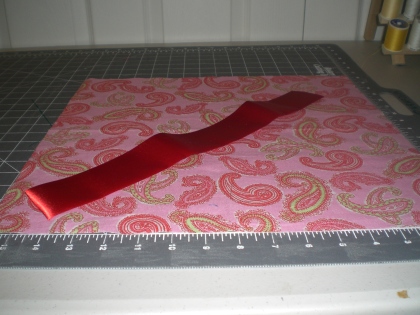
16” x 16” square of light to medium weight flannel
16” contrasting blanket binding
12” grosgrain ribbon for tie
4” grosgrain ribbon for loop
Small amount of fiberfill
Cut one square of flannel 16” x 16”. Cut 1 piece of satin blanket binding 16” long. Cut one 12” grosgrain ribbon. Cut one 4” grosgrain ribbon for loop.

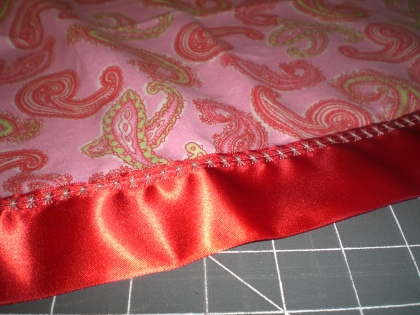
Pin blanket binding to lower edge of flannel square. Using a contrasting colored thread, sew close to the binding edge using a straight, zigzag or decorative stitch. Trim threads.
Turn a side edge 1/4 inch toward the wrong side. Steam iron it flat.
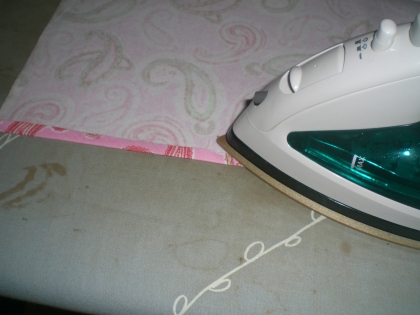
Turn this edge over another 1/4 inch to conceal all raw edges. Steam iron it flat. It helps to place 2 pins near the binding so it does not unroll.

Do steps 3 and 4 to the other side edge.
Fold the 4” piece of grosgrain ribbon in half. On either side edge, 3” from the bottom, place the folded ribbon in the seam so the 2 ends are tucked in the side edge, and the ribbon is perpendicular to the edge. Pin in place.
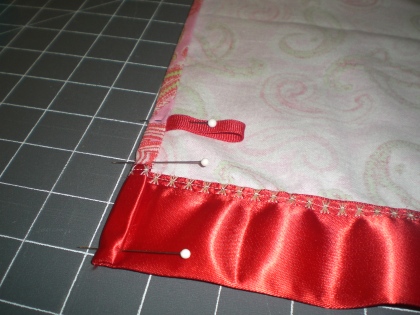
Sew 1 side edge near the inside edge. Do the same for the other side edge. Trim threads.

Turn the top edge over 1/4 inch toward the wrong side. Steam iron it flat.
Turn this edge over another 1/4 inch to conceal all raw edges. Steam iron it flat. It helps to pin the corners so they do not unroll.
Sew the top edge near the inside edge. Trim threads.
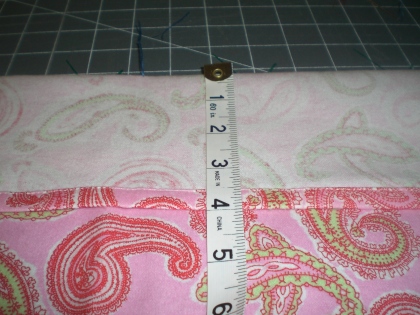
Turn down the top edge 4”. It doesn’t matter which way you turn it. Both ways look cute. See the completed pictures below to decide which way you would like to finish the doll. In the example the material is folded so the right sides are together. This means the doll’s head and bodice will be created from the wrong side of the fabric.
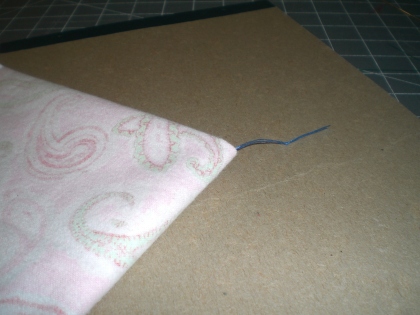
Find the center of the fold and place a marker thread. This spot will be the top of the dolls head and will be used to aid in the creation of the head.
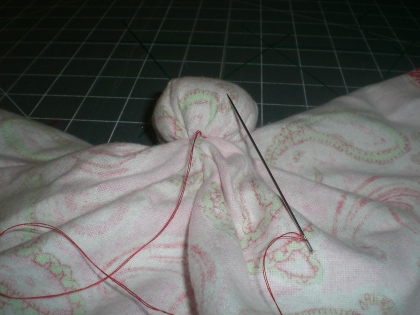
Take some fiberfill, about the size of a baseball, and position it on the inside of the dolls head, making sure the marker thread remains on top.
Compress the fiberfill until it is ping pong ball size, making sure you keep the marker thread on top and the gathers are equally distributed around the doll’s body.
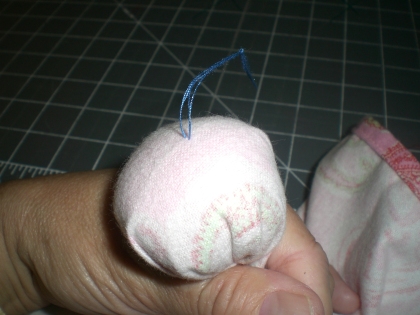
Using a double strand of thread the same color as the ribbon that will be tied around the doll’s neck, secure the fiberfill in the head by knotting thread and going through the neck. Tightly wind thread 5 times around the neck keeping gathers even and the thread marker on top of the head.

Tie off the thread in the middle of the back of the neck. DO NOT cut thread.
Mark the middle of the 12” grosgrain ribbon. Position the ribbon over the thread securing the neck matching the center of the ribbon with center of the back of the neck. Use the attached thread to securely attach the ribbon in place. DO NOT cut thread.
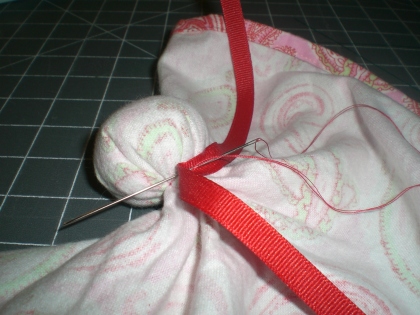
Turn doll over and tie ribbon in a bow. Clip ribbons on an angle to prevent fraying.
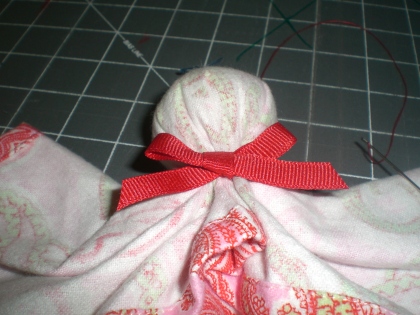
Bring the needle and thread through the dolls neck and secure bow so it cannot come untied. Clip thread and remove thread marker from doll’s head.
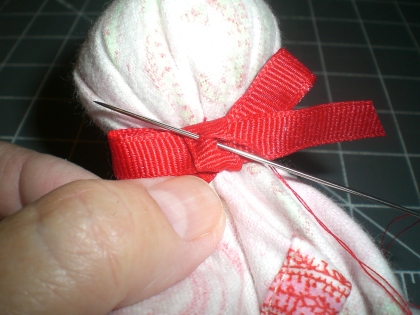
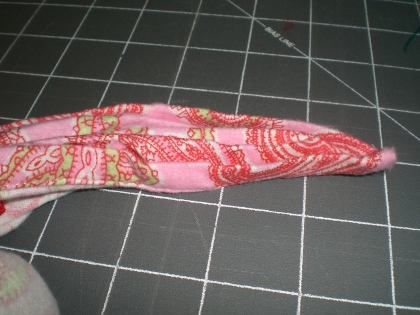
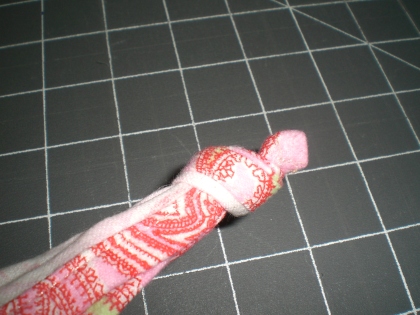
To make hands accordion pleat a corner. The more pleats you put in, the easier it will be to knot the hands.
Now tie a single knot near the end. It is rather bulk and will require some pulling to insure a small solid knot. Do the same to the other hand.
Completed dolls showing variations depending on how you fold the fabric in step 11.

www.WeeFolkArt.com
Copyright © Wee Folk Art 2008. All rights reserved.