
Out of the Block | Making the Tin Ice Cream Cone Cookie Cutter


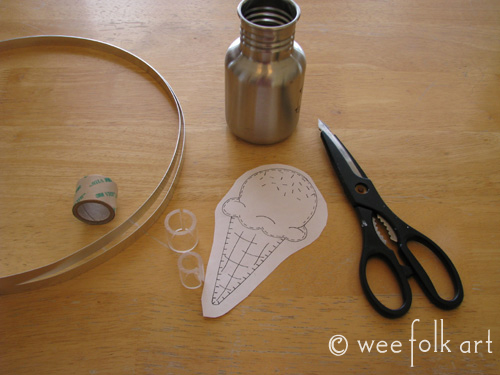
Materials:
You can purchase a tin kit here or you will need…
16″ long, 1/2″ wide food safe tin
Non-toxic metal bonding (3M tape)
and
Old kitchen shears or tin snips
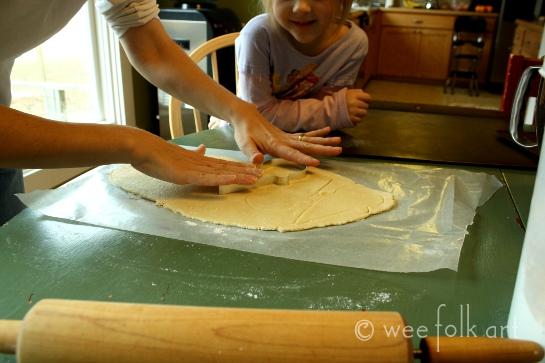
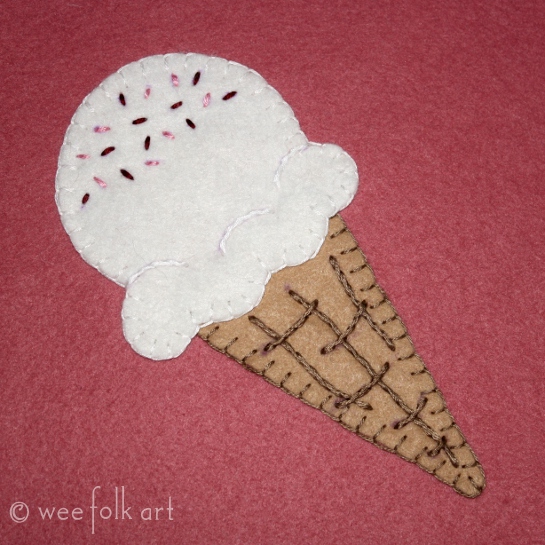
Print out a pattern at actual size (Ice Cream Cone pattern can be found HERE)
Various objects for forming shapes (cans, pencils, spools, etc or the kit includes some shapes)
Yarn or Pipe cleaners
Ruler
Clip

First measure the outside edge of your object by wrapping yarn or even better… pipe cleaners around the edge of your shape. Straighten the pipe cleaners and measure to get the perimeter length.

Add one inch so the edges can overlap. (The ice cream cone requires about 16″). Cut your tin with the shears or tin snips. You can trim the corners on an angle to reduce scratches. Be careful, the tin edges can be sharp.

Start your cookie cutter on a straight edge if possible. I lined it up starting in the middle of a cone edge. Then bend the tin to follow the perimeter shape. You can use various household objects to help you follow the outline of the ice cream cone. If you bought the kit it should come with a few shapes to get you started. A Klean Kanteen bottle worked great for the rounded top of the ice cream. Remember, you should have about 1 inch of overlap on a straight edge side.


Once you have finished bending your cookie cutter into shape clean the tin with dish soap and water. When it has dried completely adhere a 1″ piece of the 3M tape on one side of the open edge. Peel back the other side of the tape, carefully line up the overlapping edges, and stick them together.

Use a clip to hold the piece together while it sets up.

Once it has set up you can do minor adjustments to the shape.


One Comment
Kathy
Thanks for showing us your step by step instructions and pictures. This is a big help.