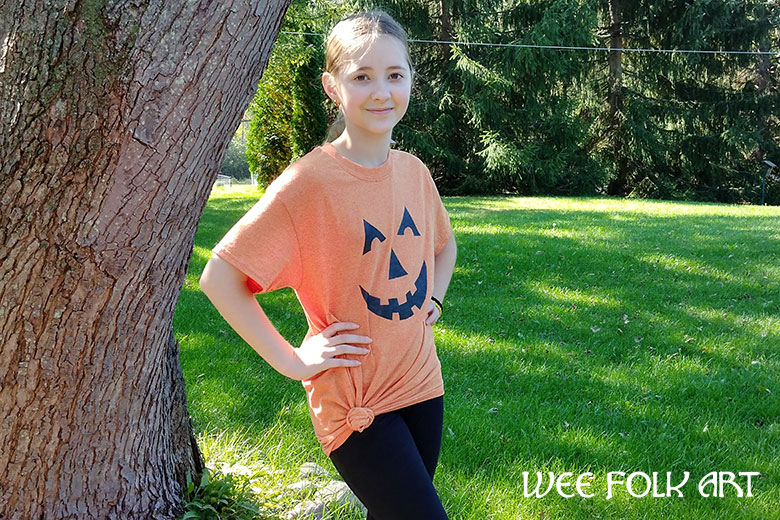
Halloween T-shirt Designs :: Jack-o-Lantern Stencil Pattern
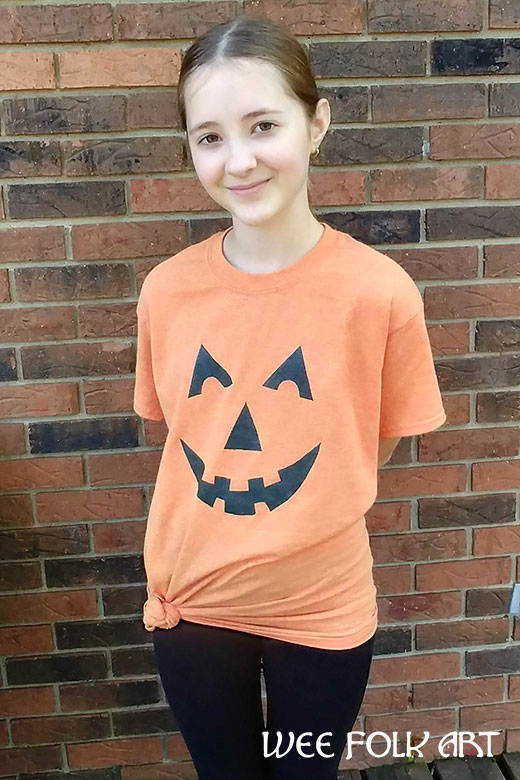
Every year at my girls’ dance studio, the kids perform a short Halloween dance in every class. This means that all week long, leading up to Halloween they dress up. They like to have a different outfit each day, and they need to be simple, easy to move in, Halloween costumes. When the girls were younger, this was very easy to accomplish, since they could just create different outfit from their dress up clothes. Now that they are older and no longer have a bucket of princess costumes, fairy wings, knights cloaks, wizard hats, etc, it has become more challenging to create fun Halloween outfits for every day of the week. I decided to make a few simple, freezer paper stencils that could be used to make some fast and cheap Halloween shirts. I was able to get my orange shirts for $2 each at the craft store! Today I am sharing two different Halloween t-shirt designs that feature a Jack-o-Lantern Stencil Pattern.
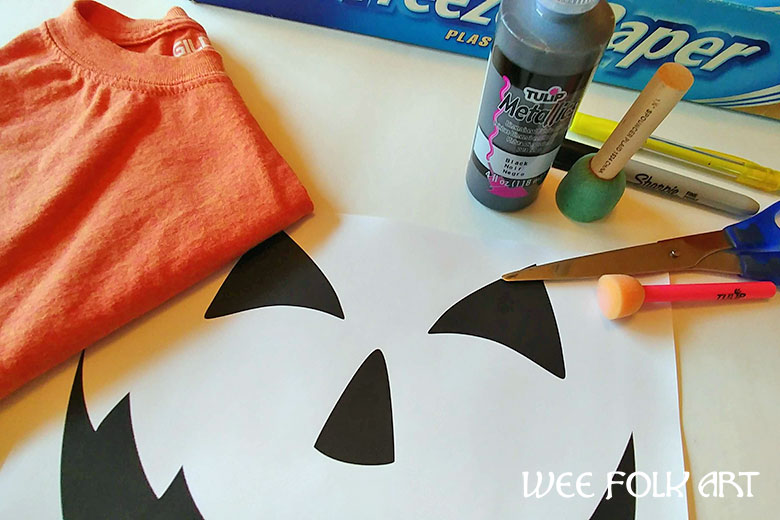
Jack-o-Lantern Stencil Pattern Materials:
- orange t-shirt
- black fabric paint
- sponge stencil brush
- freezer paper
- scissors
- pen
- iron and ironing board
- Jack-o-lantern Stencil Pattern 1
- Jack-o-lantern Stencil Pattern 2
Jack-o-Lantern Stencil Pattern Directions:
Begin by washing your shirt. Iron flat if needed.
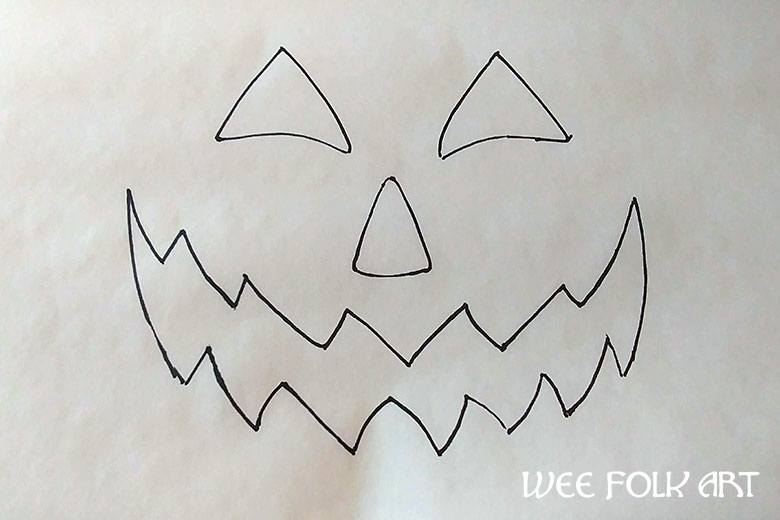
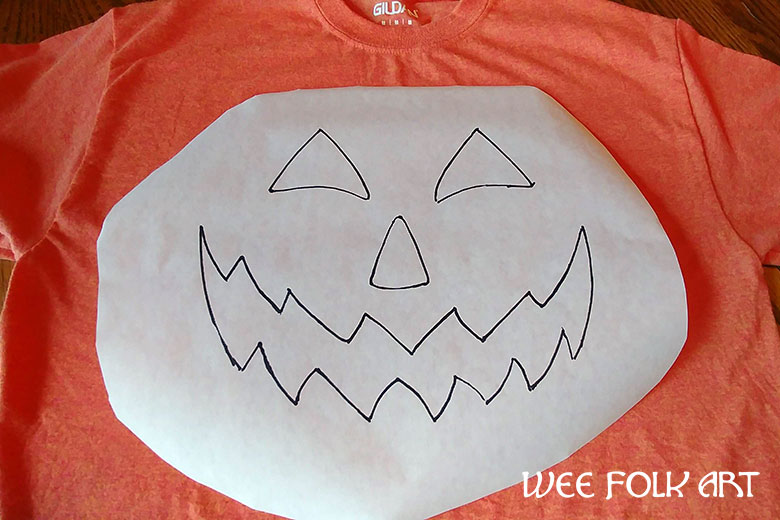
Print out a copy of your favorite Jack-o-lantern stencil pattern or design your own face.
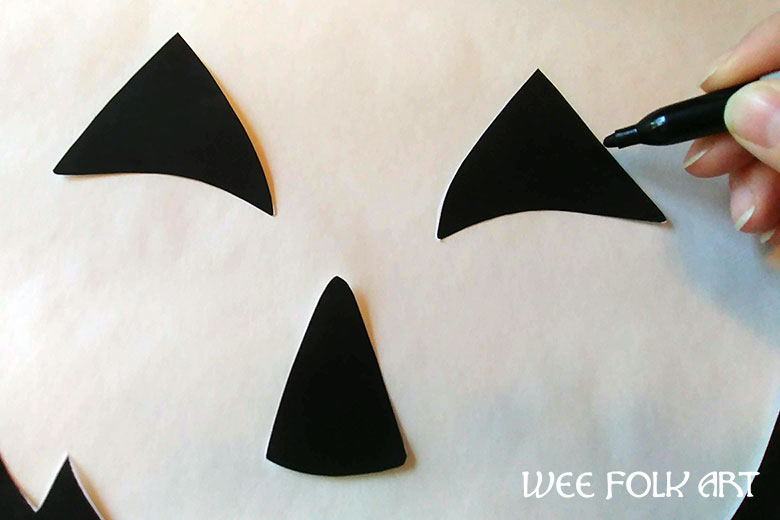
Cut out the shapes and trace them onto the paper side of the freezer paper.
Trim the freezer paper so that there is about 2 inches of extra paper around the jack-o-lantern stencil design.
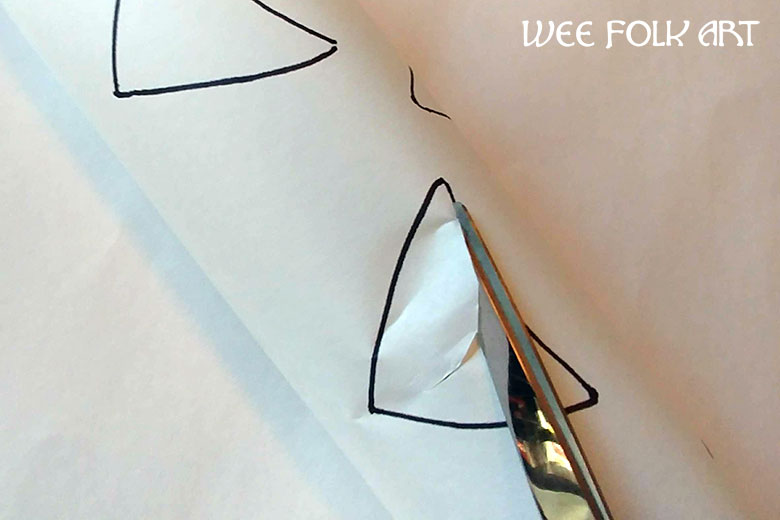
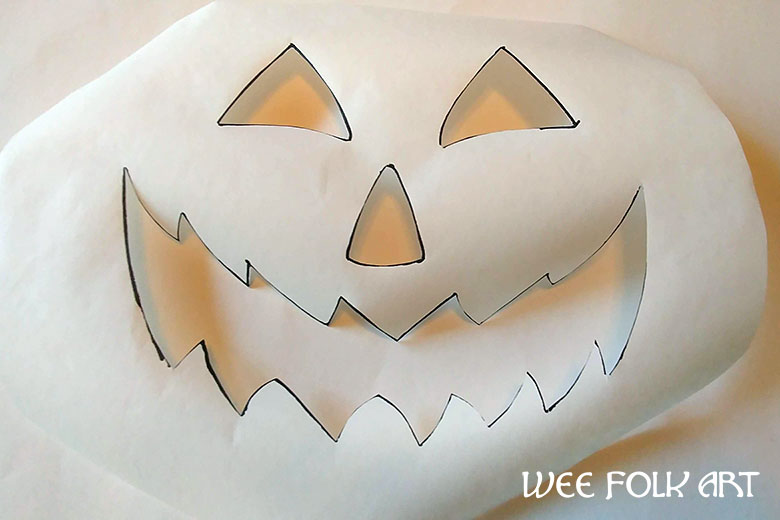
Cut out the center of the jack-o-lantern face shapes. To begin your cuts, slightly fold the freezer paper and make a snip in the center of a face shape.
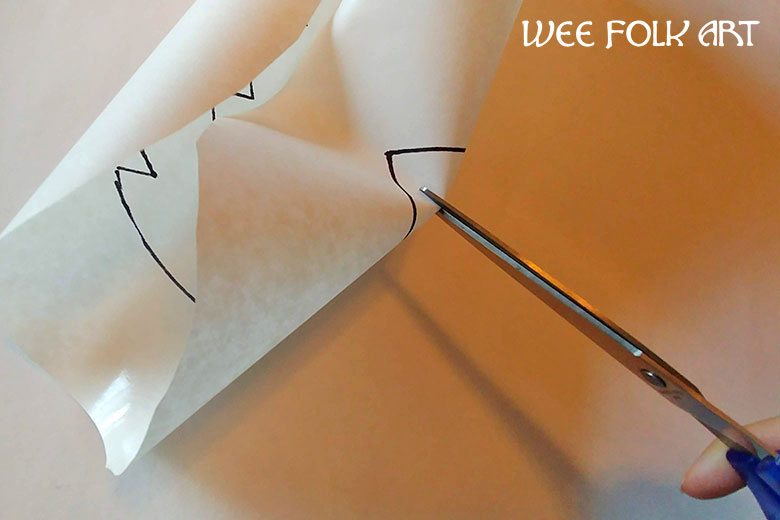
Insert the scissors into the snip you created, and cut away the center of each face shape.
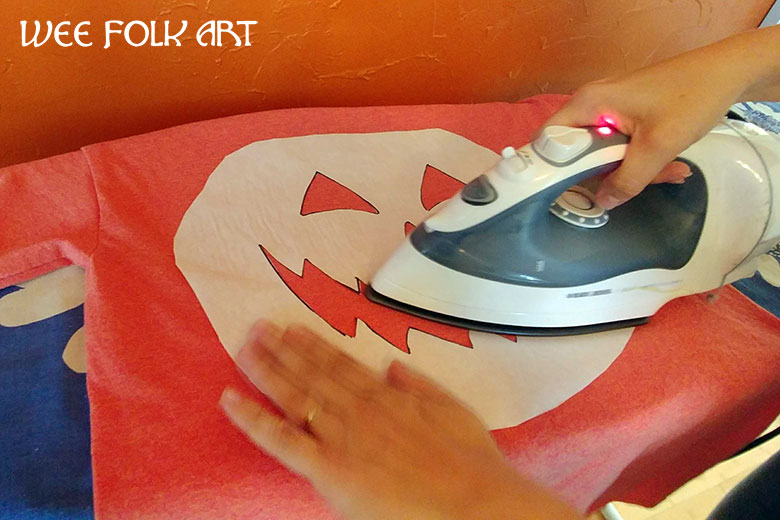
When you have cut away all the face shapes, center your stencil onto your t-shirt front. Make sure that the wax side of the freezer paper is facing down against the fabric.
Use a warm iron, without steam, to carefully press the freezer paper in place. Do not run the iron back and forth, as you might curl up the edges of the stencil. A straight up and down method works best. Do not over heat or the wax will melt away and the freezer paper will no longer stick to your fabric.
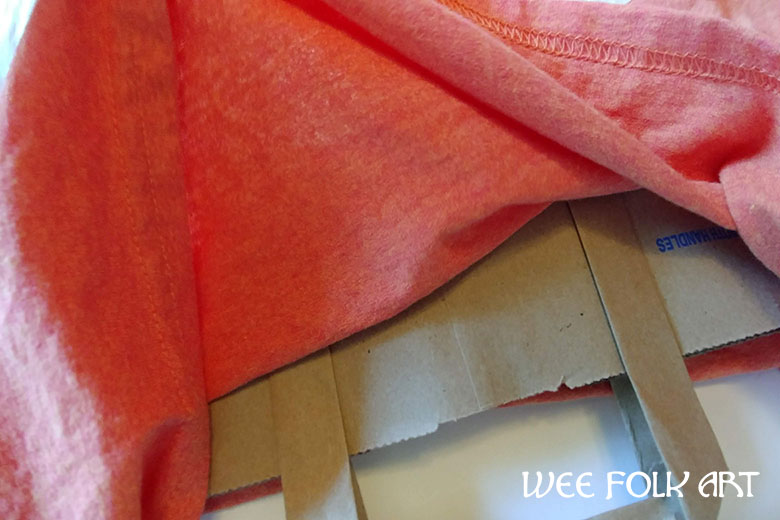
Place a piece of card board or similar in the middle of your shirt to protect the back side of the shirt from the paint bleeding through. We used a paper grocery bag. Just be sure that the surface is smooth and it completely covers the back side of the stencil.
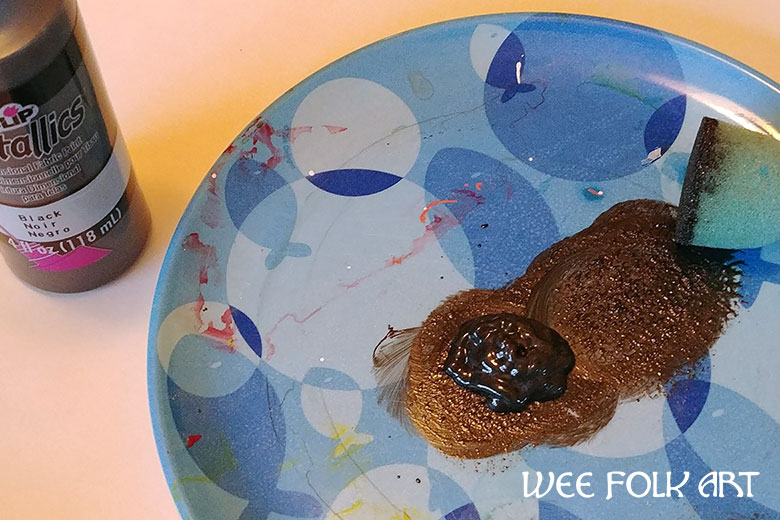
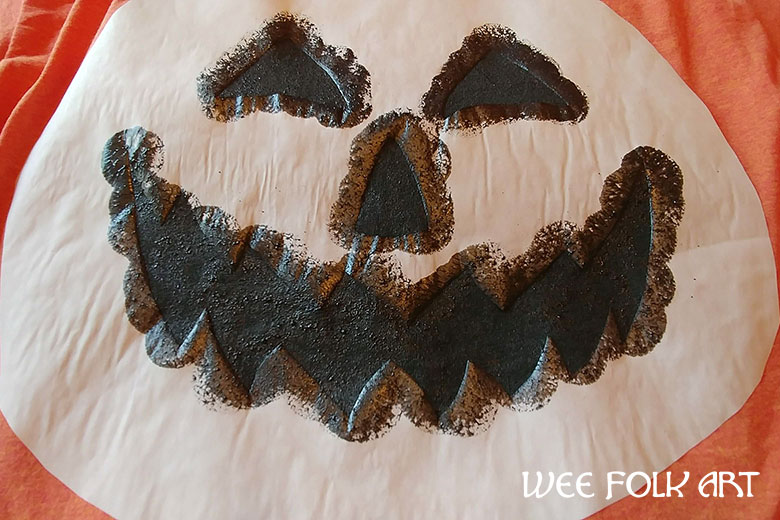
Squirt some of the black fabric paint onto a smooth paint tray. Dip the sponge stencil brush into the paint and then blot it off the the side. You don’t want the paint to be too thick in one go because it might seep under the edge of the stencil.
Apply the paint to the stencil by pressing the paint on the surface with a straight up and down motion. Do not slide the sponge brush back and forth or you might lift the edge of the stencil. Be sure to overlap the edge of the freezer paper stencil slightly to get a nice clean line. We recommend applying the paint around the edge of the stencil first and then filling in the middle.
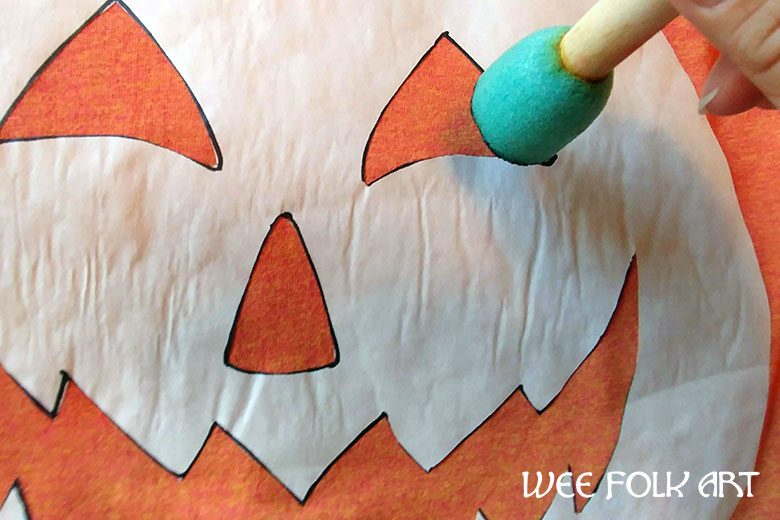
Don’t use too much paint at one time. It is better to apply several light coats of paint, rather than one thick coat of paint. This will help eliminate bleeding under the edge of the stencil. When the first coat of paint has dried, apply a second coat.
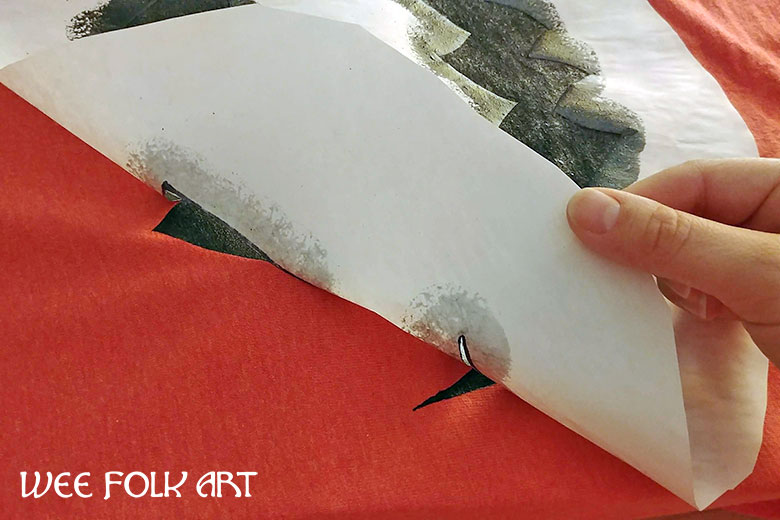
When your paint has completely dried, slowly peel away the freezer paper stencil. Do not remove the stencil before the paint is dry or you may smear the design.
Read the washing directions on your bottle of fabric paint. Ours was completely set after 72 hours and could be machine washed.
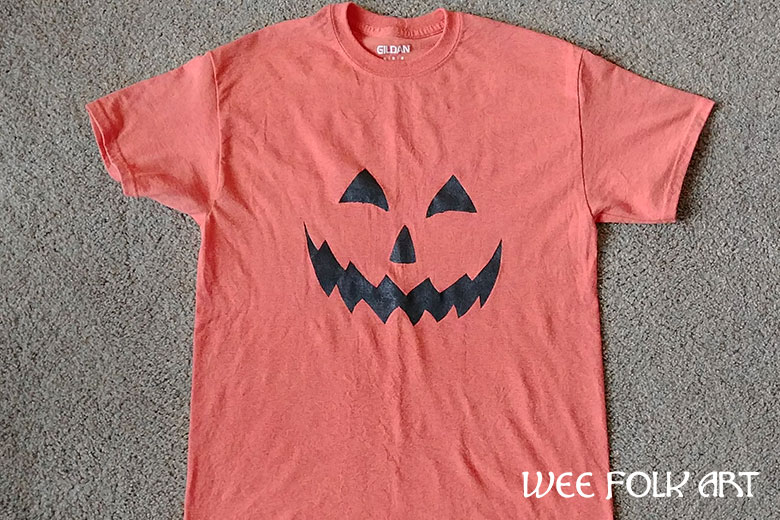
Enjoy your new jack-o-lantern stencil pattern t-shirt!