
Mason Jar Cover
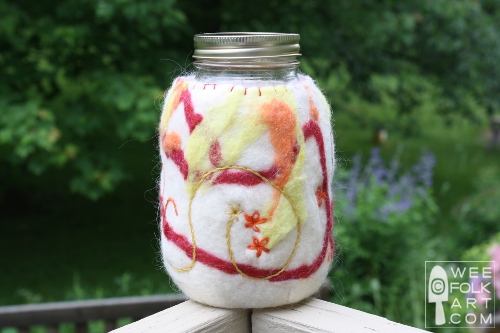
You’ve just made of quart of lemonade, and you are headed outside to garden. It’s hot, and those first few drinks of lemonade are so refreshing. But because of the heat, before long, the ice is melted, and your ice cold lemonade is now a tepid liquid. What you need is an insulated jar to keep your cold drink, well… colder… longer! Making a thermal cover for your jar is easy peasy with some wool roving or batting and a bit of embroidery thread. Not only will this cover keep your drink cold longer, but the lid will keep bugs and flying garden debris out of your glass.
But why stop there? Not only does this make a great insulator for a beverage, it also makes a beautiful jar for storing buttons and beads. It can also be used as a vase. Or… have a friend with a summer birthday? Craft one of these Mason Jar Covers, drop a lemon inside, print off the directions for lemonade, and Wah Lah… a perfect and unique gift!
I covered a quart sized Mason jar because I get mighty thirsty working in the garden, but obviously you can cover any size jar. If the wool gets dirty, simply rinse it off, roll it tightly in a towel to absorb extra moisture, and allow to air dry. Kids will definitely want to get in on the fun. Enjoy!
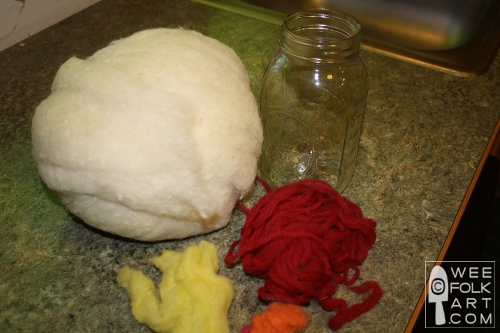
Materials:
Mason jar (I used a quart size)
Wool roving or batting
Embroidery floss
cheese cloth
Gather your supplies together.

Cover you Mason jar in a crisscross fashion. Bring the batting up and tuck the edges into the jar’s neck. Add more roving around the jar. Make sure that the roving has the same depth all over the jar.
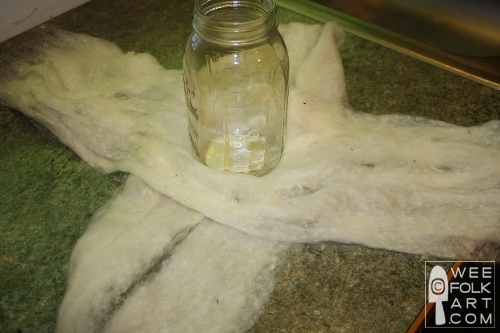
Add pieces of colored roving or wool yarns in a pleasing pattern. Because the roving will shrink, and the felting process may shift the design, it works the best with free form abstract designs. (If you want a more detailed design, wait until after the jar has been felted, then apply design by needle felting.)
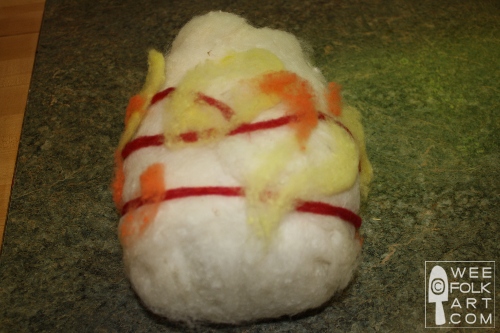
Cut a piece of cheese cloth the height of your jar, and wrap around the jar, being careful not to overlap the roving beneath the cheese cloth. As the roving begins to shrink and felt, remove the cheese cloth and rewrap tighter. You may need to rewrap the jar several times. NOTE: I use cheese cloth because it holds the roving together while it is being agitated. You can rub the jar without free of loosening the roving… especially the small embellishments.

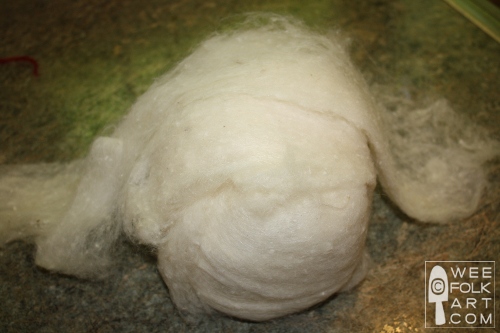
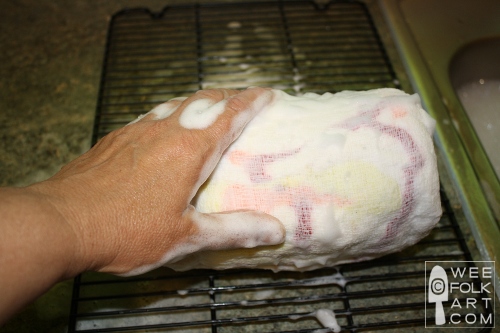
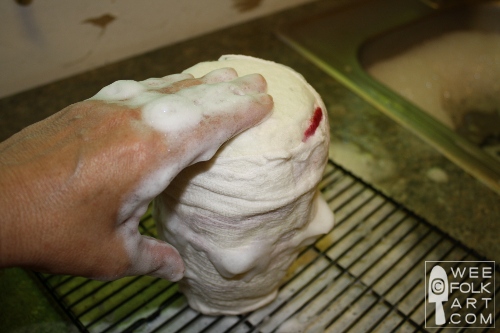
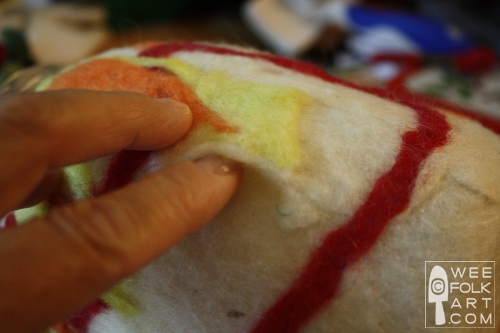
Dip your jar into warm water. Add some liquid soap. Begin rolling the jar on a rack or bamboo placemat. You are looking for a surface that will agitate the fibers. You can roll the jar between your hands, slide your hands up and down the jar, turn the jar over and rub the bottom. As the roving begins to shrink and the fibers felt, take the cheese cloth off and reroll, tightening the cloth. When the felting is near complete, remove the cheese cloth, and do the final felting until the fibers are dense and tight.
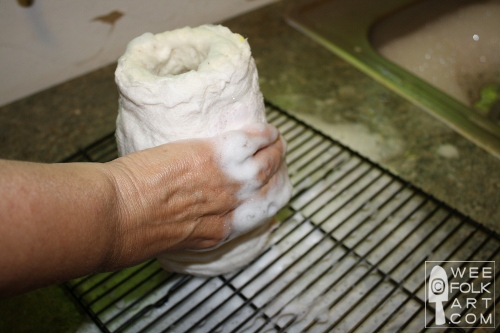
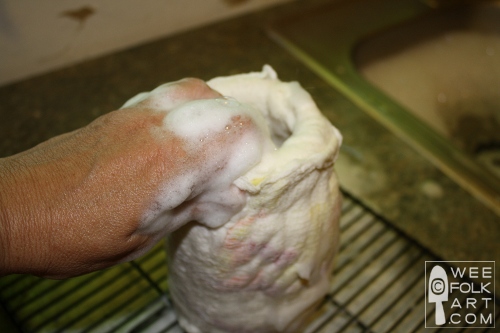
Rinse in cool water, removing all the soap, and roll tightly in a towel to remove excess moisture. Allow to dry completely.

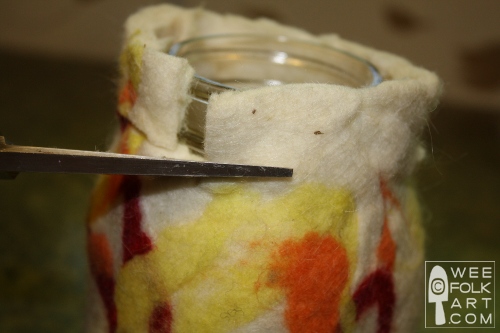
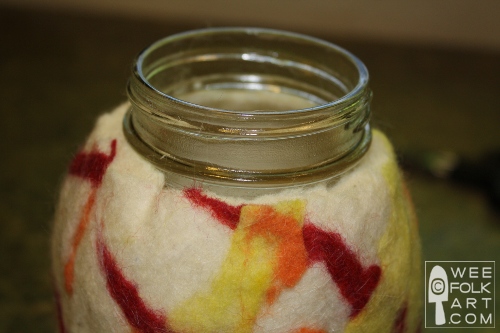
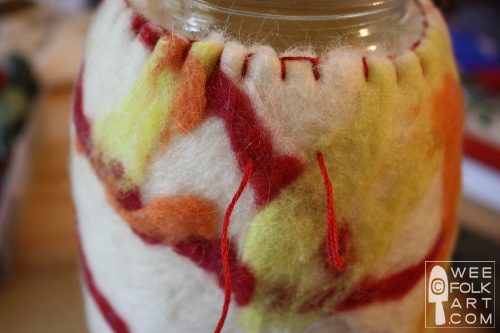
If you want to be able to screw on a lid or use the jar for drinking, you will need to cut away the extra roving at the neck. You want to cut it just below the threads on the jar at the thinnest part of the neck. If you cut it too far down, the jar can slide out of the insulator when you go to drink.
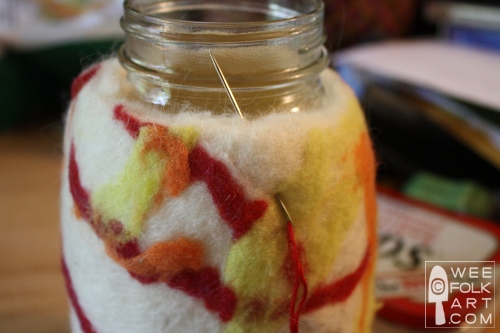
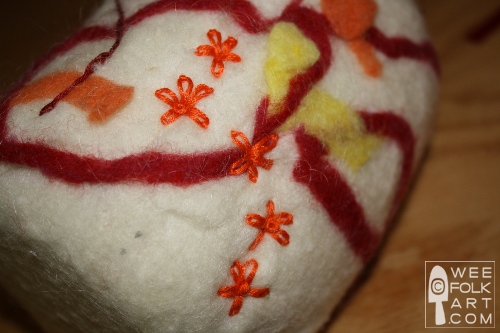
Using 6 strands of embroidery floss, blanket stitch around the cut edge. Make the blanket stitch tight. The idea is to make the top edge snug around the jar. NOTE: To start and the thread, I begin by inserting my needle an inch or 2 away from the area where I will begin stitching. I slide the needle under the roving, and bring it up to the desired area. I make a very small tack stitch to hold it in place, then I begin stitching. I do the same thing to finish stitching. I then cut the loose tails off.
![]()
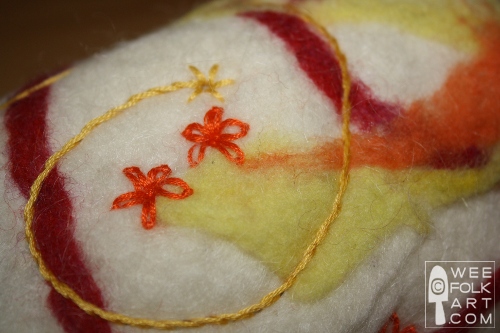
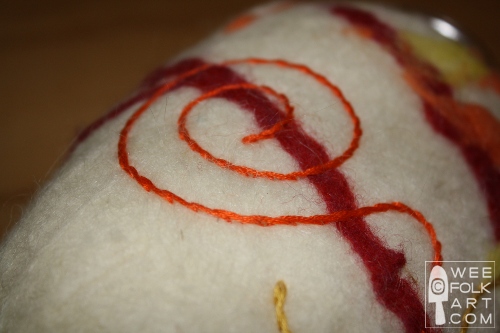
If you would like, you can use 6 strands of embroidery floss to add other embellishments. I found areas on the jar where the roving had not felted well, and I embroidered over them using a stem stitch and lazy daisies. I free handed the design as I went along.
Now, fill your jar up with lemonade, take it in the garden, and enjoy your refreshing drink as you go along. HINT: If you keep your jar in the shade, your beverage will stay cold even longer. Yum!
Copyright © Wee Folk Art 2008 – 2010. All rights reserved.
All photos, text and patterns are copyright protected. You may not copy, reproduce or redistribute any material found on WeeFolkArt.com without written permission. Wee Folk Art retains all rights.

7 Comments
Guest
Great idea–besides keeping the lemonade cold, the wool will help keep the jar from breaking if accidentally knocked over. And if the jar should get broken, the wool will contain the glass.
Kimara
I thought the same thing when I was making this. Then, the very first time I took it outside, I dropped it. Of course, Mason jars are pretty sturdy… we use them instead of glasses in our house… but I was delighted to find the jar did not break. I really think the roving saved the glass.
Janice Masters, The Everyday Joy Coach
I love what you made! I use pairs of really cute socks. Colorful, washable, easy to put on (use 2 for insulation). Does the trick. I learned this from my mom who would use a sweat sock on the olive oil bottle. 😀
Kimara
Great idea! I often use those fast and useful "inventions". My favorite rice bag is a filled tube sock! When time allows and creativity beckons, I fancy things up, but simple is often best 🙂
rae
you sure are fun! question…do you leave the cover on all the time? even through jar washings?
thanks for the inspiration! 🙂
Kimara
I made my jar cover so it stays on all the time. I was afraid that it would be slipping off the jar otherwise. I simply rinse it out when I am done using it. I try not to get the wool wet, but it’s okay if it does. Worst it can do is felt a little more 🙂 If it needs a good clean, just let it soak in some soapy water, rinse clean, wrap in a towel to remove extra water, and let dry. I wouldn’t use this with dairy products because of the potential bacteria, but water and sugar based liquids should just require a good rinsing.
If you still want to be able to remove the cover, just cut the roving lower, and finish as explained above. You could also experiment with a tie or elastic at the top edge.
Rachel
That is so fun! Thanks so much for this, I’ll be linking.