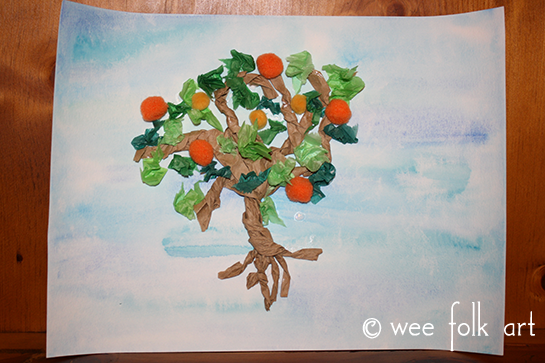
3D Peach Tree
We created these cool 3-D Peach Trees, complete with fuzzy peaches, to go along with our States Studies Unit 2 (coming soon) lessons.

Materials
- watercolor paper
- water color paints
- Brushes
- or blue construction paper
- paper lunch bag
- green tissue paper
- orange pom-poms or wool felt balls
- craft glue
We started by using a wet on wet watercolor painting to create a blue background.

After streaking the sky with a mixture of blues, we blotted the page with a paper towel.

If you would prefer, you could skip the watercolor painting and just use a sheet of blue construction paper for the background.
While your background is drying, tear the bottom off a brown lunch sack. You can definitely use a used bag. Rip the bag in half from top to bottom.

Now make several tears (about 6-7) along the bottom edge about 1.5″ long and make a few less (about 4-5) 2.5″ long tears along the top edge. These sections will become your roots and branches.


Twist the trunk of your tree around several times. Then twist each branch and root section. Shape your tree by bending the branches and roots until you have a good base.

Once you have your tree arranged the way you would like, apply a good craft glue to the back of your tree and adhere it to your background. You may need to set a heavy book or tray (we used glass bake ware) to hold your tree flat while the glue dries.

Now tear several different shades of green tissue paper into 1-2″ squares. Loosely crumple the squares.

Water down some craft glue, dip the tissue paper into the glue, and then add it to your tree base to create leaves. You can glue the leaves to the tree or to the background around the branches.

The final step is to add several orange pom-pom/felt ball peaches (or oranges) to your tree. If we had had the time, we would have made our own wet felted balls from wool roving or wool yarn scraps (similar to but smaller than our wool felted marbles), but this project kinda came to me at the last minute so we just worked with what we had.

Fairy’s Peach Tree

Pixie’s Peach Tree