Seaside Gnome House :: Part 3
Learn how to make a Seaside Gnome House for your gnomes! We are sharing directions for how we made ours but get creative when you make your own!

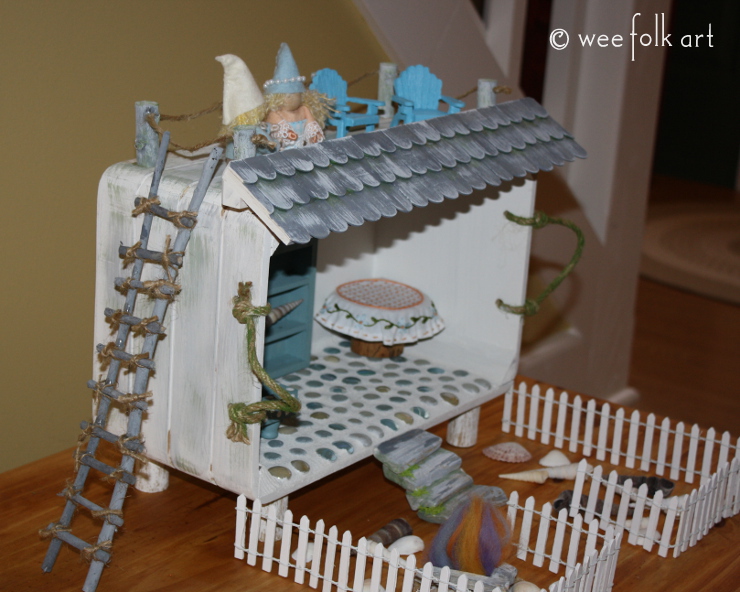
Kristoff labored long and hard on the new house. Not only did he wish to make a functional house for his soon-to-be bride, he also wanted the house to be beautiful… just as beautiful as the ocean and Calleen! Then he got an idea! He would cover the floor in pieces of sea glass that often washed ashore. It would sparkle like the ocean… and Calleen’s eyes! Then he decided make a deck on top of the house. He could just imagine sitting up on the roof on beautiful evenings, star gazing with her. And, if they wanted to “camp out”, they could sleep under the stars.
When he was finishing up the last of the railings, his best friend Rocco wandered over.
“That’s perfect!” Rocco said. “Let’s call that space up their mine! You and I can hang out up there after your wife has gone to bed. We are going to have so much fun in our new house.”
“Hmm,” thought Kristoff, “I think Rocco and I are going to need to have a talk about married life. I don’t know much about it myself, but I’m willing to bet Calleen will NOT want Rocco living on the roof!”
Kristoff shuddered. He certainly was NOT looking forward to having THAT conversation with Rocco!
The directions for making your own Seaside Gnome House will be shared in 4 parts:
PART 1 :: Crate and Dry Brush Painting can be found HERE
PART 2 :: Roof and Storage Shelf can be found HERE
PART 3 :: Flooring and Rope Railing
PART 4 :: Steps and Ladder can be found HERE
GENERAL MATERIALS FOR SEASIDE GNOME HOUSE
- crate or other wooden box (ours was a decorative crate that measures 14″ x 9″ x 6″ that we bought at a local craft shop. It was unfinished and had rope handles which we removed while painting. We tied them back on at the end) You can use or make any size crate you like.
- acrylic, soy or other non-toxic water based paints (save paint from painting crate for other pieces of the house)
- craft glue
- twine
- sea glass or decorative glass pieces
- grout
- twigs and branches for house stilts, ladder and rope railing. I bought a of small pieces of decorative driftwood from our craft store which I used for the steps but used branches from our yard for the rest.)
- wide craft sticks
- 3/16″ basswood (found in craft and hobby shops) Our piece was 4″ deep by 36″ wide
- 1″ x 1″ pine the length of your crate plus 4″ for support wedge of roof
NOTE: We are sharing how we made our seaside gnome house. Hopefully our directions will give you useful ideas that will help you make your own. You will need to make adjustments based on the size and shape of the box you start with.
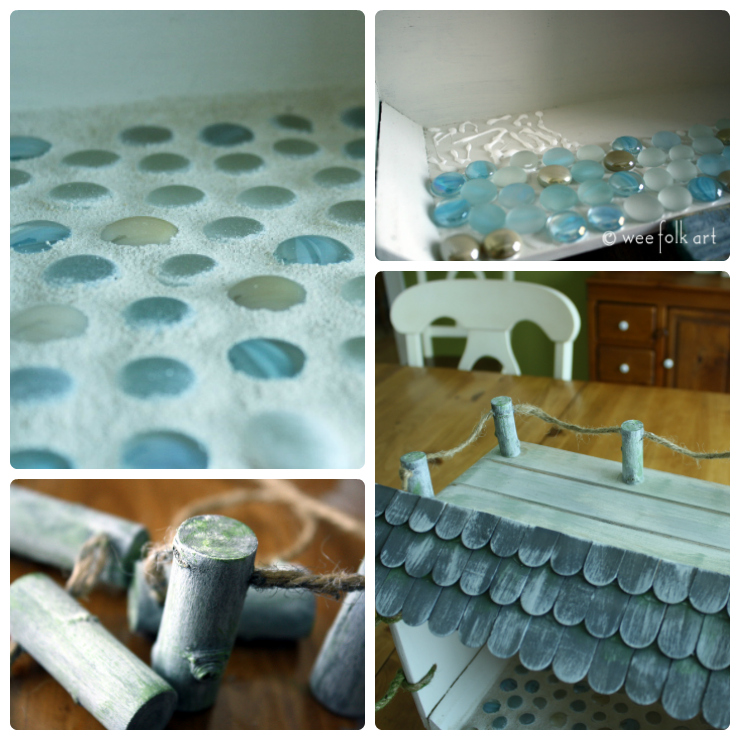
INSTALLING THE FLOOR IN THE SEASIDE GNOME HOUSE
For the flooring you will need sea glass or decorative glass pieces. If you are using actual sea glass try to get pieces that are the same width so the gnomes and furniture can stand on them. You will also need craft glue and grouting.
NOTE: Originally, I added the steps before we did the floor. We wound up taking the steps off because they were getting covered in grout!
Begin at the front of the floor so you can easily make the flooring flush with the edge of the house. Place a substantial amount of glue on a small area at a time and smear it so the entire area is covered.

Begin gluing on glass in random patterns. Keep going until the entire floor is covered. Leave enough area between each piece of glass for grouting. Allow to dry overnight. You want the glue hard.

Add grouting making sure to fill all areas. Follow directions on your grouting. Make sure your front edge is clean.


After the grout has set up, again, follow directions on your grout container, you can clean the surface of the glass.

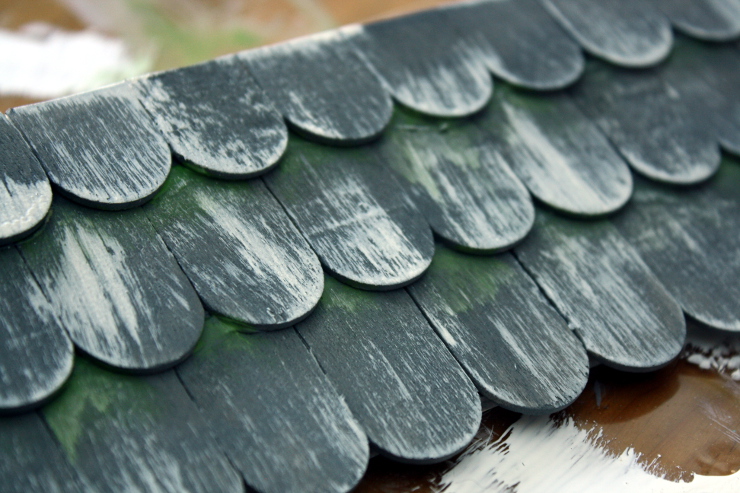
ADDING THE ROPE RAILING TO THE SEASIDE GNOME HOUSE
For the rope railings you will need a branch about 1/2″ in diameter and the paint left over from Part 1 :: Crate and Dry Brush Painting. You will also need twine to thread through the branches.
Begin my cutting 6 pieces of the branch for the railing. These should be 1 3/4″ tall. Drill a hole 1/4″ from the top of each rail large enough to thread your twine through. For painting my rails I strung them through a piece of twine so I could hang them for drying but you can paint them first.

Begin by painting a medium gray white wash. (I added more white to the gray paint I used on the house.)

Dry brush with white. Read more about dry brushing in Part 1 which can be found HERE

Finally, add green highlights. It you haven’t done so already, string the twine through all pieces of the railing. Make the twine long enough so the rope swags between each rail and so you have enough to tie off the ends.

Decide where you want to place the rails on the roof and add glue.

Place the rails so the holes and roping run parallel to the edge EXCEPT for the corner rails. The 2 corner rails should be placed diagonally.

After the rails have dried determine how much swag you want between each rail. Tie off the 2 ends of the rope in the rails near the roof and cut off access rope. Put a dot of glue on each knot so they do not come untied.
Your gnomes will now be nice and safe while they are up on the roof star gazing!

Coming soon, Part 4 :: Steps and Ladder