Candlewick Mushroom Wallhanging

Materials:
10” wooden embroidery hoop
2 pieces unbleached muslin, 16” x 16”
1 piece thin cotton batting, 16” x 16”
Ecru crochet thread (candlewicking or embroidery floss)
16” of 1/4″ grosgrain ribbon
Washable marker for tracing
Placement pattern
Mushroom pattern


1] Make copies of placement pattern and mushroom patterns.
2] If using my placement pattern, transfer markings to the center of 1 piece of muslin.
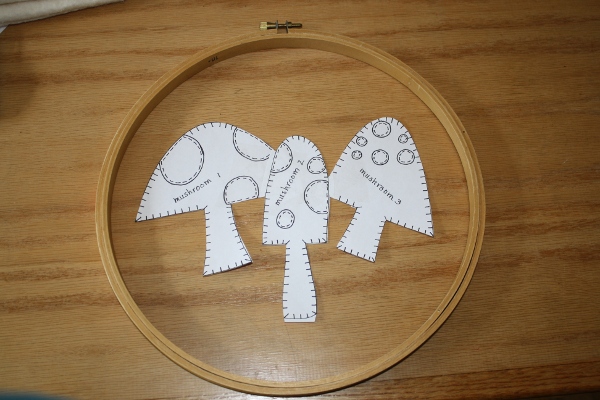
3] If you’d like to “design” your own pattern, cut out the 4 mushrooms on the mushroom pattern and lay them out in the center of the wooden hoop until you are satisfied with the placement. (I used mushrooms #1, 2 and 3.) Tape the mushrooms together. This can now be used to trace your design in the center of 1 piece of muslin. Make sure to transfer markings for the mushroom’s spots and the flowers as shown on the placement pattern.

4] Sandwich together the muslin and batting by laying the unmarked muslin, then the batting, then the marked muslin, design side up, together. Center the design in the embroidery hoop.
5] Following the placement pattern, quilt the 3 pieces together. Use a running stitch, going through all 3 layers of material, for the mushroom outline and spots.

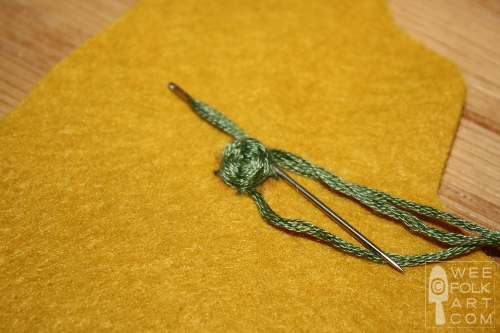
6] Going through all 3 layers of material, stem stitch the stems, use the lazy daisy stitch to make leaves, and add the flower heads using the woven spider wheel stitch.

7] Using a damp cloth, wipe off the washable marker.
Finishing the Wall Hanging:
8] Make sure your design is centered and that the fabric is taut and wrinkle free. The screw portion of the hoop should be centered at the top. Using a running stitch, sew around the circumference of the hoop, just on the inside of the back hoop. (This will be about 3/8” from the outer edge of the outside loop.) You will be going through the 3 layers of the piece AND catching the salvage or hem on the back. This will keep the fabric in the back sewn against the inside ring.


10] On the front side, wrap the grosgrain around the metal screw and tie into a bow. Hang on the wall and enjoy!


http://www.weefolkart.com
Copyright © Wee Folk Art 2008 – 2009. All rights reserved.
All photos, text and patterns are copyright protected. You may not copy, reproduce or redistribute any material found on WeeFolkArt.com without written permission. Wee Folk Art retains all rights.