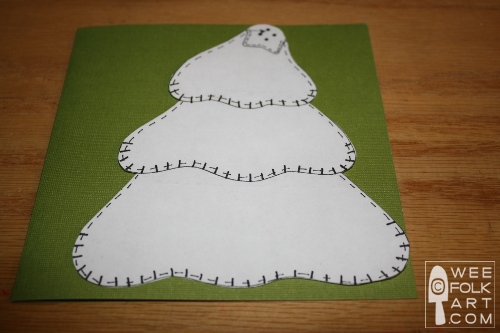
Christmas Tree Card
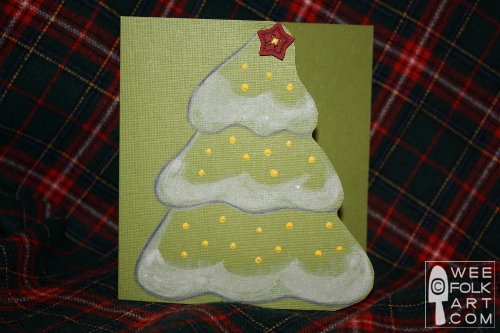
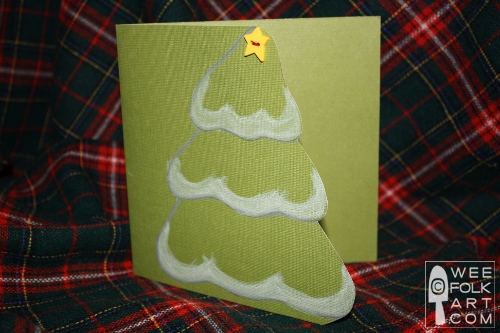
Whether you keep this card simple or embellish it with ornaments and glitter, its simple cutout shape will make for a lovely handmade Christmas card to share with family and friends. Very easy to make, you’ll have a stack ready for mailing in no time! HO! HO! HO!
Materials:
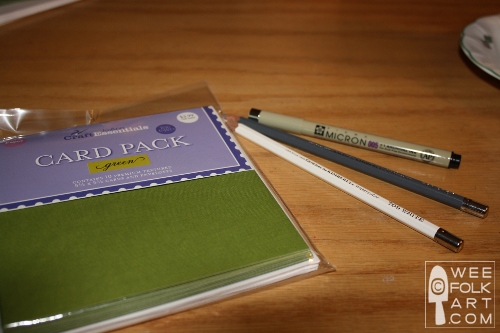
green cards and envelopes 5 1/2″ x 5 1/2″
white and gray watercolor pencils
ultra fine permanent black marker
white or silver paint pens
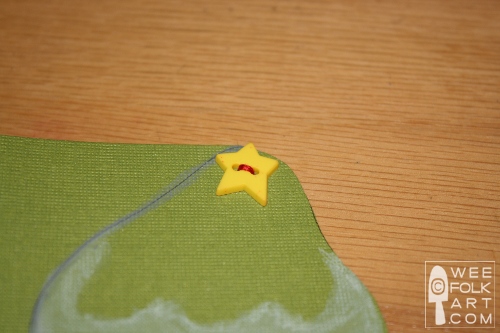
1 star button for each card
optional: white powdered glitter, paints, sequins, etc. used to decorate the tree
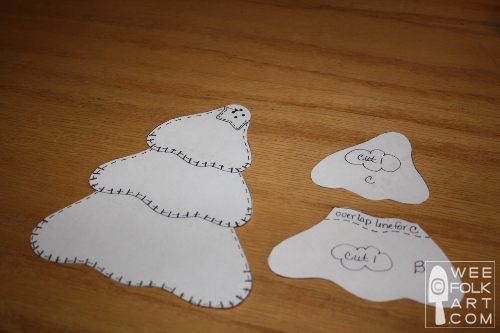
Christmas tree applique block pattern for templates
Directions:
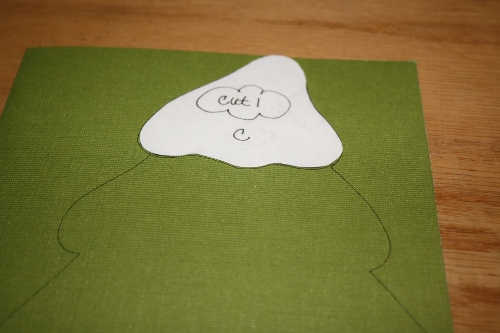
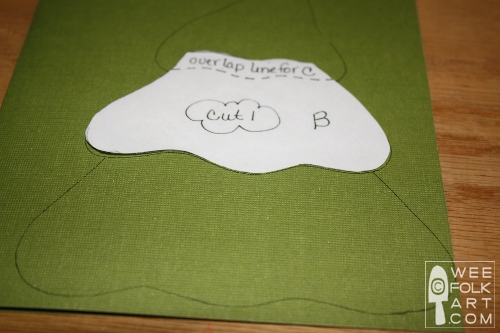
1] Make copy of the pattern. To make templates cut out tree and pieces C and B. NOTE 1: When I cut out patterns that will be used as templates, I always cover the pieces with wide tape or clear contact paper first. Then, when you cut out the templates, they will be sturdy and easy to trace around. NOTE 2: When cutting out the tree, do not include the star. Use piece C to draw in the top of the tree.
2] Position the tree template on a card so it is straight and so the top of the tree touches the top of the card. Using your ultra fine permanent black marker, trace around the entire tree.
3] Using templates C and B trace the tree layers.
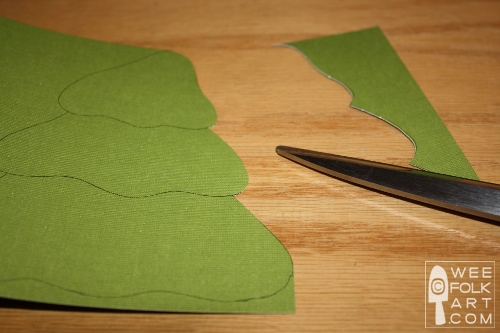
4] Cut out the outside edge (right side) of the tree. Start with the bottom layer and cut to the top of the tree. IMPORTANT: Only cut out the front of the card, do not cut the back of the card.
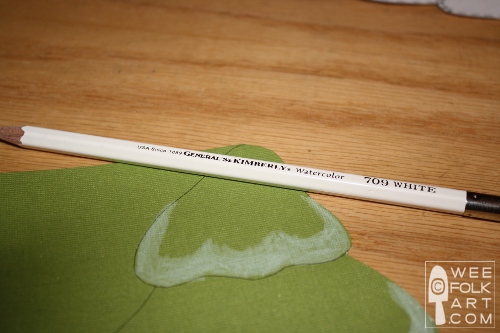
5] Using your white watercolor pencil, color a layer of snow on each layer.
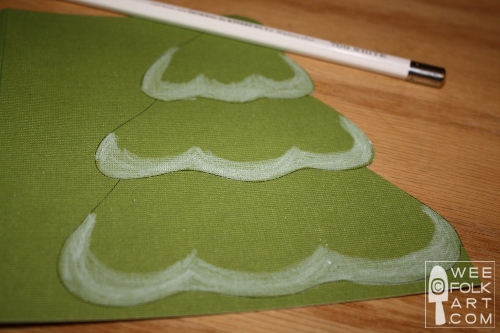
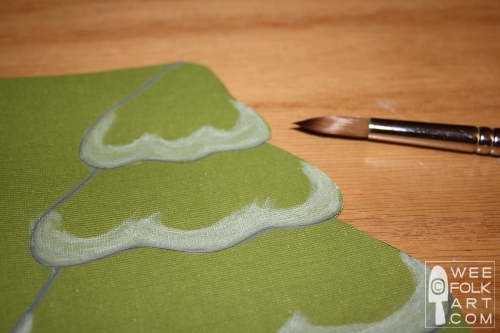
6] Using a damp paint brush, wet the watercolors using sweeping, curving motions. You want to give dimension and “flow” to your snow.

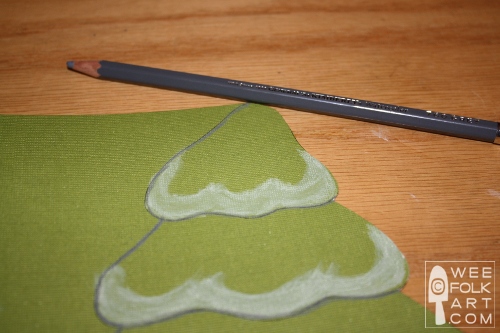
7] When the snow has dried, use your gray watercolor pencil to soften the ultra fine black marker by coloring over it. Add a bit of shading under the snow. Use a damp paint brush to blend in the color.
8] Using 6 strands of contrasting embroidery floss, sew on the button. You only need to go through the button holes once, and you should tie the floss on the inside of the card. Cut the floss leaving about 1/8″ tail. (Optional: You can put a dab of Fray Check or glue on the knot so it will not come undone.)
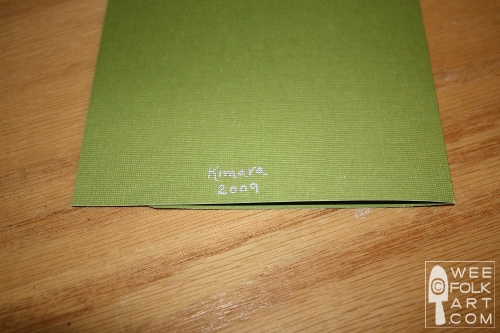
9] Using a white or silver paint pen, write your sentiment on the inside of the card. Remember to sign and date the back of your card. It’s a work of art 🙂 NOTE: Since you do not want to see any writing when the card is closed, make sure anything you write on the inside of the card stays within the cutout.
10] If you would like to embellish your card you now can using many types of materials. Be creative and have fun.
https://www.weefolkart.com
Copyright © Wee Folk Art 2008 – 2009. All rights reserved.
All photos, text and patterns are copyright protected. You may not copy, reproduce or redistribute any material found on WeeFolkArt.com without written permission. Wee Folk Art retains all rights.