Elf Applique Pattern :: North Pole Pals
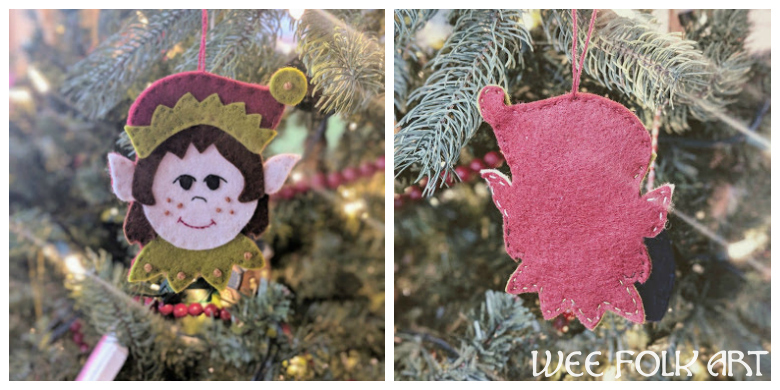
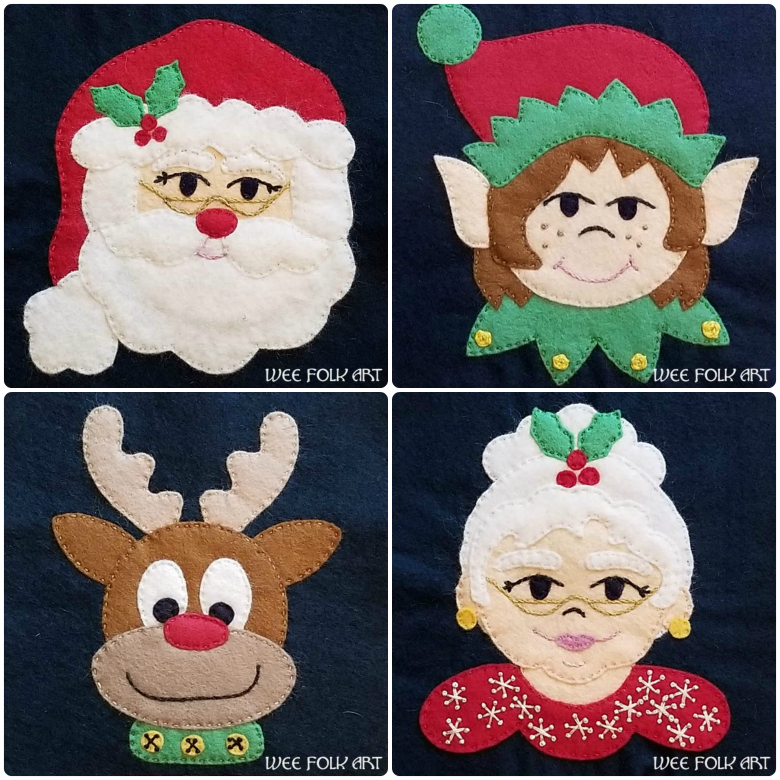
At this time of year, it is understandably busy at the North Pole. Fortunately, Santa is surrounded by a group of friends that help make the chaos joyful! We have a new collection of Christmas appliques. These are the North Pole Pals. Today we are sharing the Elf Applique Pattern. Other patterns in the group include a Reindeer, Mrs. Claus, and of course, the right jolly old elf himself, Santa Clause! They will be shared over the next two weeks. The Elf Applique Pattern is appliqued to a 6 inch square but can be enlarged or reduced to meet your needs. These appliques can easily be turned into ornaments by simply adding a backing and a string to hang them on the tree. You can choose to stuff it or leave it flat. The ornament shared at the end of the post was made by my DIL, Meghan, and she did not stuff hers. Adorable, right? Enjoy!
RELATED POSTS
The North Pole Pals Elf Applique Pattern can be found HERE.
The North Pole Pals Elf Coloring page coming soon!
The North Pole Pals Reindeer Applique Pattern coming soon!
The North Pole Pals Mrs. Claus Applique Pattern coming soon!
The North Pole Pals Santa Claus Applique Pattern coming soon!
The tutorial on How to Enlarge and Reduce Patterns can be found HERE.
The Stitching Glossary can be found HERE.
Our Gallery of all our Appliques can be found HERE.
The tutorial on How to Cut Out Felt can be found HERE.
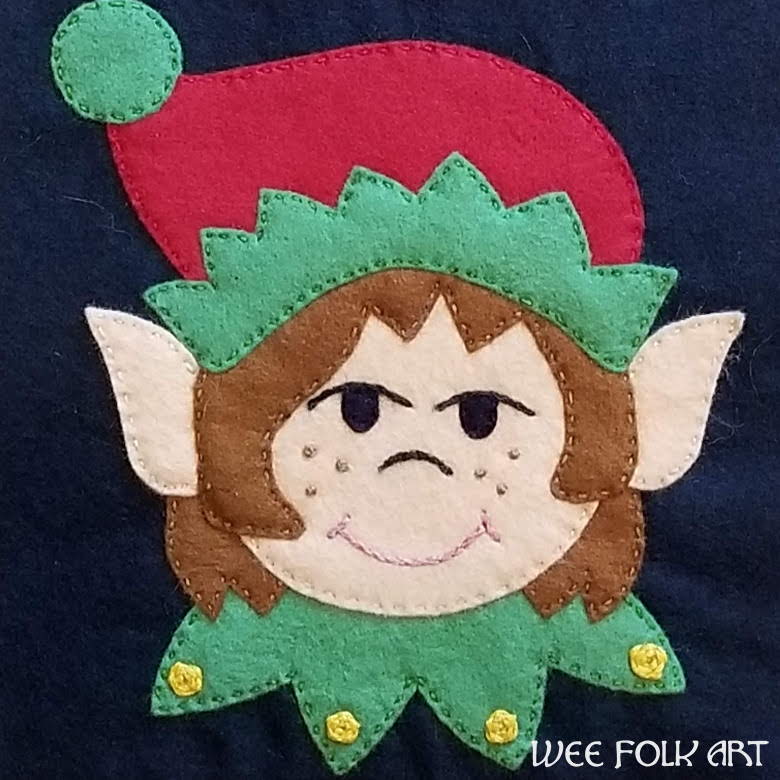
DIRECTIONS FOR THE NORTH POLE PALS ELF APPLIQUE PATTERN
Refer to pattern and photo for applique placements, cutting instructions and embroidery stitches.
Make a copy of the pattern.
Cut out felt using the photo and pattern. Transfer any embroidery markings.
The Elf Applique Pattern is layered. On the pattern pieces, dotted lined are used to show overlap lines. Unless otherwise stated, use a small running stitch using 2 strands of embroidery floss in colors that match the felt. Applique the pieces to another piece of felt or simply to one another in the following sequence:
- 1 collar
- 2 hair B
- 2 ears
- 1 face
- 1 hair A
- 1 hat
- 1 hat trim
- 1 pom-pom
- 2 eyes
Add detail to the Elf Applique Pattern as follows:
- use 3 strands of floss and a stem stitch to add eye-lids, nose, and mouth.
- use 3 strands of floss and French Knots to add freckles
- use 6 strands of floss and woven spider wheel stitch to add “bells” to the collar. Optional: can add them to hat trim, too.
To make an ornament, sew together and embroider the elf as described above. Place the finished elf on top of another piece of felt. Using 2 strands of floss and a running stitch, sew the elf to the felt changing floss as necessary so the floss matches the front of the elf. When you are at the top, loop 6 strands of floss long enough to hang from a branch. Knot the end and sew that in between the front and back of the elf. When you are done, using sharp, pointy scissors, cut away the backing close to the elf edges, being careful not to cut the loop.