Punched Tin Can Lantern Directions
One of the projects in our Winter Wonderland unit is to create a punched tin can lantern. My kids loved this project when they were little, Bug especially enjoyed hammering holes all over his can. Unfortunately we did it before I was consistently blogging. It is a project that I just don’t seem to have any record of completing. As I have been updating the Winter Wonderland unit for the updated digital/print edition I have been going back and making sure I have photos of each project. This was one that I needed to re-do. I set about doing it myself with the thought of just taking a few quick pictures but you can’t craft for long without Pixie joining in. She was at my side and jumped right into the project.
Punched Tin Can Lantern Materials:
- Empty, cleaned can
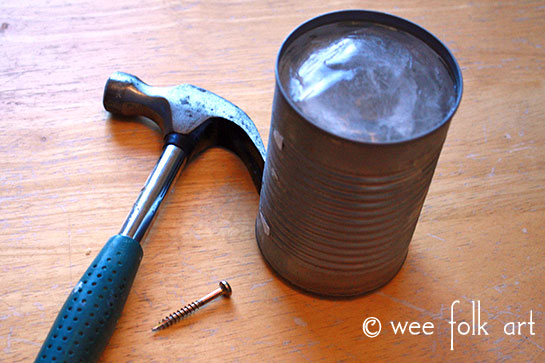
- Hammer
- Nail or screw
- Dish Towel
- Candle
- Optional: Wire for Handle & Gloves
Punched Tin Can Lantern Directions:
You will want to prep your can a couple of days before you plan to do the project. Clean out your can and remove all label residue. Fill the can with water and place in your freezer. You need the ice in your can to stop your can from collapsing when you punch holes in it.
When it has frozen solid, you can begin making your lantern. Lay it flat on a kitchen towel. If you fold over the edges of the towel it will help stop the can from rolling around too much.
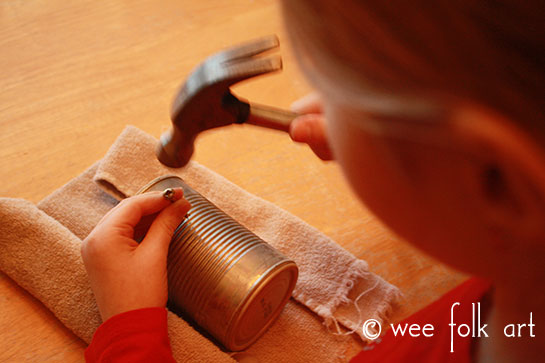
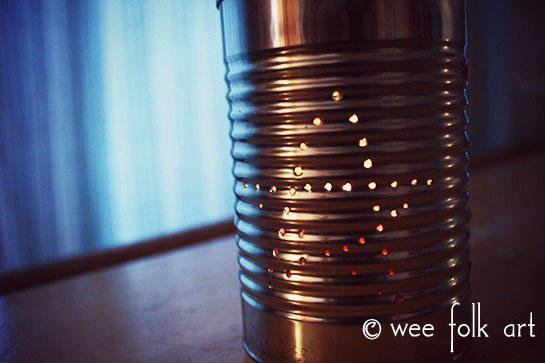
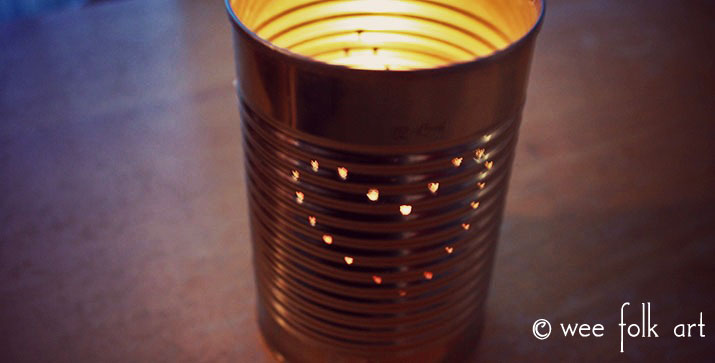
Use the hammer and nail/screw to punch holes in the side of your can. Don’t hammer the nail/screw in very far. You just want to punch a hole in the surface of the can. I found that the screw was actually easier for the kids to use because our screw had a much wider head to hammer. You can punch holes in a geometric pattern, make shapes, pictures, or whatever you like. When my son did this project he just went for as many holes as he could, the girls on the other hand made picture designs. Be sure to make holes all the way around the can. If you would like to add a wire to the top of your can, make sure you punch a hole on either side of the can near the top. You may want to wear a glove on the hand that is holding the can still. It can get a bit cold.
When you are done punching holes in your can, leave it in the sink until the ice has melted enough to remove it from the can. You can of course run some warm water over it to speed up the process. When your can is dry, you can add a wire handle if you would like and a candle.
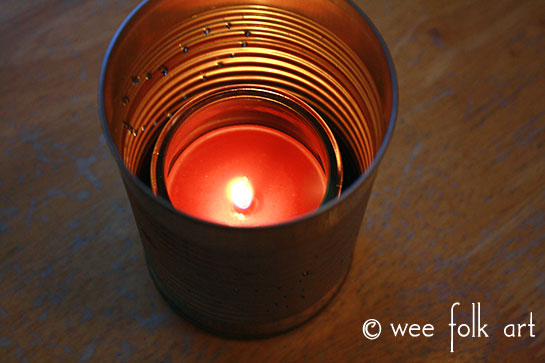
Please be careful putting your hand inside the can, the holes can be sharp (like a grater). If a child will be walking around with the lantern, we recommend using flame-less LED candles for safety.

You May Also Like
Direction for the Owl Doorstop