Watercolor Snowflake Craft
Baby, it’s cold outside! Normally that is something you just hear in the northern states, but today it seems to be cold all over the country! Going with that old adage… If life gives you lemons, make lemonade… if Mother Nature gives us cold, make snowflakes! Although playing outside is not an option today with temperatures well below 0 degrees F, we can do some indoor winter playing. Several years ago, inspired by Kathy Barbro’s blog Art Projects for Kids, we made some winter birch trees for ourselves. They were so fun to make and turned out fantastic that we have modified this project and have used it over and over again over the years. Since they are simple to make and do not require any crazy supplies, today, during the polar vortex, we created beautiful snowflakes. To be very honest, it really doesn’t matter whether uncoordinated children or pedantic adults do this project, the colors will be wonderful and all the finished projects will be frame worthy! So, gather your supplies and tell Mother Nature to bring it on. Baby, it may be cold outside, but inside we can enjoy winter from the comfort of our toasty homes! Enjoy our Watercolor Snowflake Craft.
Note: This project has a lot of cutting. It is not “cheating” to cut strips of tape for your wee ones. They can place the tape on their papers and do their own painting. They will still take ownership of their finished projects.
Book Corner – Books you may enjoy!
- The Snowflake : A Water Cycle Story – by Neil Waldman
- Katy and the Big Snow Paperback – by Virginia Lee Burton
- Snow – by Cynthia Rylant
- Snowflake Bentley by Jacqueline Briggs Martin
Watercolor Snowflake Craft Materials
- watercolor paper (we used 9 x 12 inch papers)
- 1 inch painters tape
- scissors
- watercolors
- paint brushes
- kosher salt
- hair dryer (optional)
Watercolor Snowflake Craft Directions
Before you begin, look at photographs of real pictures of snowflakes. Often we see crafts of snowflakes made with 8 points. Actually, they have six points, with each snowflake as unique as your own fingerprints. You can find awesome photographs of snowflakes in books like The Snowflake: Winter’s Frozen Artistry by Kenneth Libbrecht and Rachael Wind or you can find a bazillion examples online!
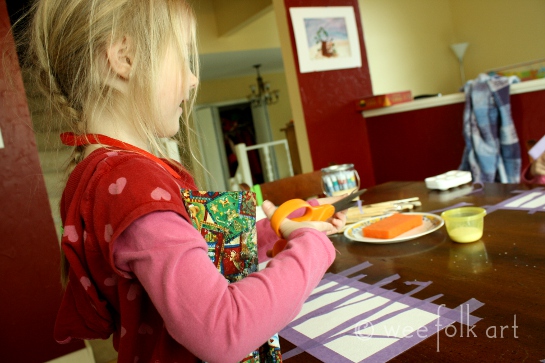
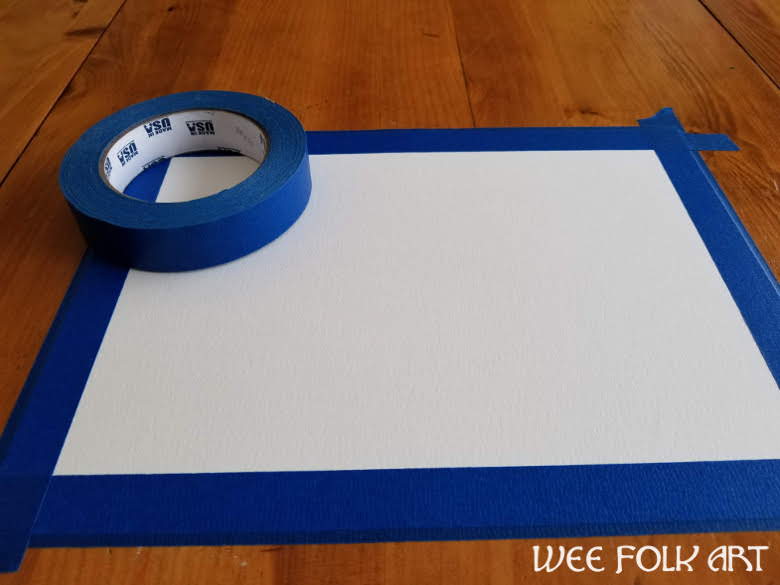
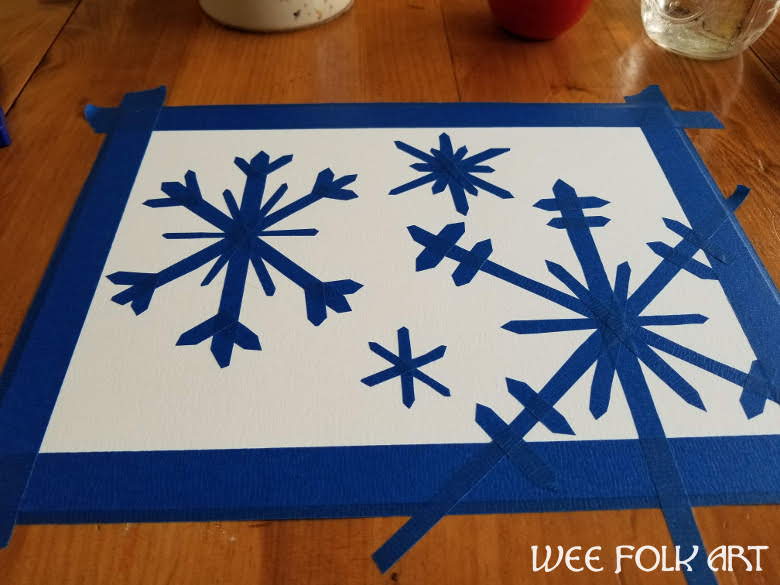
Tape a piece of directly to a hard worker surface. If you need to protect your table, try taping it to a thoroughly oil-free cookie sheet. It is important to tape down your work to help prevent curling of the paper. Also, when you are taping down the paper, try to be consistent on tape placement. When you are done painting and the tape is removed, the paper under the tape will remain white and make a perfect matting for your painting.
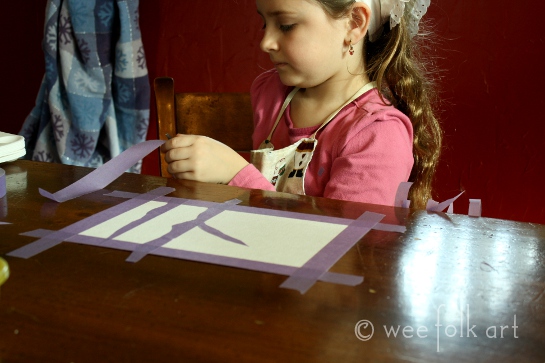
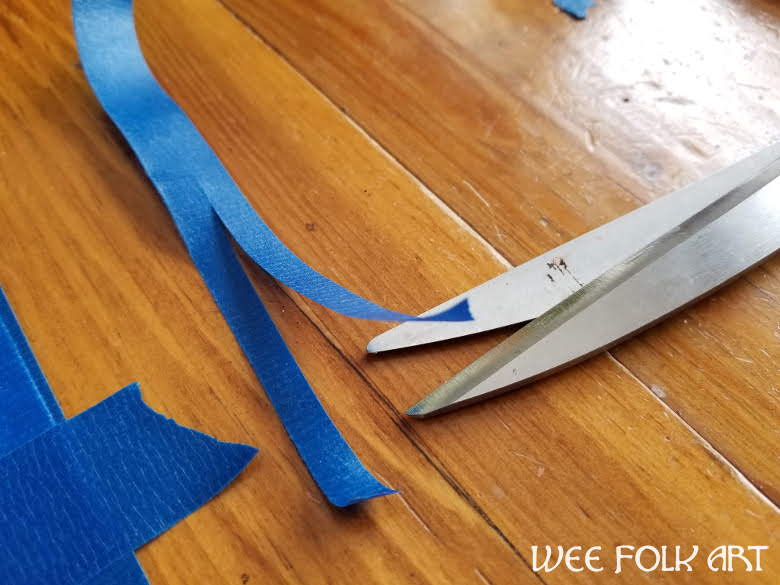
Before you begin, decide whether you want to make one large snowflake on your page or many. We made four, each a slightly different size. Our large one even goes off the edge of the paper. We wanted to give an illusion of distance to the smaller snowflakes. Cut your tape approximately the size of the snowflake you wish to create. You will now need to cut the tape lengthwise. For the large snowflakes, we cut the tape into 3 pieces. For the medium flakes 4, and for the smallest snowflake 5. Although you do not need to do this, we cut each end into a point.
Place the tape on the paper, crossing in the centers.
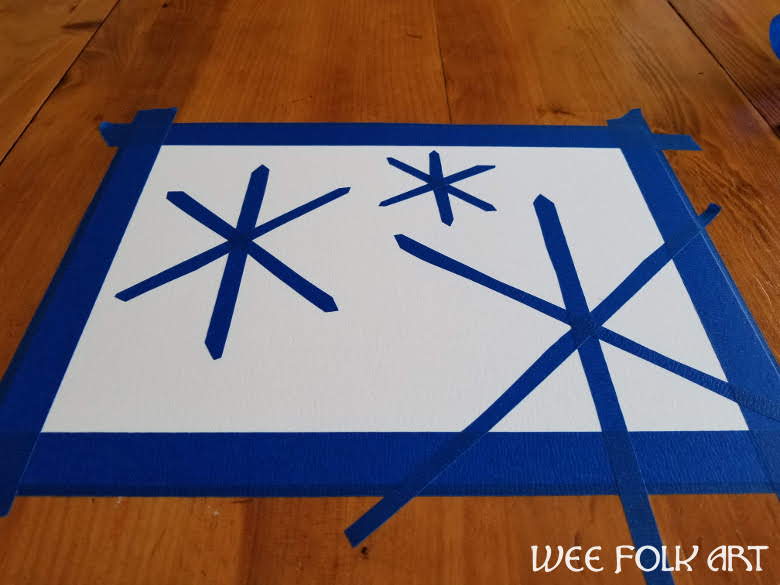
Now, go back and add detail to each snowflake. Note: Make sure all of the tape is pushed down securely. This will keep the paper nice and white when the tape is removed. If the tape is not secure, paint will get under the tape and your snowflake will be wonky. If that does happen, just go with it. To a man on a galloping horse, it will still look fantastic! When satisfied, it is time to paint.
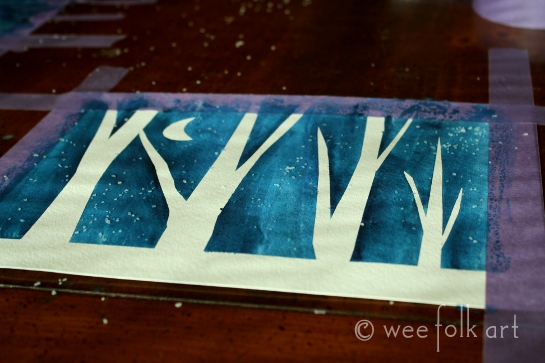
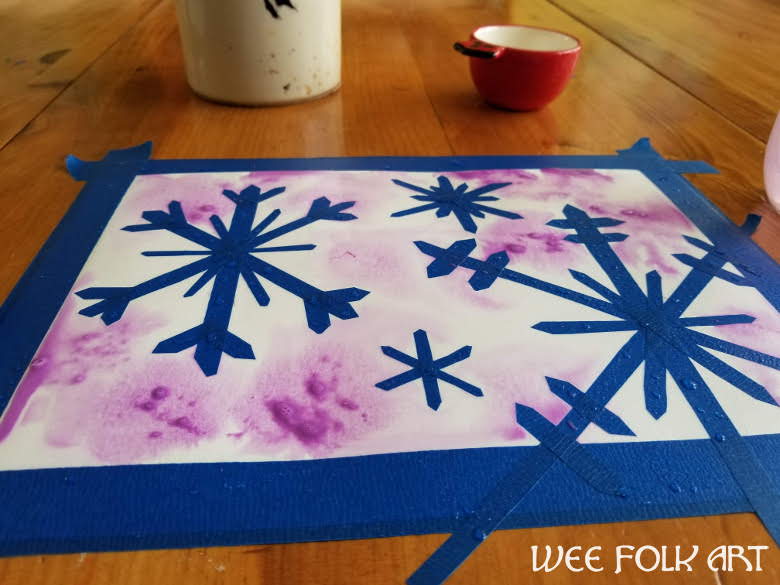
Begin by wetting your whole paper with clean water. You want the paper moist, but not so wet that you have water pooling.

Add color to your page. Pick 2 or 3 colors. We chose dark blue, medium blue, and purple. Dip your paint brush in the water colors and dab paint around the paper. Add more colors until the color is pleasing. If there is a lot of pooling of paint, use the edge of a piece of paper towel to absorb some of the paint. Do not “blot” the painting of your will remove too much paint.
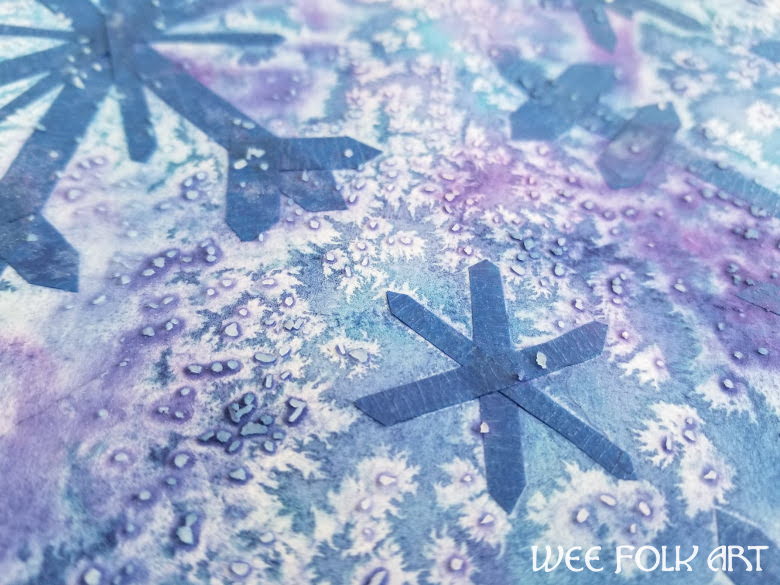
Sprinkle painting with kosher salt. Do not pile the salt or use to much. You want to salt spread out evenly of the painting. The salt will absorb the liquid right around the individual crystals, and when the painting is dried and the salt is brushed away, it will look like Jack Frost paid you a visit!

Allow the painting to dry completely. In most cases, depending on how much water was used, it will dry in 1 – 3 hours. If you would like to speed up the process, you can use a hair dryer to speed the process. You can really see the frost look now. Brush off the salt crystals.

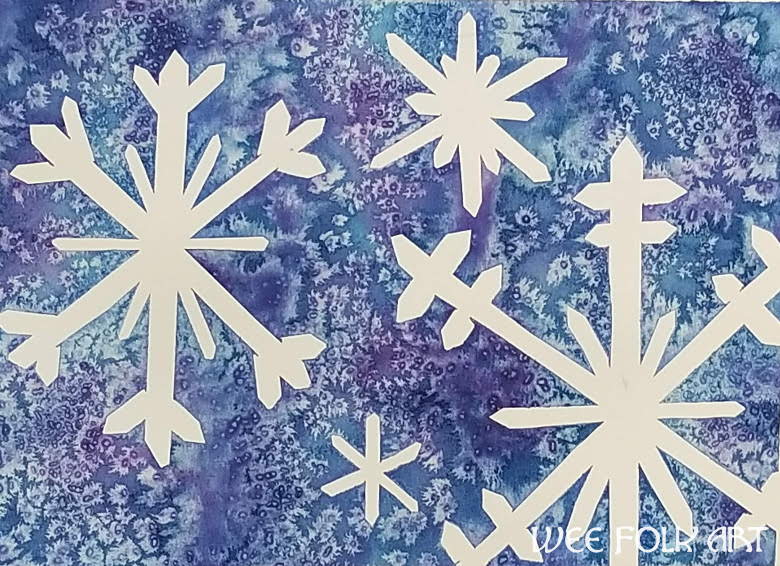
Carefully remove the tape and frame or simply hang up! Your watercolor snowflake is beautiful, right?
Note: If your painting is real wavy, you can turn the painting over on a protected surface and iron the picture from the back. This usually is not necessary if you taped your paper down.