
Felt and Wood Reeds

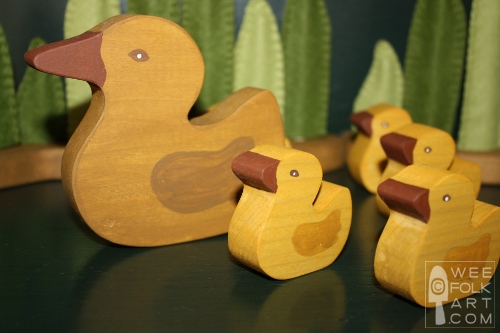
Here are the Felt and Wood Reeds that I used with the Wooden Ducklings to go along with the Book Nook – Have You Seen My Duckling? but they would be just as at home used with our Gnomes.


I made 2 different sizes; one with 7 reeds and one with 8 reeds. The bases are an easy shape to cut out with a scroll saw, and I cut the dowels to different sizes to give a natural look. The directions are quite simple.
Materials
For Bases:
1″ wood (popular, pine, maple, ash, etc.)
1/4″ dowel rods
stains, paints, and finish (see note in text)
pattern

For Felt Reeds:
assorted green felt
embroidery floss
pattern

Wood Base and Rods:
Trace the patterns on to 1″ thick lumber. I used popular for mine but pine, maple, and ash would also be good choices. Cut out the bases, sand, paint or stain, and finish. For general directions for cutting out and finishing wood, refer to the tutorial of our Wooden Apple Orchard.
Using the pattern as a guide, mark and drill holes in the base. The holes should be 1/4″ wide and 1/2″ deep.

Rods for small base cut 1/4″ dowel as follows: 1 – 6 1/2″, 1 – 5 1/2″, 2 – 4 1/2″, 2 – 3 1/2″ and 1 – 2 1/2″.
Rods for large base cut 1/4″ dowel as follows: 2 – 6 1/2″, 1 – 5 1/2″, 2 – 4 1/2″, 2 – 3 1/2″ and 1 – 2 1/2″.


Felt Reeds:
Make a copy of the pattern. For each rod, cut out 2 pieces of felt.
Blanket stitch the two pieces together using 3 strands of floss. Leave the bottom open.
![]()
Slide the felt reeds over the rods.
I did not glue the rods into the base. This gives you the flexibility to arrange the reeds in any manner you wish. Plus, I have some other ideas on how to use the rods and bases and I want to be able to move the rods around. Enjoy!
Copyright © Wee Folk Art 2008 – 2010. All rights reserved.
All photos, text and patterns are copyright protected. You may not copy, reproduce or redistribute any material found on WeeFolkArt.com without written permission. Wee Folk Art retains all rights.


One Comment
celia braser
These are great. I am going to make a few of them for our spring nature table. Thanks for all your great patterns and generosity.