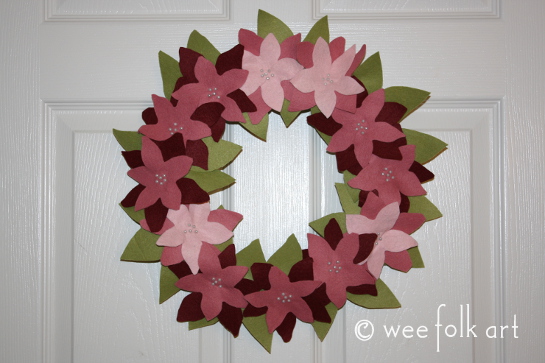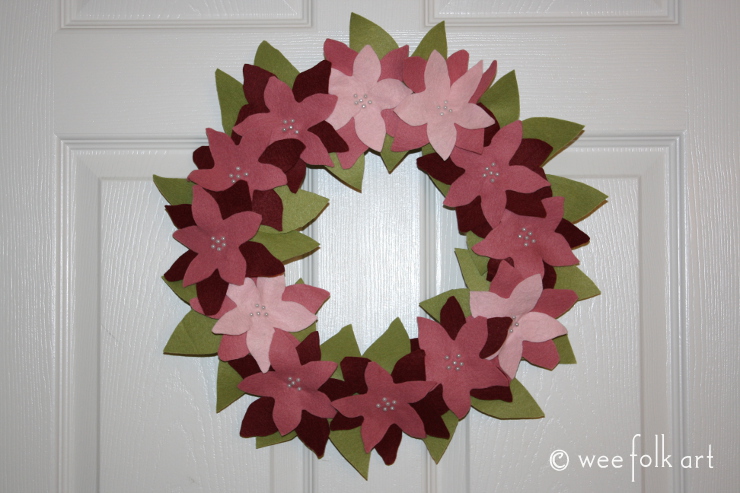
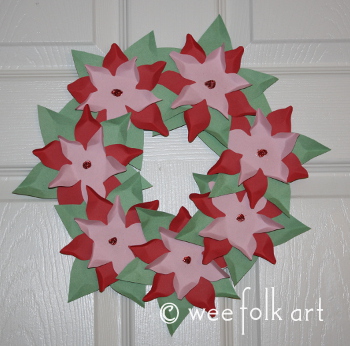
Felt Poinsettia Wreath
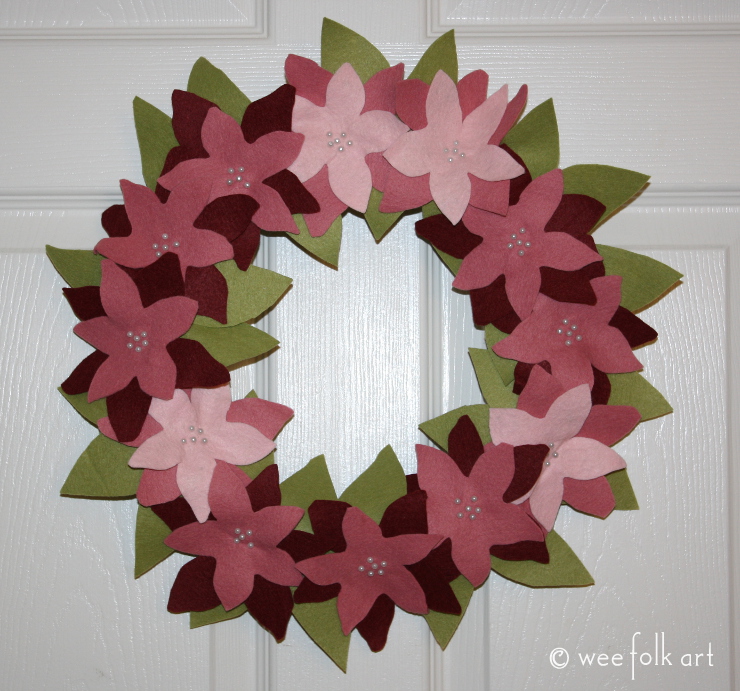
In our Advent Activities Guide we shared a tutorial for making a Paper Poinsettia Wreath. This was based on a Poinsettia Garland we had made before. (You can find the links below.) Using the same pattern as the paper wreath we created this beautiful Felt Poinsettia Wreath that you can reuse year after year. This wreath can be made in any size. Obviously, the larger the wreath the more flowers and leaves you will need. I am giving instructions for the 12″ wreath I made. Depending on how you position the flowers and leaves, you may need more or less than I did. Just work with it until you are satisfied with the look. You could also add a bow, buttons or sequins to make it extra festive!
Related Posts:
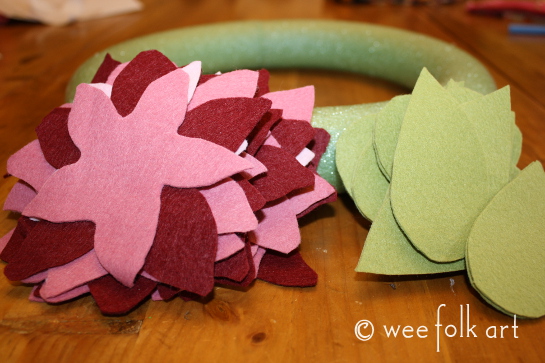
Materials:
- 12″ Styrofoam wreath
- cranberry, mauve, pink and green felt
- beaded straight pins
- pattern
Directions:
Make a copy of the pattern. Cut out leaves and petals. There are 2 sizes of petals. I used 3 colors for the petals. I made 8 with large cranberry petals and mauve small petals and 4 with mauve large petals and pink small petals, but just use combos that are pleasing to you. NOTE: You can also reduce the pattern to create a third set of petals. Each flower would then have 3 petals, giving a fuller look or you could make smaller flowers using the 2 smallest petals, to fill in here and there. Have fun experimenting!
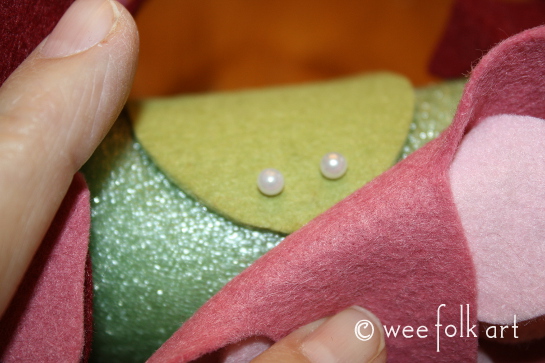
Start pinning the petals to your wreath. Position the smaller petals over the larger and use at least 3 pins to hold in place. NOTE: You can use more pins to define the center more or gold pins to make the center “pop”. You can even cut a shape in gold felt for the center. I wanted to keep mine very simple and muted so I chose the understated white pins. I randomly placed the different colored flowers, and placed most on top but some more towards the outside or inside.
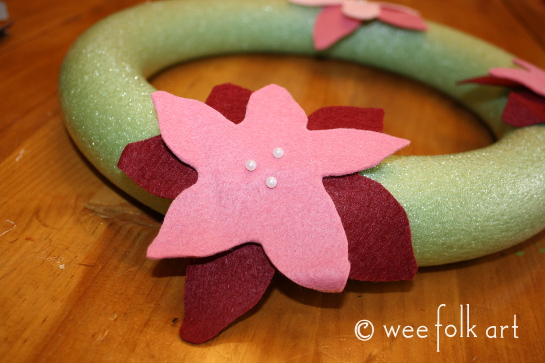
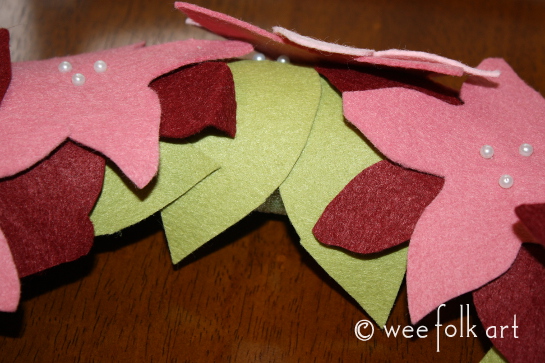
Continuing adding flowers, overlapping the petals. There will be some bare spots. That’s fine. That is where the leaves will go.
Start pinning your leaves in place. Position the base of the leaves so it is under the petals of the flowers. Give some thought to the way the leaves would naturally grow. Use 2 pins to pin to the wreath making sure they are hidden under the flower petals.
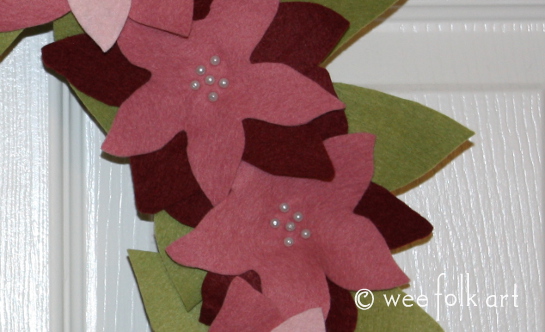
Continuing adding leaves until the wreath is full and the Styrofoam is completely covered. Step back and take a look at your wreath. I decided I wanted more pins in the center of each flower and went back and added more to look like clusters.
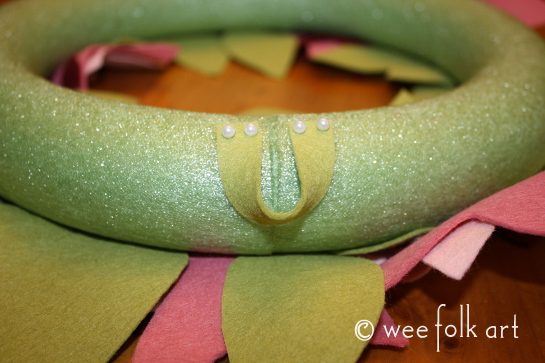
Out of scraps of felt, cut a narrow strip of green felt to use as a hanger. When putting in the pins, push them in on an angle, coming from the bottom up, so the pins do not pull out when hanging on the wall.
If desired, you can add a bow, buttons, sequins, etc. to your wreath. We are keeping ours very simple but personalize yours any way you like!