

Learn-to-Knit Afghan Block One

This series covers several different knitting stitches using the Learn-to-Knit Afghan book by Barbara Walker. Whether you are a true beginner or an intermediate knitter, you can take your knitting to the next level working through the blocks in this book. About once a week I will be adding one new block to the blog with some of my notes. If you would like to knit along with us please feel free to leave your comments, questions, suggestions, and links to photos in the COMMENT section. You can also add a photo to our Flickr group or tag a Tweet with #WFAlearn2knit. If you are just joining us you might want to start with the introductory post.
Block One: Striped Garter Stitch
Block Two (coming soon)
Getting Started Knitting
If you are completely new to knitting you can learn the basics of getting starting with our Newbie Knitting series. Once you have tackled the first few lessons there, you will be ready to begin your afghan.
How to tell the front and back of a knit garter stitch
One of the main points to take away from this block is the ability to see the difference between the right and wrong side of a garter stitch piece. When working in a single color there really is no discernable difference but since we are working with two colors the front and back become obvious.
The front side of your garter stitch piece will have the color row lining up so that each color change makes a new bump in the fabric which creates a very clean look.
When you flip your piece over you will see that each color band is now split in half over two bumps. So the backside is almost appears to have more stripes, especially since you can see the dark yarn in the ditch between the two rows of the light color yarn.
Counting rows when working in garter stitch is very easy. You can just count 2 rows for every bump.
How to start a second yarn color
The second thing to think about in this piece is how to join that second color of yarn. In the book, Barbara Walker has you tie the new color strand to your original yarn at the beginning of the row. To do this tie your new color to your original yarn and slide the knot up. This does assure that you don’t have loose ends that could unravel later on but I don’t like this method. No matter how small you make your knot, you are left with a bump in your work that will never lay as flat as the rest of your piece.

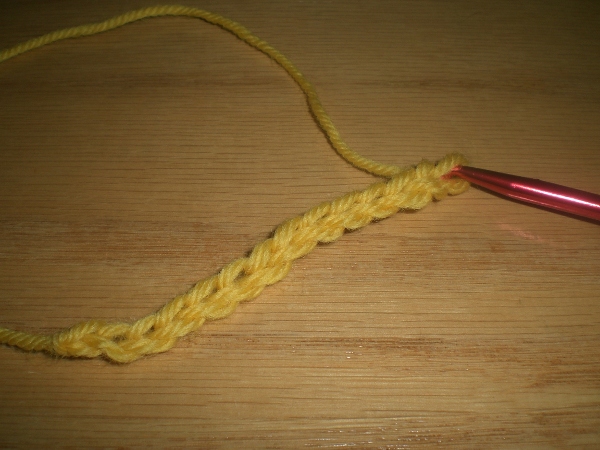
I prefer to just make a loop out of the new color, place it over the needle as my first stitch, and knit away without doing anything to tie off the new strand. After my piece is done and I have woven in my ends properly, I shouldn’t have to worry about the ends unraveling.

If you choose to use the loop method, you can always twist the first stitch to hold the strands together tighter. To do this hold the original color and the tail end of the new color together in the back. Twist the new live color strand counter clockwise once when you knit your second stitch in the row so that the live strand locks in the tail ends. Drop the tail and first color down in the back of your piece.

FYI – We are an Amazon affliate.


One Comment
Pingback: