

Spoon Doll Pattern
Think of our directions for spoon dolls merely as a starting point. Add aprons and bonnets. Partially sew up the bottom of the dress to make legs or add legs under the dress. Hair can be made from roving, yarn or painted on. If young children are making dolls, you can wrap and glue instead of sewing. The possibilities are endless. To store or display dolls, I place them is empty long necked glass beverage bottles. For young children plastic soda bottles will work, although they tip easier.
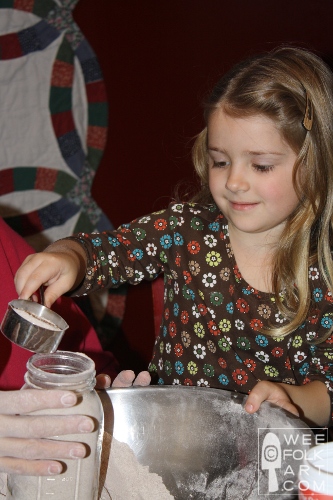
To see how the kids made their own spoon dolls check these posts:
Important note about spoon dolls. Directions for spoon dolls is an “ish” thing. The length of the handle, the size and shape of the bowl will all affect the patterns used. The spoons used for in these directions are 12” long, with a long and narrow bowl approximately 1 1/2″ x 3”. Lengthen or shorten patterns to fit your doll, although they do not need to be “perfect” to be lovely!
Spoon Doll Pattern Materials:
- 1/3 yard fabric for dress or robe
- 4” x 6” piece of wool felt for arms
- 1 8” pipe cleaner
- 5” x 5” piece of wool felt for hat (for wizard, princess, etc.)
- Lace, trims, wool and fabric scraps for embellishments
- roving or yarn for hair
- wooden spoon – a 12” spoon was used
- acrylic paints for face
- crafting glue
- pattern
Spoon Doll Pattern Directions:
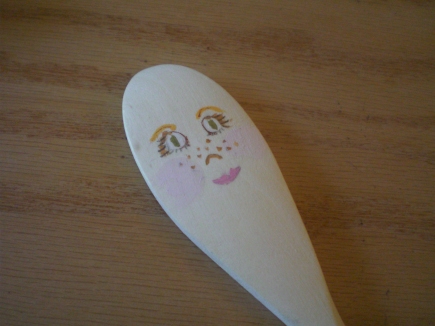
Face:
[1] Using acrylics, paint your doll’s face on the convex side of the bowl. I highly suggest practicing on a piece of paper before actually painting the face. Placement depends on the size of the bowl of the spoon. Remember, you will be adding a hat and/or hair, so take that into account when deciding on placement. Faces can be as elaborate or simple as you wish. You may even choose not to paint on features. It’s a good idea to sketch the features onto the spoon with a pencil that can be erased until you are satisfied. Allow to dry completely.
[2] Make copies of the pattern and cut out necessary pieces.
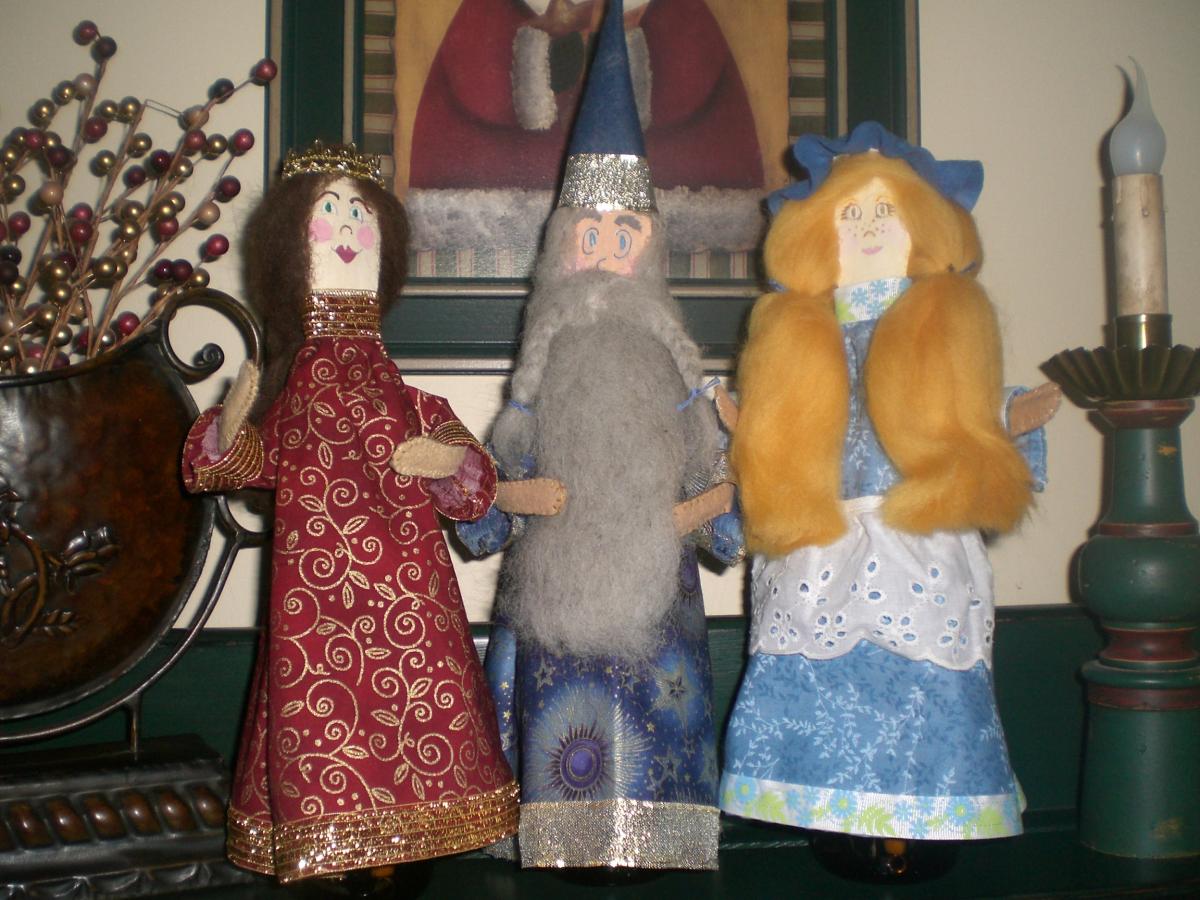
Queen: 2 dress/robe pieces and 2 sleeves cut from fabric; 4 arm pieces cut from felt; 2 pieces of pipe cleaners.
Maid: 2 dress/robe pieces and 2 sleeves cut from fabric; 4 arm pieces cut from felt; 2 pieces of pipe cleans, 1 5″ diameter circle cut from felt, wide eyelet ribbon for apron for dress front.
Wizard: 2 dress/robe pieces and 2 sleeves cut from fabric; 4 arm pieces cut from felt; 2 pieces of pipe cleaners; 1 hat piece cut from felt.
All characters: ribbons, lace, buttons, etc. to embellish dolls.
Arms:
[3] To make arms place 2 arm pieces together and blanket stitch using 2 strands of embroidery floss the color of the felt. When you have blanket stitched down one side and around the hand portion, position 1 pipe cleaner so it goes down into the hand. Continue blanket stitching up the other side encasing the pipe cleaner in the arm. The pipe cleaner should be about 1/2″ from the upper edge. Make the second arm in the same manner.


Sleeves:
[4] To make the sleeves turn the hem under 1/4” and press. Turn under another 1/4″ and pin in place. Hand or machine stitch in place.

[5] Add lace or trim if desired.

[6] With right sides together, sew up sleeve’s side seam using a 1/4″ seam allowance.

[7] Turn right side out. Position 1 arm in the sleeve so the arm is in the middle of the sleeve and the edge of the arm is even with the edge of the sleeve. Baste in place close to edge. Make the second sleeve.

Dress/Robe:
[8] To make the dress/robe make front and back separately in the same manner. Turn hem under 1/4″ and press. Turn under another 1/4″ and pin in place. Hand or machine stitch in place.

[9] Add lace or trim if desired.

[10] Turn neckline at fold. Turn under on second fold and stitch in place.
[11] Place sleeves on the right side of dress front as indicated on pattern and pin in place. Sew the front and back of the dress together by placing right sides together, and sewing the 2 side seams using a 1/4″ seam allowance. The sleeves will be pinned in place between the front and back of the dress. (For maid’s apron or any other embellishments, add them to the front of the doll before you sew front to back.)


[12] Using 6 strands of embroidery floss that match the dress color, run a gathering stitch around the neckline of the dress, about 1/4″ from the edge. This will be used to gather up the dress at the neckline and secure it to the spoon.

[13] Gather the neckline enough so the dress takes form but loose enough so it will slide easily. Decide where it should be secured to the spoon. The best place is at the neck of the spoon, where the bowl is attached to the handle.
[14] When you are satisfied with the placement, lightly mark it with a pencil, slide the dress down the handle and apply a generous amount of crafting glue around the spoon at your mark.

[15] Move the dress in place and pull tautly on the gathering stitch. Tie off securely so neckline does not slip. Allow to dry completely.

Hair:
[16] Add hair using roving, yarn or paint. To make the queen’s hair I used a 12” piece of alpaca roving. I placed glue on the back, edges and front hairline then laid it in the middle of the roving. Tuck the hair until you are satisfied with the look. Add more glue around the face until you get the desired look. For the wizard, I added a beard and braided mustache. Give your doll its own unique look!


Queen’s Crown:
[17] Using the desired trim, fit to the queen’s head, then stitch the trim in a circle. Position it on the queen’s head and add small amounts of glue to the back and sides to hold in place.


Wizard’s Hat:
[18] If desired, stitch lace or trim to the bottom edge of the hat. Overlap the side seams and blanket stitch in place. Position on the wizard’s head and glue in place.


Maid’s Cap:
[19] Cut a 5″ diameter circle out of felt. Mark a 3″ diameter circle in the middle.
[20] Using 6 strands of embroidery floss, sew a gathering stitch along the 3″ diameter circle.
[21] Pull gathers tight enough to fit nicely on doll’s head. Apply glue to stitching line and position on doll’s head. Let dry completely.
Note about hair: Use trial and error to get hair to the the look you want. Mustaches and breads, buns and braids are all possible styles. Have fun creating your doll’s unique look!

One Comment
Pingback: