Newbie Knitting | The Purl Stitch
Lesson Five: The Purl Stitch
So now that you have been knitting for awhile, it is time to learn the purl stitch. You actually already know the mechanics… IN, AROUND, UNDER, OFF… but this time instead of working to the back, we will be working in the front. To get started cast on a bunch of stitches and knit one row. In the photos below I have already purled a few stitches trying to find a good spot in the variegated yarn for photos.
First off, when Purling always keep your live yarn in FRONT of your needles. So for knitting it is always in the back, for purling it is always in the front. Go into the stitch from the back to the front. It is more of a downward motion, rather than an upward one. (If you need more help seeing if you went IN the right way… scroll down… I have some more detailed photos).

Keeping the live yarn in front of your needles wrap it AROUND your right needle. It is the same counter-clockwise motion.

Just as before you will take the tip of your right needle UNDER the old stitch.

And slip the old stitch OFF the left needle. Tighten as you would your knit stitch. That’s it. You now know how to knit and purl. A whole new realm of pattern possibilities has opened up to you.

Keep practicing. Purl to the end of the row. Then knit the next row. Work back and forth in this manner… knitting one row, purling one row, knitting one row, purling one row, etc. That is called Stockinette stitch and will give you a smooth, finished piece. Note the edge will probably curl. We will start a new project next week.
Here is another way to see the difference in the stitches. When you knit, after you go into a stitch align your needles parallel to each other.

When knitting, both points will be facing the same direction.

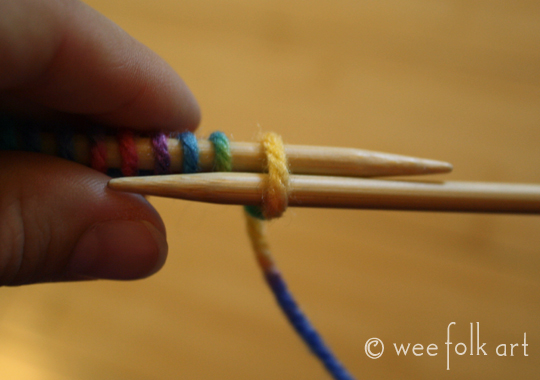
When you purl, after you go into a stitch align your needles parallel to each other.

When purling, the needle points will be facing away from each other.