

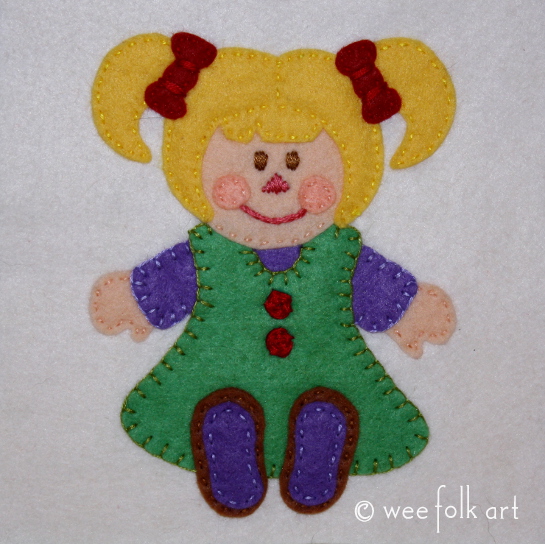
Santa’s Workshop Rag Doll Ornament
These ornaments were based on our Santa’s Workshop Rag Doll Applique which can be found HERE. I made them two different ways. The first ornament has a border around the design and in the second ornament there is no border. Decide which you like best and sew away!
Materials:
- Bordered Pattern or
- Borderless Pattern
- Felt – although I usually use 100% wool felt for items that get high use, like children’s toys, I am fine with using wool blend felts for ornaments. I got my wool blend felt from our sponsor Prairie Point Junction. To learn more about felt read our article Felt 101.
- 6 Strand Embroidery floss
- Sequins or other materials used for embellishing
- Metallic embroidery floss or 1/8″ ribbon for hanger
- Stuffing – I used Polyfil but you can also use wool roving
Directions for Bordered Ornament:
NOTE: Get tips on cutting out felt HERE.
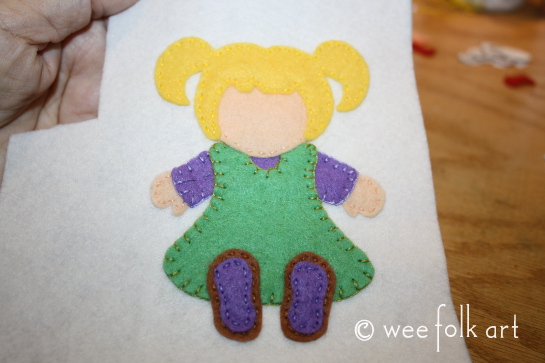
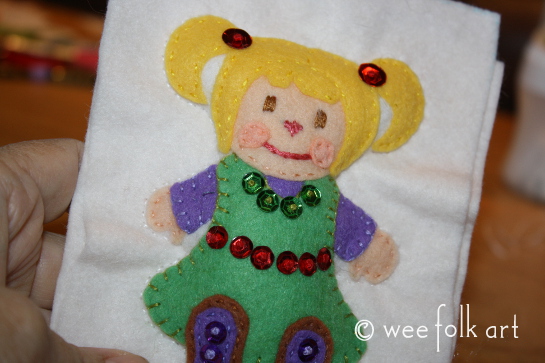
Using the Bordered Pattern (which is an 80% reduction of the Santa’s Workshop Rag Doll Top Applique), cut out all pieces of felt.
Using the pattern as a guide, position the pieces on your border felt giving yourself at least a 1″ border around the whole design. Again, using the pattern pieces as a guide, overlap pieces of felt and baste to your border felt.

Using the pattern as a guide, sew doll pieces to border felt using 2 strands of floss for running stitches and 3 strands of felt for blanket stitches. sew the rag doll to the border felt with coordinating floss. Remove basting stitches.
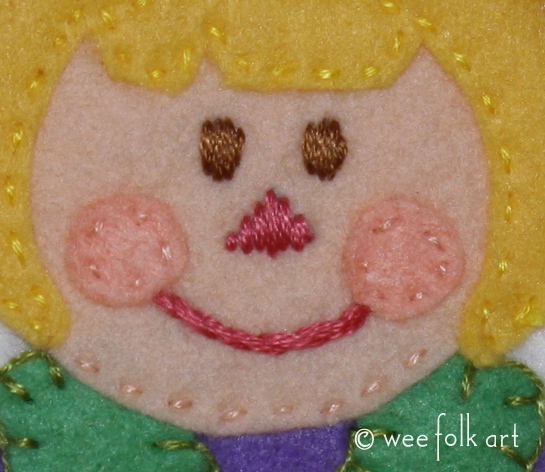
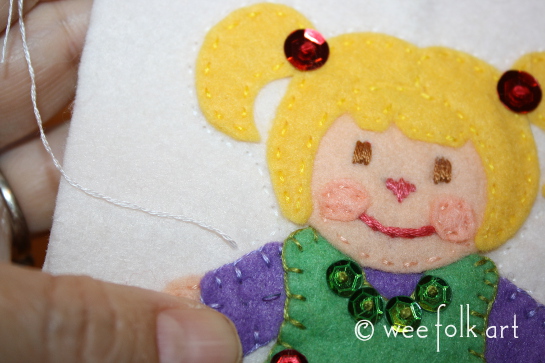
For the face add cheeks using a running stitch and 2 strands floss. For the eyes and nose use a satin stitch and 6 strands of floss. For the mouth use a stem stitch and 6 strands of floss.
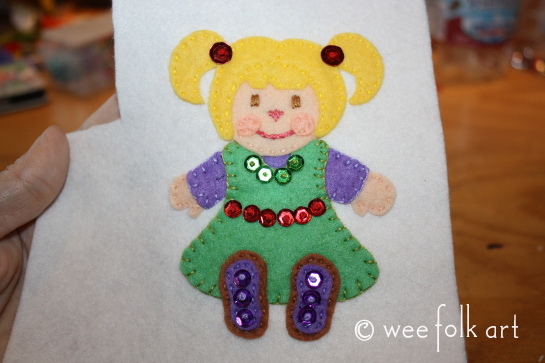
To add the sequins use 6 strands of floss and a French knot in the center of each sequin.
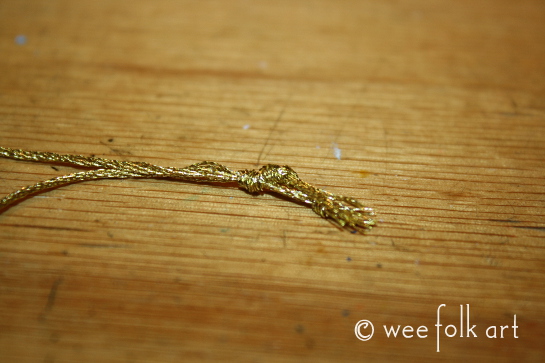
Cut a piece of metallic floss or 1/8″ ribbon 8″. Create a loop by bringing the 2 ends together and knot. This will be used to hang the ornament on the tree.
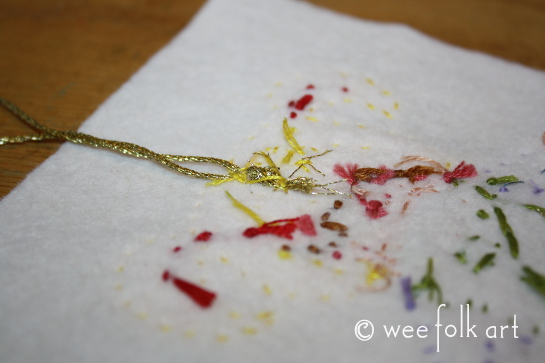
On the back of your piece, position the hanger so the knot is behind the uppermost position on your ornament. Tack in place making sure to sew it only to the border felt. Do not go all the way through to the front of the ornament or the stitches will be seen.
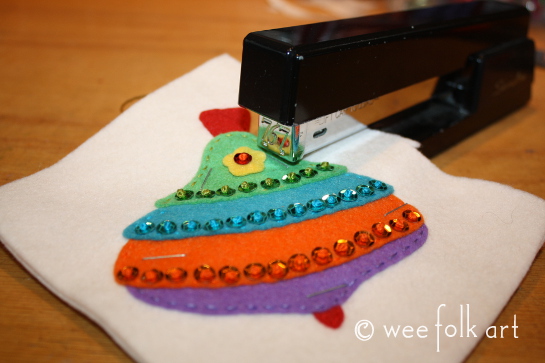
Pin, baste or staple your ornament to a second piece of felt that will be the back of your ornament. Make sure your hanger extends beyond the ornament. Note: I didn’t get photos of this step with the rag doll but it is the same as the spinning top.
Using a running stitch and 2 strands of floss, sew the border felt to the backing, about 1/8″ from the design. When going around the top, make sure your hanger is out of the way. Make sure to leave an opening for stuffing.
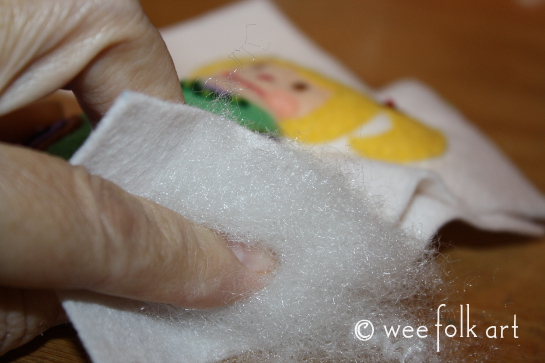
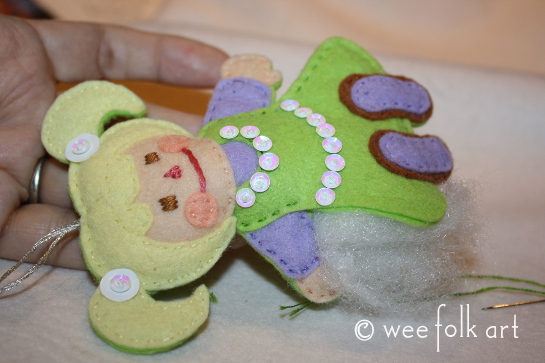
Lightly stuff the ornament.
When the ornament is stuffed, finishing sewing the border felt and the backing together.
Cut away the excess felt leaving a 1/4″ border all around the ornament. Be careful not to cut your running stitches that hold the ornament together. Be especially careful when you come around the top. You do not want to cut off your hanger. To cut around the top, cut the border felt and the backing separately.


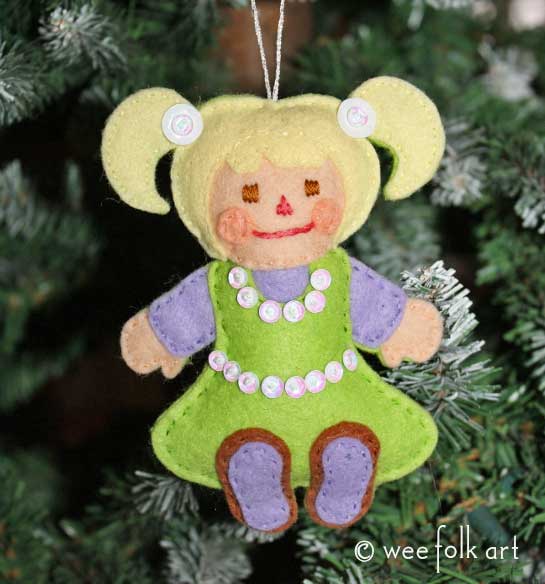
Your Santa’s Workshop Rag Doll is now ready to hang on the tree!

Directions for Borderless Ornament:
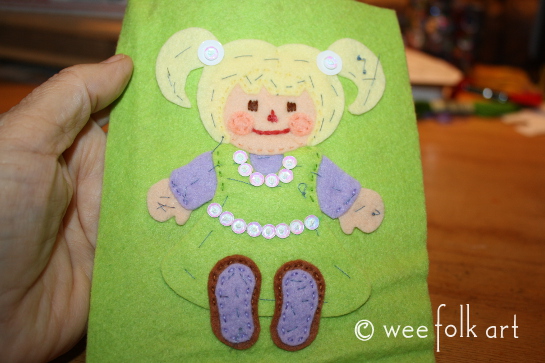
Using the Borderless Pattern (which is a 90% reduction of the Santa’s Workshop Rag Doll Applique), cut out all pieces of felt.
Follow the directions for the Bordered Ornament with these changes:
The finished ornament will not have border but you will still sew the individual pieces to separate piece of felt that I refer to as “ticking felt”. After you baste your ornament to the ticking felt, sew the pieces to the ticking felt as indicated on the pattern. DO NOT sew the outside edges to the ticking felt. Refer to pattern to see where you should sew. Add sequins.
After you are done embellishing the ornament, pin, baste or staple your ornament to the back. Cut out the ornament, without leaving a border. Again, be careful at the top so you do not cut off the hanger. Sew the rag doll to the backing using a running stitch and 2 strands of floss. Remove basting or staples.
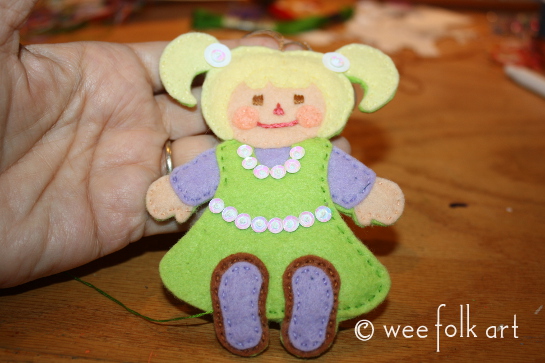
Lightly stuff the rag doll and finish sewing up the side.
Finished!

One Comment
Pingback: