
Freezer Paper Snowflake Stencil
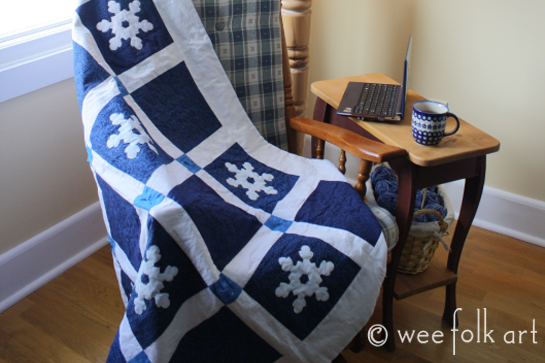
Once you learn this technique for making freezer paper stencils, you'll find a 101 ways to use them. It is a fast, inexpensive technique that allows you to make more detailed designs than traditional appliqueing will allow. Materials listed below are to go with our Snowflake Quilt. The pattern for that will be available later in the week.
Note: The paint can bleed through your fabric, so if you are stenciling a t-shirt or other clothing, make sure to place a heavy piece of paper inside your shirt so the paint does not bleed through from the front to the back.
Materials:
12 Navy 9" Squares of Fabric
Freezer Paper
Snowflake Pattern Copied on Card stock at 120% (click here for tips on enlarging)
White Fabric Paint (preferably one that has you iron to set the color)
Sponge Stencil Brush
Small, Sharp Scissors
Iron
pen
Wash your fabric! This step must not be skipped in order for the fabric paint to adhere. Due to the high contrast of Navy and White I also used a 1/4 cup of vinegar when washing the blues to help color set the fabric. Remove fabric promptly from the dryer to reduce/eliminate wrinkles. Iron if needed.
Cut out 24 9" Navy Squares (I used three different navy fabrics and cut out 4 from each print). Set aside 12 squares (2 from each print).
Cut out 12 8" squares of freezer paper. I cut mine as I would fabric with a rotary blade.
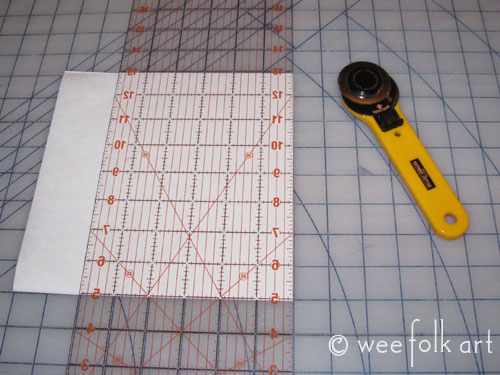
Lay 2 freezer paper squares on top of each other, wax to wax so they don't slip, and then carefully fold the squares in half. Repeat 5 more times.
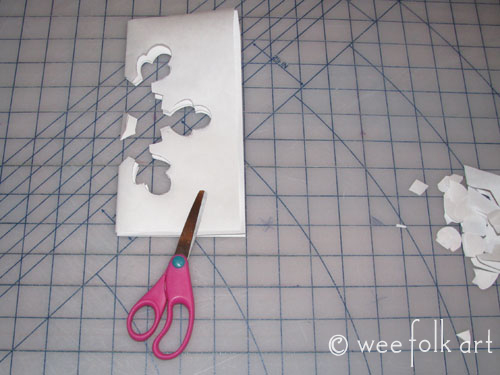
Cut out Snowflake Pattern (enlarged 120%) on Card Stock. Fold the snowflake in half with one set of the mid points standing straight up/down.

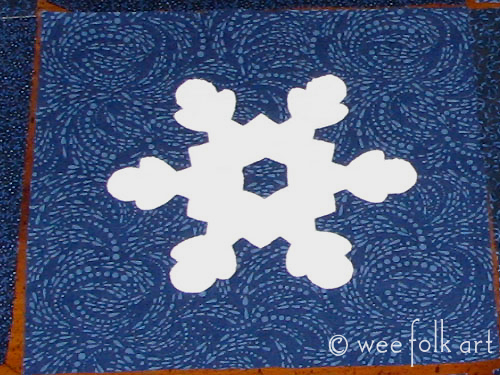
Carefully center the pattern piece onto the folded freezer paper, aligning the folded sides together. Trace the snowflake half onto the folded freezer paper. Cut out the freezer paper… keeping the negative portion (ie the outside portion not the flake). Remember to save the center piece of the snowflake (the little hexagon)! I found that by folding the two square of freezer paper together wax to wax they did not slip and I was able to cut out two at a time. If you find this awkward you can do each one separately.
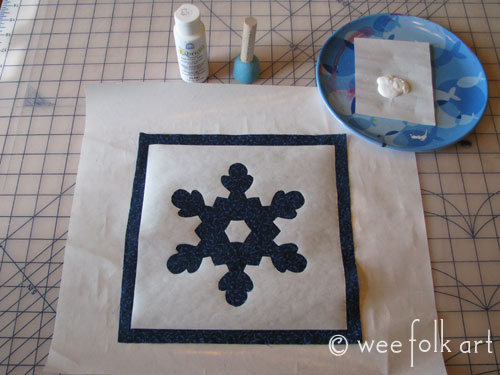
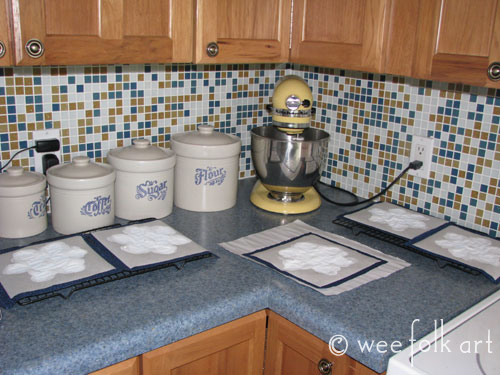
Once you have all your stencils cut out it is time to iron them onto your fabric squares. Set you iron to the hottest non-steam setting. Iron your fabric square to be sure it is smooth. Then center the freezer paper stencil onto your fabric square. Right side of fabric up, wax side of freezer paper down. You should have a half inch border around the stencil to help you align your stencil properly. Iron your stencil in place. Be sure to add your little hexagon piece (note keep the little hexagon rotated the same direction on all pieces… as shown it is parallel to the mid hexagon section of the snowflake body). Repeat 11 times.
Set up your paint work station. You will need a mat to keep your surface clean (a piece of freezer paper wax side up works well, uncurl it by rolling it in the opposite direction), your fabric paint in a flat bottom paint pallet (again you can use the freezer paper wax side up on a plate), a sponge stencil brush and a flat surface for your squares to dry on (I used basic cookie racks).
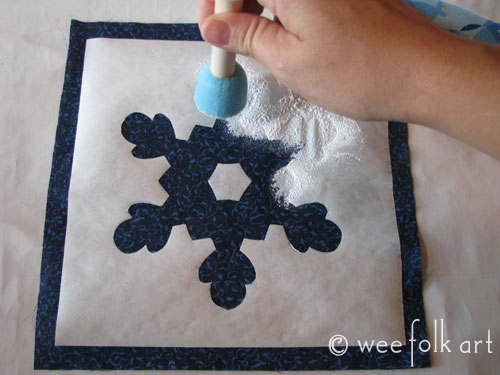
Dip the brush in the paint, dab it off on the side of the pallet to reduce excess paint, and apply to the fabric square in an even up and down motion. Do not slide the brush or you will pull up the edges of the stencil, be especially carefully around the center piece. Repeat until the entire snowflake has been covered in an even coat of paint. You can try different amounts of paint for different effects. I was happy with a single coat with some fabric visible through the paint, if you would prefer a more opaque design you can apply a second coat after the first coat dries.
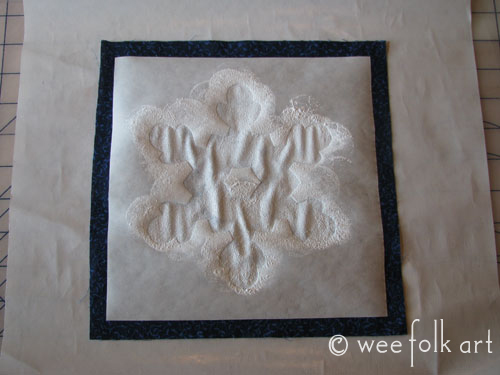
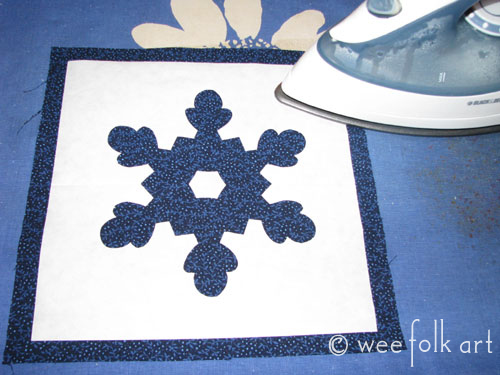
Move the square to a drying rack, wipe down your work surface and continue with the next fabric square. Be sure to follow the directions on your fabric paint bottle for drying instructions. Ours required 24 hours of air drying time followed by ironing with a piece of fabric over the design to set the color. Once the paint is dry to the touch you can remove the freezer paper.
Now you are ready to begin on your quilt.


5 Comments
Michelle Longworth
My first nephew was just born this weekend. Yay! They didn’t tell us the sex of the baby so I didn’t want to make a quilt until I knew. Going out today to get the supplies. I was thinking since he was born in the winter, having a winter theme would be neat. I’m going to stencil one of your snowflakes in the middle. Perfect timing. Thanks!
Belinda
I have a question. I tried freezer paper stenciling but I kept getting paint on the stencil and the lines weren’t nice like yours. Any ideas what I might be doing wrong?
Belinda
Michelle
Make sure the freezer paper has adhered completely, use a smaller amount of paint (this may be the biggest issue – it is better to do two coats than a thick first one) and make sure you go straight up and down. Do not slide at all. HTH
Michelle
Also – be sure to pre-wash whatever fabric you are stenciling on… it makes the freezer paper and the paint stick better.
Pingback: