
Newbie Knitting | Finishing Your Little Birdie
To finish your Little Birdie that we started last week, you will need a yarn needle, scissors, and a softball size amount of batting.
Fold your birdie in half diagonally to make a triangle. Have your corner with the smaller tail (probably the cast on tail) meet at the right angle and the longer tail (left from binding off) be on one of the acute ends. You remember your geometry, right? 😉 The acute ends will be along the fold.

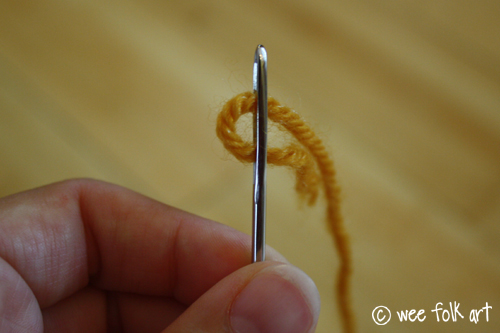
Thread the yarn needle with the shorter tail. (The right angels on top.) Tip: It is easier to thread your needle if you fold the yarn first.
Use a slip stitch to catch the edge of a loop on either side to sew up the first seam. You will be working from the right angle to the acute angle that does not have the other yarn tail attached. Note: I’m using red yarn just so you can see what I’m doing. Your yarn tail will obviously be the same color as the rest of your bird and you will not be able to see it when you are done.

When you reach the end of the seam, create a loop by going through the tip and pull your yarn through the loop to knot it. You will want to pull this knot tighter than normal. We want the tip to curl down forming the head.


After you have shaped the head, thread the yarn back down the seam a bit. Then pull the yarn needle through the middle of the bird and cut the yarn. This will hide the end of your yarn inside the bird body. (Be careful not to catch the other side of the chick.)


Now thread the other tail onto your needle and work from the opposite end towards the right angle. Stop about one inch away from finishing the seam. Stuff the bird with batting… enough to fill it nicely, but not too full or it will show through your stitches.

Once stuffed, sew up the rest of the seam. This corner with the seams is your bird’s belly. It is now time to shape your bird. Push your yarn needle from the belly out in the middle of the birds back, slightly off centered.

Run the needle under a few stitches and then push the yarn needle back through the bird’s body to the belly.


Pull on the yarn slightly to curve the back. I like to do the same thing across the belly, and then once more across the back. Once you are back at the belly, knot off your yarn, run it through a few stitches and hide the yarn end inside the bird like we did with the other yarn tail.
Thread a 6 inch piece of orange yarn onto your yarn needle. Run it through the point of your bird’s head. Double knot the yarn and trim the ends to be about 1/2 inch long. This forms your bird’s beak.

You can gently form your bird by adjusting the batting with your hands. Tada, you have now just completed your first knitting project. Congrats! You are now a knitter! I will have a few more knit only projects available before I teach the purl stitch. Keep practicing what you have learned so far.

One Comment
Julie- This Cosy Life
Very cute! I will have to tuck this little project away for when my eldest starts 1st grade next yr. Thanks!