

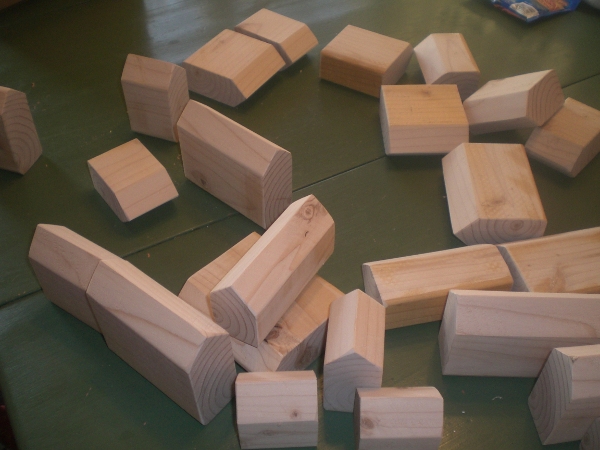
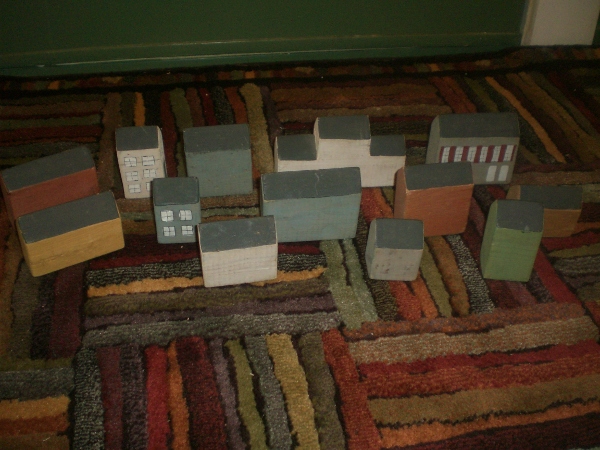
All Natural Wooden BUILDING Blocks Tutorial
Today we are making these fun “Building” shaped All Natural Wooden BUILDING Blocks. We made our All Natural Wooden BUILDING Blocks out of pine wood. Many old, rustic toys were made out of pine because the wood was readily available and easy to work with. Although the wood is soft, and will show wear (which I find appealing) with proper care, pine toys can last for decades, if not centuries! A negative feature of pine is its tendency to splinter BUT if you keep the blocks oiled and waxed, this should not be a problem. If a splinter does develop, just sand it down! If you prefer a harder wood, try maple, oak or poplar, which are available at most local lumber yards. To make 12 blocks you’ll need a piece of pine 2 x 4 that is 36″ long. (28 blocks pictured)
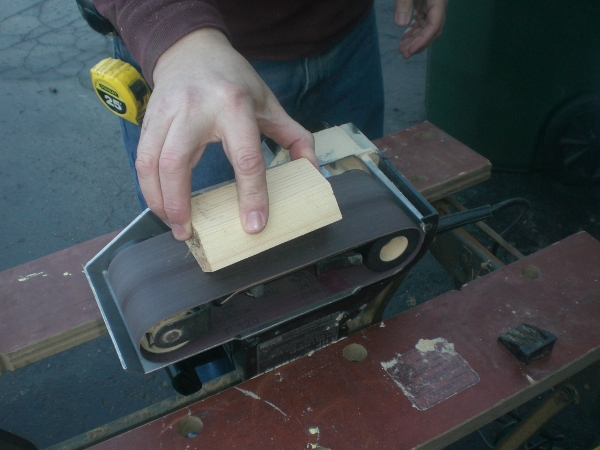
Note: Although power tools are pictured, all of this can be done with an old fashioned saw!
All Natural Wooden BUILDING Blocks Materials
- pine 2×4 (36 inch piece will make 12 various sized blocks)
- sandpaper
- nontoxic craft paint
- beeswax polish or other nontoxic wood polish
- saw (table saw or hand saw)
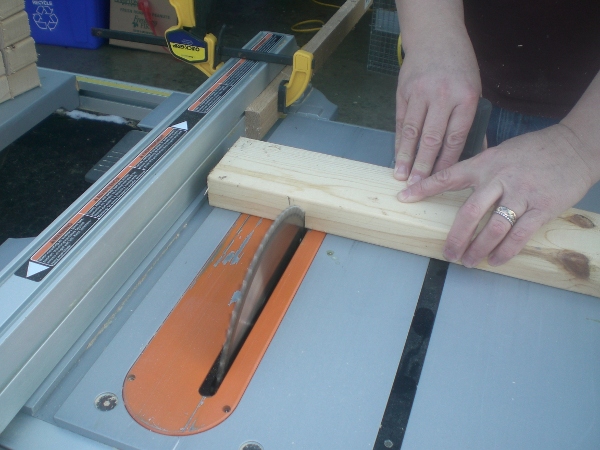
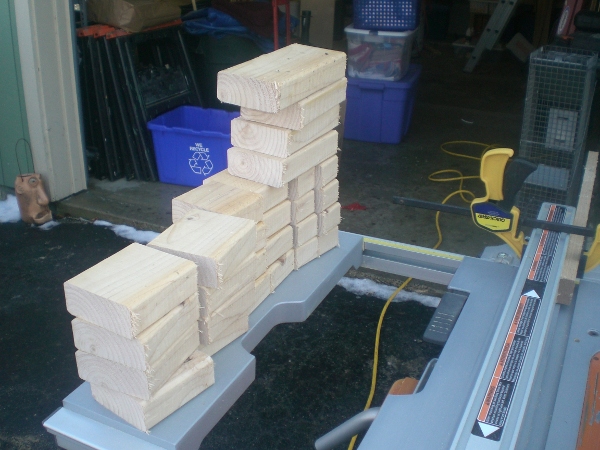
Cutting Out the All Natural Wooden BUILDING Blocks
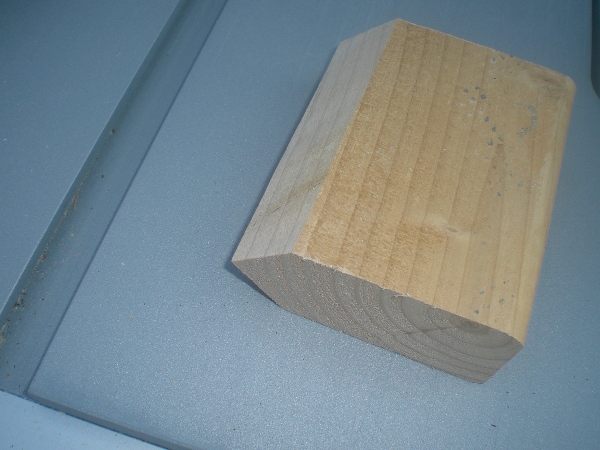
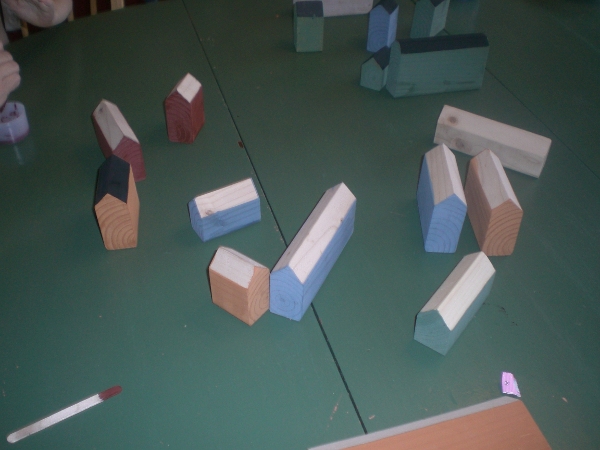
Cut the 2 x 4 into (4) 2 inch, (4) 3 inch and (4) 4 inch pieces.
CAUTION: Note that the saw blade guard is not in place in the photos so that the directions are easier to understand, but we used it when the camera was off. ALWAYS use appropriate safety products when using power equipment.
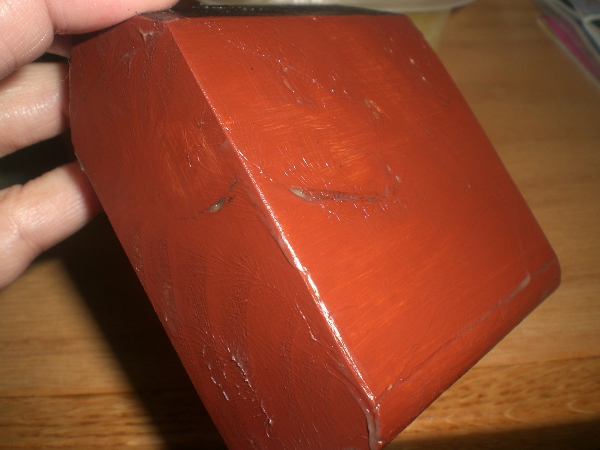
Cut the top edge on a 45 degree angle, then turn it over and cut the other edge on a 45 degree angle. If you would like a variety of building heights, just cut off different amounts at the top.
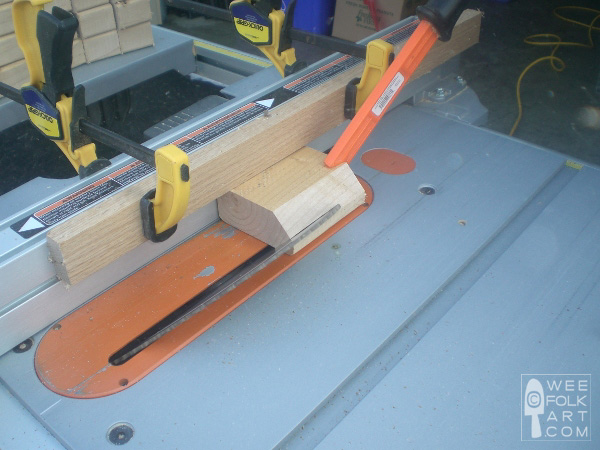
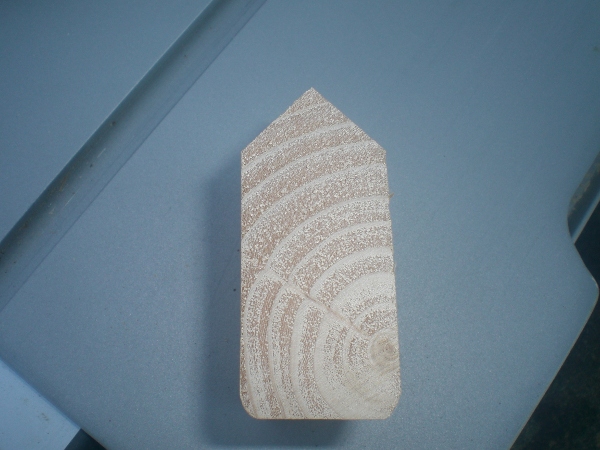
Sand to remove rough edges.
Remember…these are suppose to look rustic. If they are not perfect, it will just add to their charm.
Painting the All Natural Wooden BUILDING Blocks
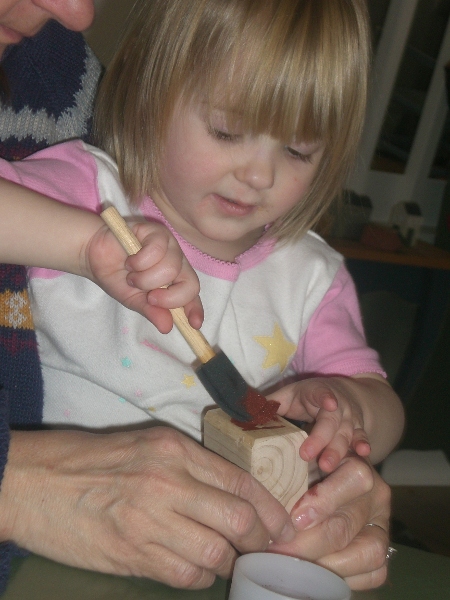
After you’re done cutting and sanding the All Natural Wooden Building Blocks, it’s time to paint. Although you can paint your wooden building blocks with any non toxic paint, I adore milk paint for several reasons. First, I love the colors. They are soft and muted, and have an old world quality to them. Next, they come in a powdered form that you mix yourself. The dry powder can last indefinitely if kept in an airtight container. No worry about your paints drying out. (Once you mix the paint with water it should be used at once but can be kept in the fridge for a couple of days.) Another wonderful characteristic is the ease of controlling how opaque the paint is by how much water you add. On the wooden building blocks I like the look of a “white wash” so I keep my paint rather thin. Another great feature of milk paint is how quickly it dries…basically in minutes! Finally, milk paint is all natural and non toxic! What could be better?
I bought a sampler pack of milk paint from Gallagher’s Milk Paint. I was able to pick out 10 different 1 oz. samples. To make enough paint to cover 4 or 5 blocks I mixed 1/2 teaspoon of the powder with 3/4 teaspoon water. Read directions for exact prep technique. When you apply milk paint, use a sponge brush and small amounts of paint. Work the paint into the wood with a back and forth motion following the grain of the wood. I wanted a “white washed” look so you can see the grain, but if you prefer a solid cover, use a little less water in your mix.
If using milk paint, mix paint as directed.
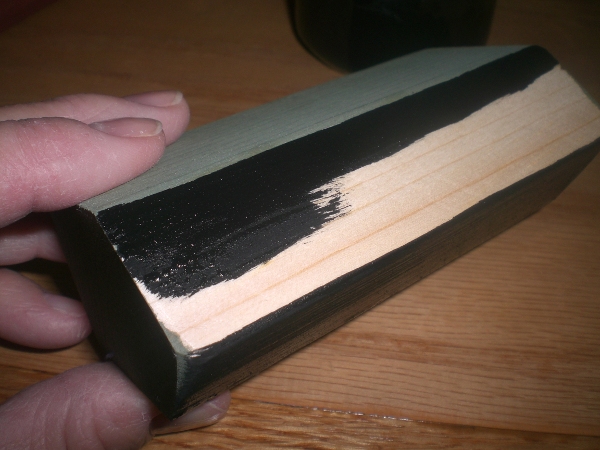
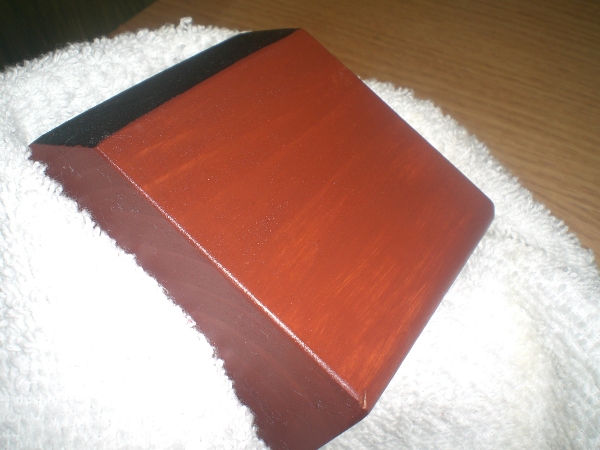
Paint the base, and 4 sides of the building. Let the paint overlap slightly onto the roof. You’ll be painting the roof black and it will cover any other paint color. By overlapping you’ll guarantee that all the raw wood is covered.
Using black paint, paint the two sides of the roof. Allow to dry completely before adding the finish.
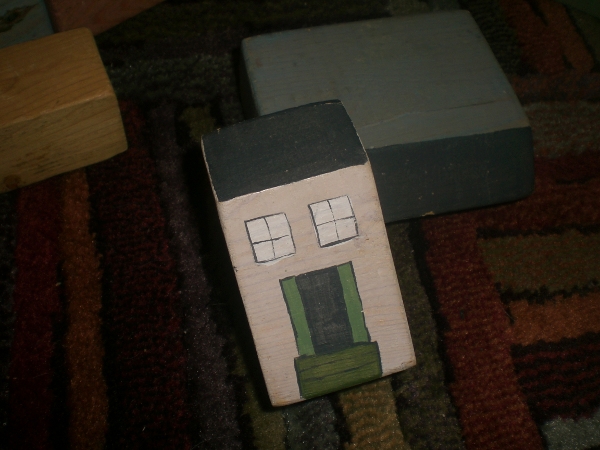
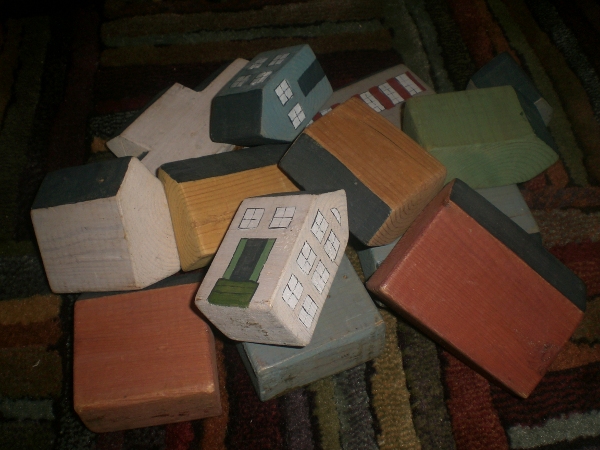
If you would like more detail on your wooden building blocks, like windows and doors, add those now.
Finishing the All Natural Wooden BUILDING Blocks
Now that we are done cutting, sanding, and painting the All Natural Wooden Building Blocks, it’s time for my favorite part… finishing the blocks. Because wood will dry out over time causing cracks and splinters, it’s a good idea to protect the blocks in some way. There are 2 different ways of approaching this. First, you can “seal” the blocks with an impermeable layer that will prevent moisture from escaping from the wood. Products like varnishes and polyurethanes fall into that category. In my mind, the problem with that is twofold. First, most are toxic to some degree. Considering these are meant as toys, they will be in the hands and mouths of wee ones. Not desirable! Also, these sealants provide an outside coating, and through play, especially with soft woods, chips will occur and the protective properties will begin to diminish.
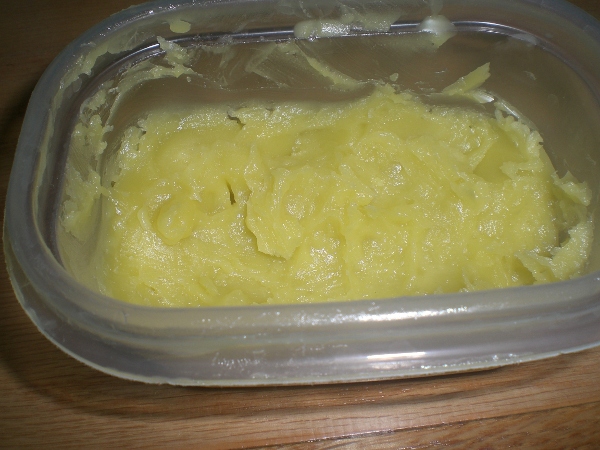
We prefer to use our Homemade Beeswax Wood Finish.
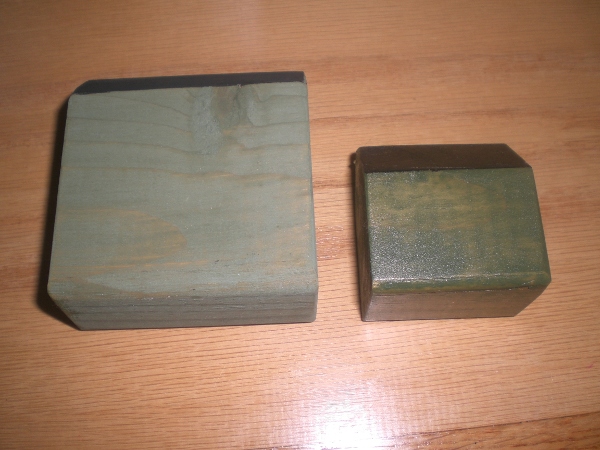
The other way to protect the wooden building blocks is to apply an oil and wax coating on the outside of the wood. Instead of sealing the wood, you are conditioning the wood. By applying oil to the wood, it will seep down into the wood bringing moisture to its fibers. Then, after the oil has seeped into the wood, you apply a wax layer to the outside which helps prevent, or rather slow down, the loss of moisture from the wood.
There are a couple of possible disadvantageous to this process. First, it usually darkens the wood, as the oil seeps in. I personally think this creates richer tones, but it is a matter of taste.
Also, you will need to re-wax the wood occasionally. This finish is not as tough as a varnish, and the wood can begin to dry out. At that time you will need to repeat the process. But I think that is a small price to pay for the rich patina of this type of finish, and the most obvious advantage… it is entirely non toxic and safe for even the youngest child!
If you do decide to use a varnish or polyurethane make sure you get one that is labeled “non toxic” and “safe for children”. If you want to use a natural, organic finish, you can follow our beeswax wood finish recipe and directions for use.
If you would like to use your own homemade beeswax wood finish, finish the all natural wooden BUILDING blocks with the beeswax wood finish, either “paint” the liquid on blocks making sure to cover all surfaces, or if using a paste, use your hands or a rag to scoop the paste out of the container and work it into the wood.
Apply the oil or paste liberally, making sure you have total coverage. Apply enough so you leave a film similar to applying lip gloss.
Let the finish sit on the wood 1 – 2 hours. Use rags to wipe off the excess finish then buff with a clean rag. Wait a day or two and check the wood. If it seems dry to you, you can repeat the above steps one or two more times, waiting a day between each process. The wood should have a nice smooth feel without being greasy. Make sure the wax coating is worked into the wood. You should not leave behind fingerprints. The blocks are now ready to be played with.
Occasionally, you will need to re-polish the blocks. But remember, when they are played with, the oil from hands helps to keep them supple! So just check them regularly for drying, and re-polish as necessary following the steps above.

4 Comments
Rachel
These are fabulous! I would have loved these when I was younger! I’ll be linking.
lieben
Interessante Informationen.
Kimara
fussball deutschland
Gute Arbeit hier! Gute Inhalte.