Crocheted Rug for Gnome or Doll House

Here is a little pattern to make crocheted rugs that have the look of braided rugs. They are crocheted with felting yarn, then felted to give the dense, thick look of braided rugs. Make one or many. Your gnomes will love the feel of them under their little feet!
Please Note: I am not a seasoned crocheter. Although I love how the rugs turned out, I’m not sure my directions are written in “crocheter’s lingo”! I do apologize in advance, and hope my feeble attempt at sharing this pattern makes sense. If anyone IS a true crocheter, and would be willing to look over my directions, I would gladly change terminology or directions to make them more clear. You can email me at weefolkart@yahoo.com or just post a comment in the directions. Otherwise, I’ll keep my figures crossed and hope it all makes sense!
Materials:
3 colors 100% wool yarn suitable for felt
Crochet hook – size I 5.50
Directions:
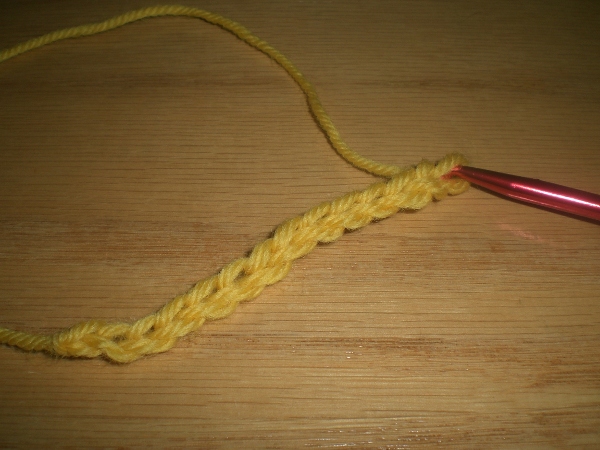
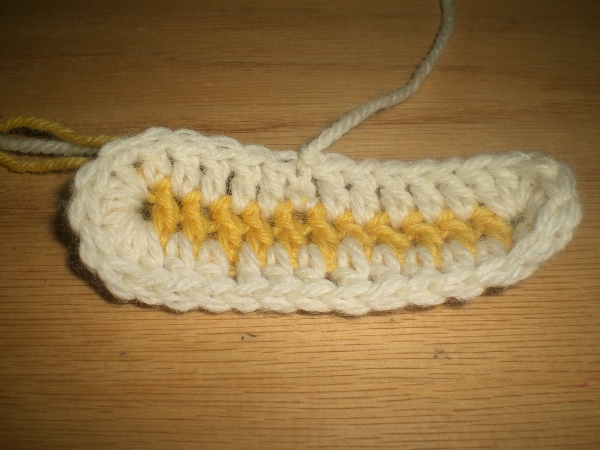
1] With color A chain 13.

2] First round: Double crochet in 12 chains. Clip thread
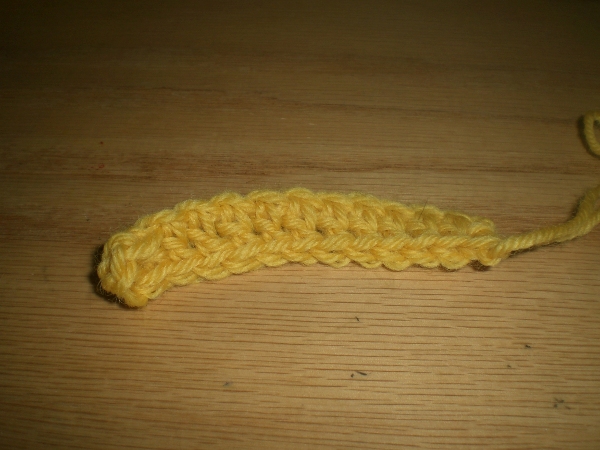
3] Second round: Starting in the middle of one side, add color B. Chain 3. This will be your first double crochet on this round.

4] Continue double crocheting to the end of the row.

5] Double crochet 6 times in last stitch.
7] Double crochet 6 times in last stitch.
8] Double crochet down the side until you reach your 1st double crocheted chain.
9] Slip stitch through the 3rd chain in that 1st double crochet. Clip thread.
10] Third Round: Starting in the middle of one side, add color C. Chain 3. This will be your first double crochet on this round.
11] Double crochet down the side until you get to the stitch before you began your 6 double crochets on the previous round.
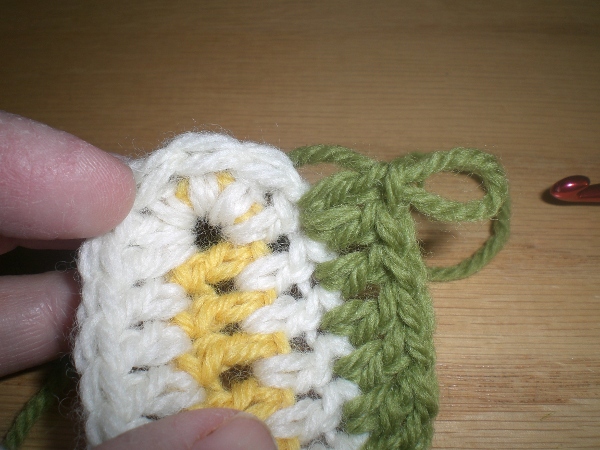
12] *Double crochet in the next stitch twice*. This will give you 1 increased stitch. Repeat the increases between the *s until you’ve increased a total of 6 stitches. There are now 12 stitches on the curved end.
13] Double crochet down the other side until you get to the stitch before you began your 6 double crochets on the previous round.
14] Repeat step 12.
15] Double crochet down the side until you reach your 1st double crocheted chain.
16] Slip stitch through the 3rd chain in that 1st double crochet. Clip thread.
NOTE: For each additional round you will be increasing by 6 stitches on either end. Follow the general pattern above adding to each end as follows:

17] Fourth Round: Color A *Double crochet twice (one increase) in the stitch before your 1st increase on the prior round, double crochet in the next stitch.* Repeat the stitches between the *s until you’ve increased 6 stitches. There are now 18 stitches on the curved end.
18] Fifth Round: Color B *Double crochet twice (one increase) in the stitch before your 1st increase on the prior round, double crochet in the next 2 stitches.* Repeat the stitches between the *s until you’ve increased 6 stitches. There are now 24 stitches on the curved end.
19] Sixth Round: Color C *Double crochet twice (one increase) in the stitch before your 1st increase on the prior round, double crochet in the next 3 stitches.* Repeat the stitches between the *s until you’ve increased 6 stitches. There are now 30 stitches on the curved end.
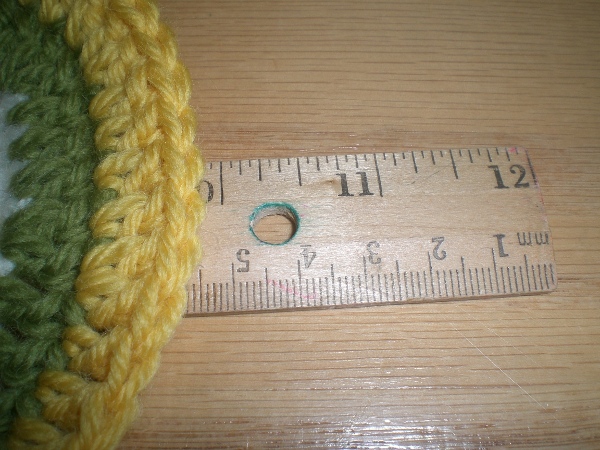
20] Seventh Round: Color A *Double crochet twice (one increase) in the stitch before your 1st increase on the prior round, double crochet in the next 4 stitches.* Repeat the stitches between the *s until you’ve increased 6 stitches. There are now 36 stitches on the curved end.
21] To finish rug, weave threads into rug and clip close to rug. If your original increase of 6 stitches in steps 5 and 7 created a hole, from the wrong side of the rug, loosely sew the hole closed.

22] Use your favorite method to felt the circles. I have a front loading machine with a sanitize setting which uses very hot water. I add detergent, along with the old snow boots Bug wore when he was two years old (all Velcro and “snaggy” pieces removed) and let it run its cycle. I then take them out, shape if necessary, and allow to air dry completely.
Note about patterns: We are sharing patterns we have designed and made for our own children, families and friends. Every effort is made to share information in a clear and accurate manner. We offer preemptive apologies for any mistakes that may be made. Please let us know via comments or emails if you stumble upon a mistake or if you encounter directions that leave your scratching your head! We will rectify the situation as soon as humanly possible!
Copyright © Wee Folk Art 2008 – 2009. All rights reserved. All photos, text and patterns are copyright protected. You may not copy, reproduce or redistribute any material found on WeeFolkArt.com without written permission. Wee Folk Art retains all rights. All projects, patterns and directions are meant for your personal use and neither the patterns nor completed projects may be used for personal gain.