
Lavender Beanbags

As I mentioned in previous posts, Pixie’s birthday is coming up… actually, this Friday. I wanted her gifts to have a rainbow theme. First, I made her a Rainbow Coiled Rag Bowl which I love. Next, I wanted to make her some beanbags. And NOT just any beanbags. I wanted lavender in the bags so the area would be filled with a lovely scent while she played. I finished them this morning. (Finally, I have the to beanbags to send the winners of our contest!)
I have this philosophy when I’m crafting, much like my cooking… never make as much as you need… always make more. I needed to make 4 sets of beanbags; one for Pixie, two for our giveaway winners, and of course, one for the little lady due the 25th of this month. I bought 6 fat quarters in rainbow colors. I could get 6 beanbags out of each quarter, so I made 6 sets. Only makes sense, right? I had to change the thread in the machine for each fabric, and since setting up any craft is half the battle, I figured I’d make all of them right now and put away the 2 extra sets for those times when I need a quick gift.
So, whether you’ve been making toys for your children for years or if this is your first project, making beanbags is fast and easy! A great beginner project. This is also a great project for using up fabric scraps.
Question… how do your children use beanbags?
IMPORTANT: Beanbags contain beans which are a potential choke hazard. Check your beanbags often for any holes that could allow the beans to spill out.
Materials:
fabric in assorted colors
matching thread
dried peas or beans
dried lavender flowers
Directions:
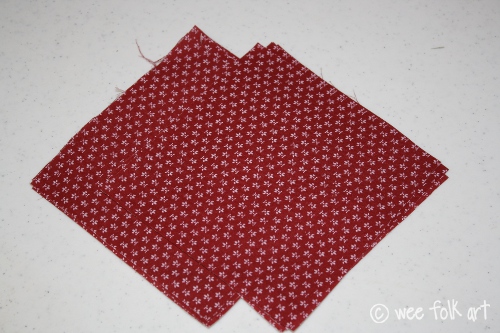
For each beanbag, cut two 5″ squares.

With right sides together, sew 3 sides of the square, pivoting at the corners, using 1/2″ seams. NOTE: Make sure to back stitch at the beginning and end of each seam. This will stop the seam from opening allowing beans to come out.

Clip the corners on a 45 degree angle being careful to not get too close to the sewn seam. This will help reduce the bulk in the corner.

Turn the beanbag right side out.

Turn the top edge down 1/2″ toward the inside of the beanbag. Iron the bag making sure the turned down seam lays flat.

Fill your bag with 1/2 cup of beans and 2 tablespoons of lavender.


Pin the bag shut.

Sew the seam shut by top stitching 1/8″ away from the edge. Make sure to back stitch the beginning and end of the seam. Clip the loose threads and you have a beanbag!


SUGGESTION: If you store the beanbags in an airtight container after play, the lavender scent will last longer. But not to worry when the scent fades, the beanbags will still be fun to play with!


10 Comments
Kelly Lee
I think these are easy enough for my daughter to make. She just started using the sewing machine. Would make great gifts for the little ones. My youngest use beanbags for put and take. My older boys use them to “bomb” buildings they’ve made out of wooden blocks! Can never have too many beanbags.
Joan
I love the bean bag’s, but how about that Fabric Bowl!? Will I find instructions for that one on here? So glad I stumbled upon this!
Kimara
Glad you stumbled us, too 🙂 If you click on highlighted words in our posts, they will take you to the link they refer to. In the above post, if you clicked on Rainbow Coiled Rag Bowl it would take you directly to the directions for the bowl. Here is the for it link, too. http://weefolkart.com/content/pixies-rainbow-coiled-rag-bowl We hope you come back and spend many happy days with us.
Sue Caissy
Lovely.
When I was working with children we had lots of beanbags. Throw them through a hoop or into a bucket. Balance them on your head/shoulder/foot/ and walk or even run. A simple game of a circle of children, one in the middle throws the b/bag to each child in turn, they drop it in their space, run around the outside of the circle, pick up and throw the b/bag back to the child in the middle and so on. Place the beanbag on your foot, toss it upwards and try to catch it.
Your scented beanbags will even make a nice heat-pack for small aches and pains!
Sue
xxx
Kimara
Thanks for all the great suggestions, Sue. I taught preschool for 10 years and was always delighted to see the different ways children used our beanbags. One year a favorite game was for 1 person the hide them around the room while others searched for them. It was a game they invented on their own.
rebecca-bending birches
so pretty!
monica
these are so cute and i have a ton of fabric already cut so excited to make these. I know my kids will love them and I have the perfect box to decorate a more natural waldorf look as a bean bag game. i was hoping i won some. many blessings and thank you so much for sharing such great ideas. i am in love with your gnome home and have decided we have to make one for our house for our fairies, gnomes and owls. much love, monica
Claire M
These are great! I have been meaning to make some and these have inspired me. Where do you get your dried lavender flowers?
Kimara
Hi Claire,
"I bought my lavender here: http://www.save-on-crafts.com/frenlavflow7.html It was only $11.00 a pound. What do I know about lavender? I ordered 2 pounds. I got enough lavender to fill 2 gallon sized Ziplocks. Making 36 beanbags and 10 sachets, I’ve only used about 1/5 of my first bag. Yikes! EVERYONE I know is going to get SOMETHING made out of lavender this Christmas!!!" – Taken from my Facebook comment.
Pingback: