
A Carton of Soy Egg Crayons
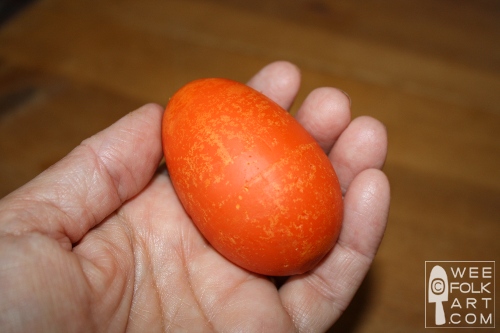
Imagine the delight on your children’s faces when they open this carton of eggs…

and find these lovely gems inside!

No, it is not a dozen hard boiled eggs, but rather a dozen Soy Crayons! It is easy to sing the praises of soy crayons; brilliant colors, smooth drawing without flaking, biodegradable, renewable resource and non toxic. You can buy ready made soy crayons (Bella Luna carries Soy Rocks) or you can make them yourself. Understand, soy crayons aren’t for every project. The wax is soft and begins melting at a low temp. As a matter of fact, even holding a soy crayon for too long will start the surface to become “slimy” (but in a good way 🙂 You can’t use them for detailed work BUT for projects begging for large sweeps of a crayon, this is the perfect choice. They are always a wonderful choice for your youngest budding artists; easy to hold and you don’t need to press down hard to get results.

Directions:
To make soy crayons simply melt soy wax flakes,

add coloring agent,

pour into desired mold,

allow to cool completely, and there you have it… a soy crayon.

Wax can be melted on the stove top set at medium to medium low, or it melts wonderfully, in a microwave safe container, in just minutes. Hint: To easily remove crayons from mold, I submerged the mold in very hot tap water for a few seconds, thus melting the surface a bit, and they popped right out! Note: as the wax cools, it will contract. When filling my eggs, I needed to reheat some of the left over wax and pour into the mold to “top it off”.
Resources I used:
I purchased my soy wax flakes from www.zionsvillecandleco.com and my veggie based colorant from www.fireandicecandles.com. I used egg molds that I had gotten years ago from Jello. Unfortunately, Jello no longer sells the molds, but I did check out EBay and there were quite a few Sellers with them for sale or try your local thrift store. To melt the wax I used some plastic cups left over from days gone by… not a good idea. As the wax began to melt… so did the cups. I am going to keep my eyes open at the thrift store and garage sales for 1 cup Pyrex measuring cups.
Because the quantity of soy wax flakes you will need varies with the molds you use it is hard to estimate how “much” you will need for a project. In general, I found 1 cup of flakes yields 1/2 cup melted wax, so a 2:1 ration. To get vibrant colors I needed to add 4 colorant wax chips to 1 cup of the unmelted soy wax chips. And, in my case, it took about 1/2 cup of the melted wax to fill each egg.
So, whether you want to make a dozen colored soy wax eggs for Easter or just a few to add to your child’s crafting supplies, you are all set to go. Obviously, hot wax is… well… it’s hot, so use caution especially if children are “helping”. Also, because the wax melts at such a low temperature, I was able to wash all the spoons and containers in my dishwasher. Everything came out clean and there was no residual mess in the dishwasher, making clean up a breeze!
BTW… if you have a favorite suppliers of the soy wax flakes or the color agents, please share 🙂
Copyright © Wee Folk Art 2008 – 2010. All rights reserved.
All photos, text and patterns are copyright protected. You may not copy, reproduce or redistribute any material found on WeeFolkArt.com without written permission. Wee Folk Art retains all rights.


19 Comments
Guest
These are so cool, I must make them. If I look them up on ebay, what are they called?
Kimara
Just search under Jello egg molds. There are a bunch!
rae
these are great! i love the colors. i, too, want those molds! 😉
Sarah Baldwin
I found a variety of egg shaped molds by Googling “egg candle molds.”
nightshade
I just ordered all my supplies to make these. I hope everything is in in time to make them for Easter.
MC
Great project for toddlers. The egg shape is perfect for their little handles and big enough not be a choking hazard. How many pounds of the soy wax flakes are needed for this project?
Thanks for the good idea.
Kimara
I’m sorry but I can’t give you an exact amount. I bought 5 pounds of soy flakes, but I used it for other projects, too. Unfortunately, I don’t have a scale that measures that small amount either. So, here’s my best guest. A dozen soy eggs feels like it weighs about as much as a dozen large eggs. The carton reads 1 pound, 8 ounces. You do lose a bit of wax in the container, and if you are messy like me, in overflow. So, probably 2 pounds of wax would be enough to make a dozen eggs, but don’t hold me to that! I always buy more than I think I need… soy wax makes great candles, too. Hope that helps… at least a little.
Diana (Ladybug Limited)
These look so fun! However, I’ve got leftover beeswax from a candle project and am in search for a reliable tutorial for beeswax crayons. Any words of wisdom?
Kimara
I haven’t made beeswax crayons in a number of years but I remember I added soap, bars of soap, to the wax. I will look up the recipe next week when we return from spring break 🙂
Angie
I just wanted to let you know how much I loved this idea and I am linking ot it for the 6/14/10 post. Thanks!
Kimara
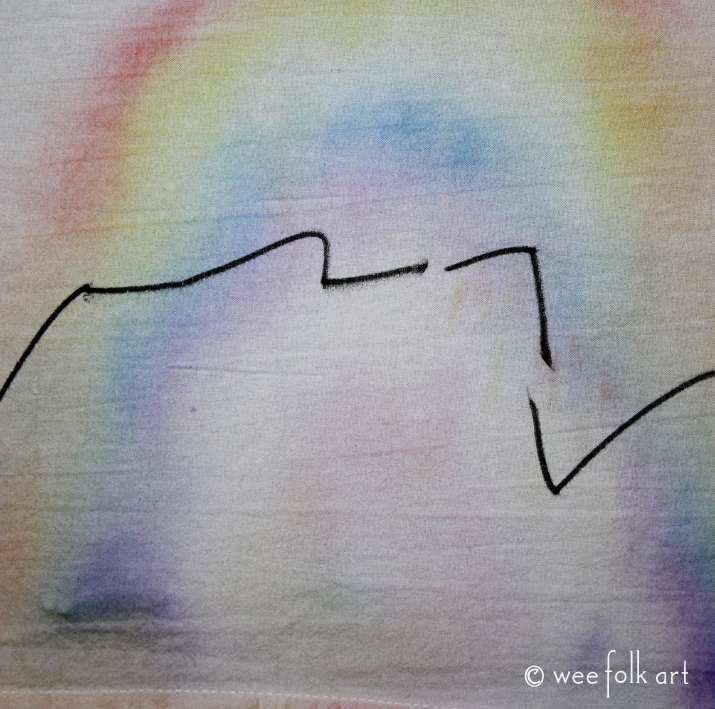
They were a lot of fun to make… although quite messy… but small price to pay. The end result produced wonder colors and the size is wonderful for budding artists. (Although I must admit I LOVED the way the colors smear across a blank page.) If you make them, make sure to let us know.
Mary Wallace Ireland
This sounds like such a lovely idea for kids – even grown-up ones like me! I use beeswax in making my art and am looking for a recipe for crayons made from beeswax too. Did you ever find that recipe you mentioned Kimara?
Kimara
Yes, Mary, I did dig up my recipe for the beeswax crayons, so of course I had to make some tonight! I’ll be posting a tute on them in the next couple of days. I love them. They are harder than the soy crayons, so both have their own unique qualities. Watch for them soon 🙂
Tiffany
So, I tried it and it isn’t working for me. I have soy flakes like the ones for making candles. For coloring I have tried both wax coloring and food paste. I made some pretty pink crayon with the wax dye, but they don’t show up on the paper.
Kimara
The first time I made them, they looked pretty, but it was like trying to color with birthday candles… almost no color. I wound up needing to use 4 colorant wax chips to get my nice colors. I’m not sure how economical they are when you need that much coloring, but we found them fun to make. Sorry it was disappointing, but don’t pitch them yet. If you’d like to try again, just melt them again and add more coloring… more than you think you’d need. OR… I’m going to be making some soy candles soon. You don’t need nearly as much colorant. So, get yourself some wicks, add some yummy smelling oils, and turn your "failed" crayons into successful candles!
Tiffany
Okay, that is good to know. I will try again and keep you updated.
Sam
Hi,
This is such an amazingly cute project, I just had to try it! I have been melting old wax crayons down so have tons of moulds already 🙂 I end up with loads of dark colours that no-one wants though….so the idea of being able to make my own sounded amazing!
Tried it (added a spot of gelatine to firm the crayons up too – worked a treat!) but the colour is pale and almost invisible on the paper 🙁 The crayons themselves are bright and vivid but not usable. Can you provide any more info about what I can use to make the colour brighter? I’m not a candle maker so this is all new to me! Is there any reason why kids paint wouldn’t work mixed up?? I can’t find any powder paints either – not exactly sure what I am looking for….
I know this is an old post so I am very much hoping you read and reply as I really really really want to get this to work!!! 🙂
Thank you – Sam
alkaiasboutique
I typically get my wax 50 lbs at a time and as shipping seems to be what makes the cost of this item increase significantly being that I live in Texas I get my soy wax from http://www.lonestarcandlesupply.com/. It’s “local” and shipping is alot less for me. I’ve never had an issue with their wax.
Kimara
Thanks for sharing and the link 🙂 ~Kimara~