-
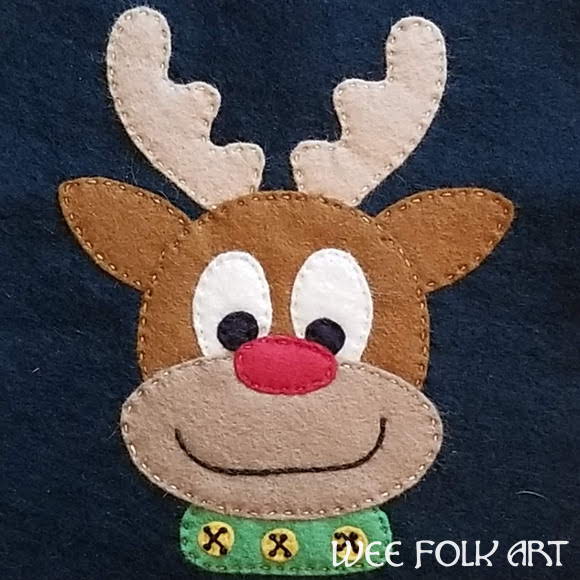
Reindeer Applique Pattern :: North Pole Pals
Today we are sharing our Reindeer Applique Pattern, the second in our North Pole Pals series. I happen to think he is just a cutie, and I’d be pleased as punch, or perhaps eggnog, to…
-
Elf Applique Pattern :: North Pole Pals
At this time of year, it is understandably busy at the North Pole. Fortunately, Santa is surrounded by a group of friends that help make the chaos joyful! We have a new collection of Christmas…
-
Easel Ornaments Tutorial :: Set 1
Nothing is quite so nostalgic as putting up the annual Christmas tree. Memories are shared, and we meander through the years every time we touch an ornament. I love traditions so my family was quite…
-
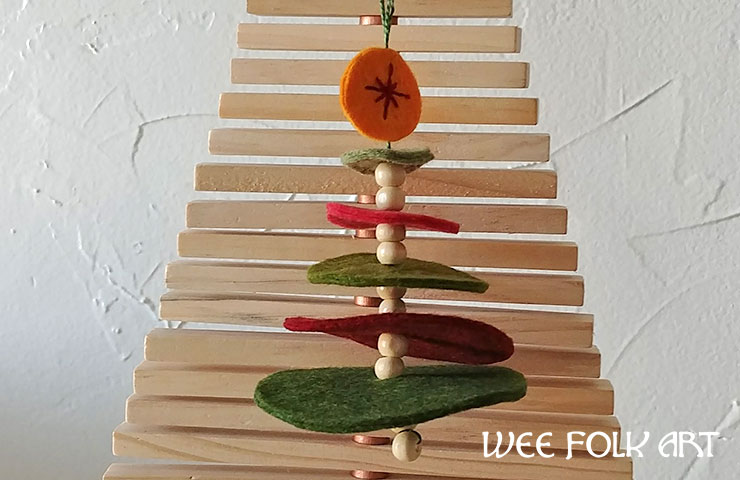
Stacked Wool Felt Christmas Tree Ornament
I found a cute stacked wool felt Christmas tree ornament at a store a few years ago. When people see it, all my friends and family all assume I made it. Although I didn’t make…
-
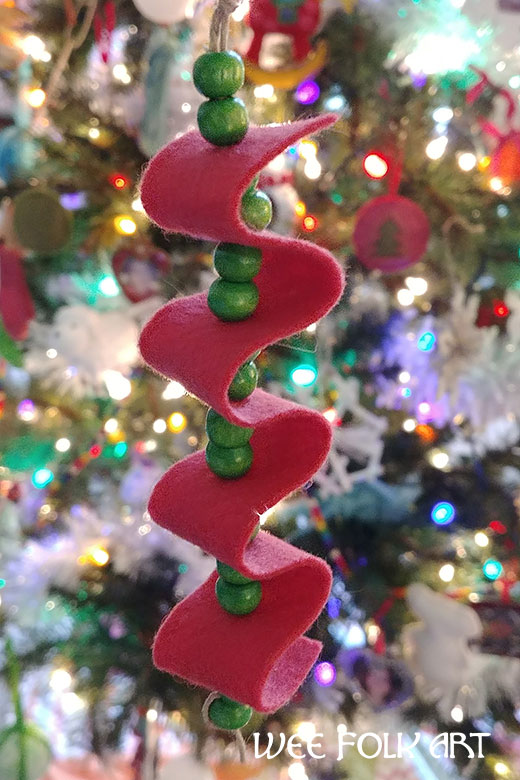
Ribbon Candy Felt Ornament Pattern
This ribbon candy felt ornament with wooden beads came to be because I had a bunch of 1 inch wide felt strips left over from my paper inspired felt onion ornaments. I also had a…
-
Cut Away Window Felt Ornaments Tutorial
These Cut Away Window Felt Ornaments are a fun craft for adults and kids alike. With just two simple stitches, a bit of craft glue, and a small amount of wool felt, you can play…
-
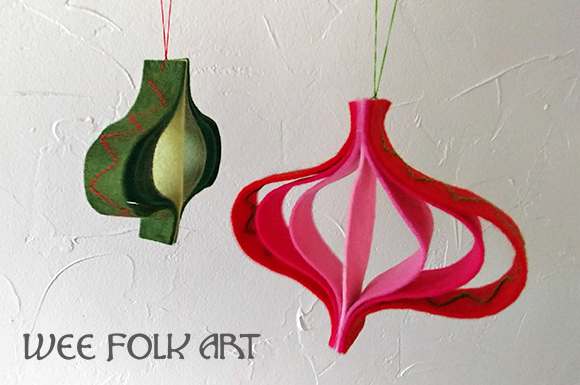
Paper Strip Inspired Felt Ornaments
Here is another easy-to-make felt ornament that was inspired by the popular paper strip ornaments. My girls had a dance convention last weekend and I had lots of sitting around time to get some crafting…
-
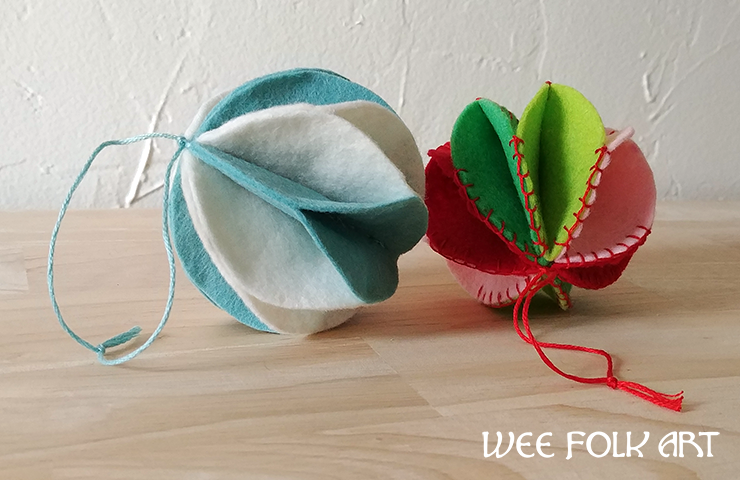
Wool Felt Christmas Ornament Accordion Ball Pattern
This simple wool felt Christmas ornament pattern is easy and fun to make. It mimics a traditional honeycomb folded paper decoration. Play with different color combinations to make fun patterns or use a single color…
-
Paper Bird Ornaments
With just a stack of rainbow origami paper, card stock paper, and glue, you can create a flock of beautiful paper bird ornaments! Whether you make one of these sweet paper bird ornaments… hmmm… I…
-
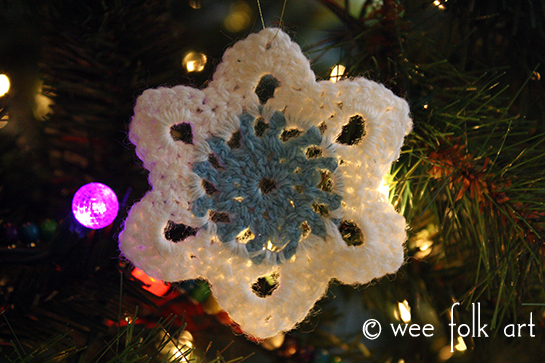
Retro Crochet Snowflake Ornament Pattern
As a kid, my Nana always had these hand crocheted lace snowflakes on her tree. Her mother-in-law (my great-grandmother) had made them. They were delicately made and starched until they were firm. There was definitely…
-
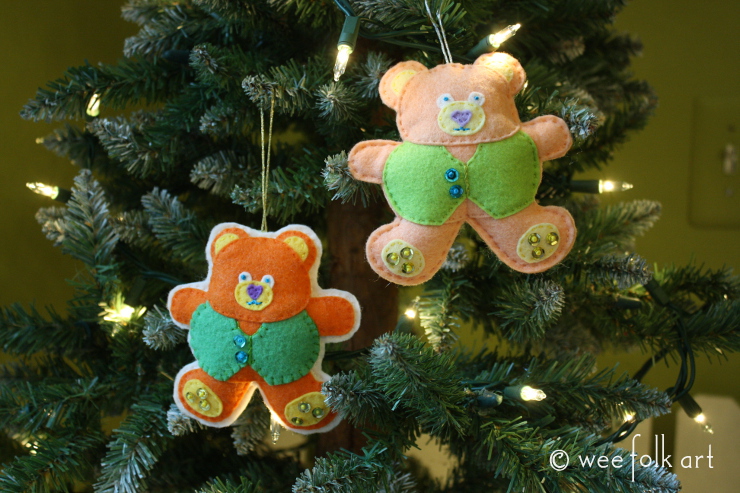
Santa’s Workshop Teddy Bear Ornament
Here is another free felt Christmas ornament in our Santa’s Workshop Applique Collection. Teddy Bears are a part of childhood and look lovely on the tree! These ornaments were based on our Santa’s Workshop Teddy Bear…
-
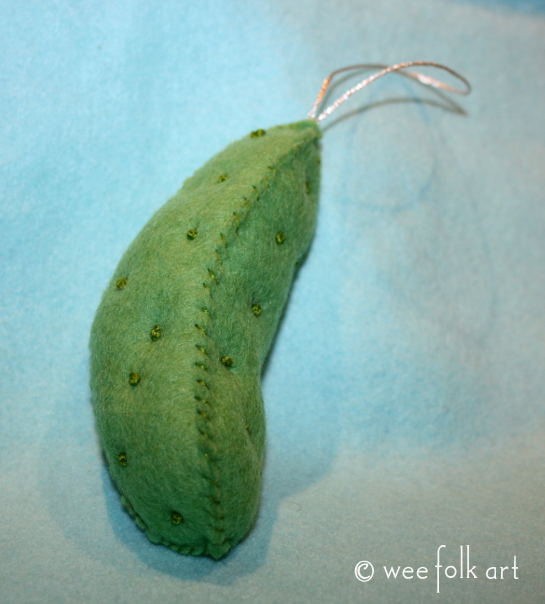
Felt Pickle Ornament
As you know, this year Michelle and I have been busy making new ornaments for her tree. Because of children and dogs… mainly 1 furry beast that goes by the name of Fargo… she decided…
-
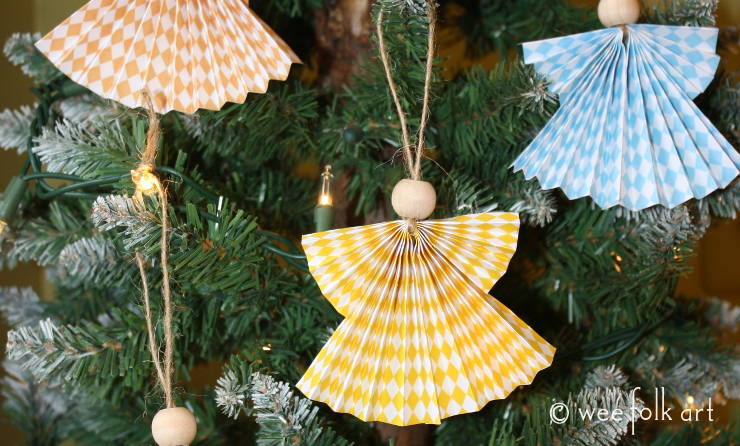
Paper Fan Angel Craft
Create beautiful Paper Fan Angels with just a piece of paper, a small bead, and some twine. It only takes minutes to make a heavenly host for your tree! I remember the first time I…
-
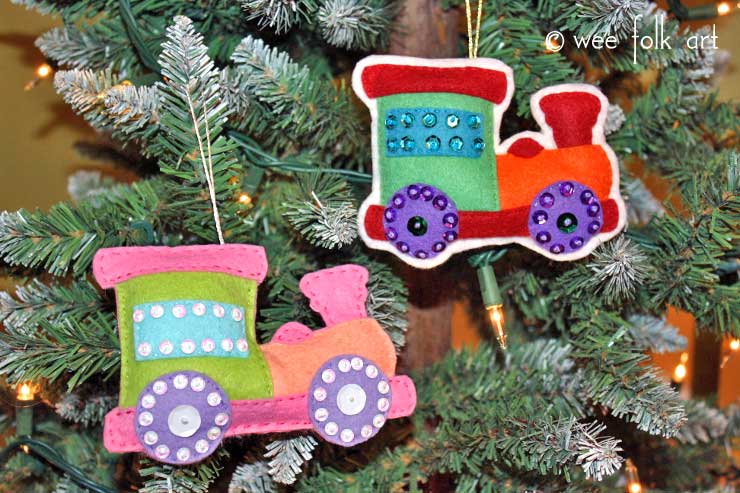
Santa’s Workshop Toy Train Ornaments
Here is another free felt Christmas ornament in our Santa’s Workshop Applique Collection. Toy trains are a part of childhood and look lovely on the tree! These ornaments were based on our Santa’s Workshop…
-
Pinwheel Ornaments :: Easy to Make!
Learn how to make felt pinwheel ornaments and bring a splash of color and whimsy to your Christmas tree this year. Easy and fast. Perfect holiday gift. Today we are sharing a tutorial for…
-
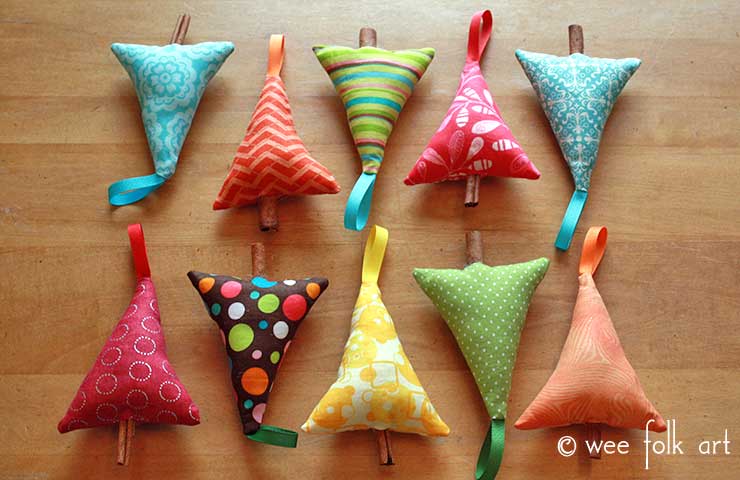
Cinnamon Stick Christmas Tree Ornament
These colorful, fabric Cinnamon Stick Christmas Tree Ornaments are easy to make and add a lovely bit of holiday scent to your decor. This is a great ornament craft to share with kids, as my girls…
-
Easy Pom-Pom Quilted Tree Skirt
This pattern makes an approximately 48″ Christmas tree skirt. The bobble trim adds a retro flair and a bit of whimsy. It is easy to sew and makes a great pattern for a beginner. You…
-
Santa’s Workshop Rag Doll Ornament
These ornaments were based on our Santa’s Workshop Rag Doll Applique which can be found HERE. I made them two different ways. The first ornament has a border around the design and in the second ornament there…
-
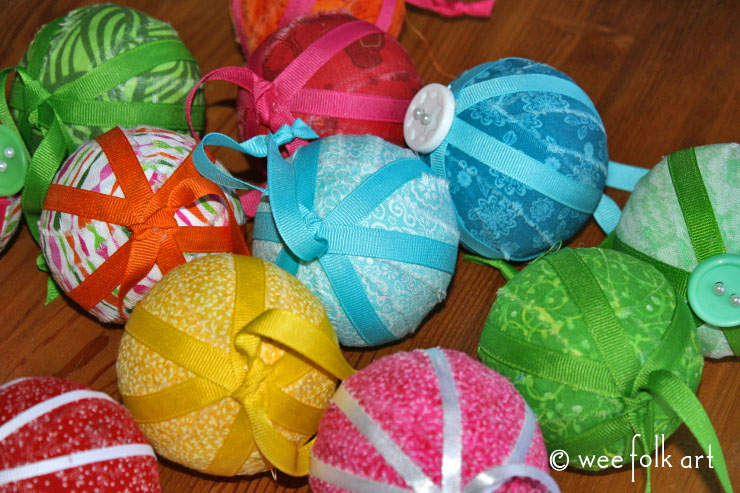
Rag Ball Ornaments
This is our month of ornaments! Today we are sharing simple rag ball ornaments. Simply rip and tear strips of fabrics, wrap them around Styrofoam balls, add a little ribbon and you are good to…
-
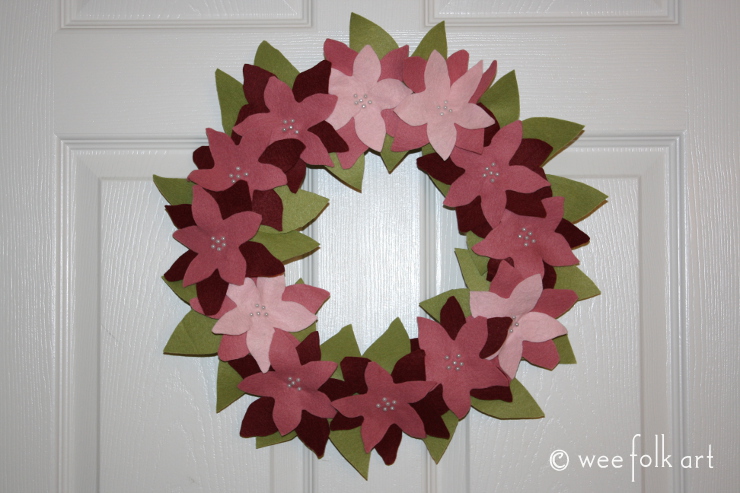
Felt Poinsettia Wreath
In our Advent Activities Guide we shared a tutorial for making a Paper Poinsettia Wreath. This was based on a Poinsettia Garland we had made before. (You can find the links below.) Using the same pattern…
-
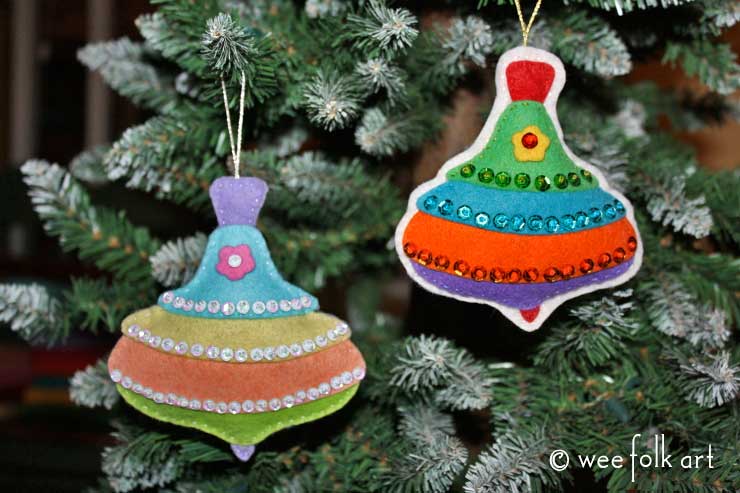
Santa’s Workshop Spinning Top Ornament Patterns
These ornaments were based on our Santa’s Workshop Spinning Top Applique which can be found HERE. I made them two different ways. The first ornament has a border around the design and in the second…
-
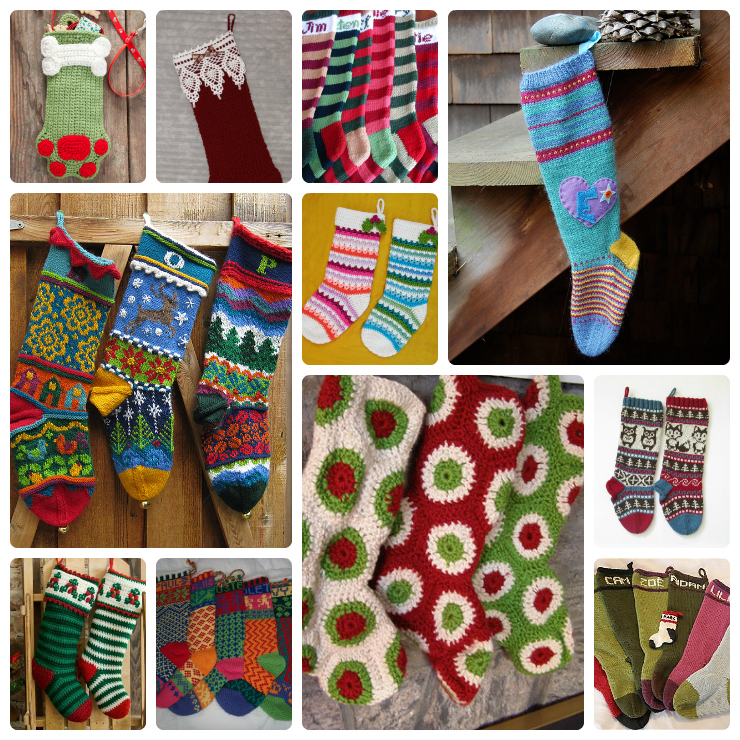
Knit and Crochet Christmas Stocking Patterns
Take heart! There is still time to knit or crochet a stocking for Christmas. Whether you are looking for a simple stocking or a fancy doodle one, there is something here for everyone. Most patterns…
-
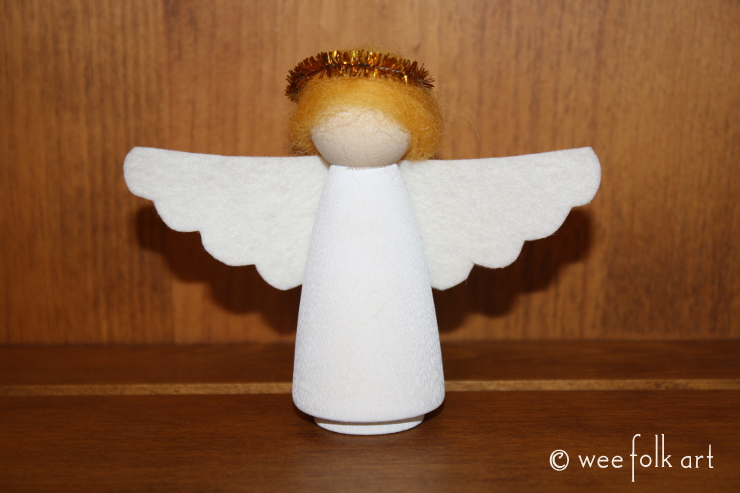
Wooden Advent Angel
Hark the Herald Angels sing. Glory to the newborn king. Make a single angel or a Heavenly Host. Have them visit Baby Jesus at our Advent Nativity which can be found HERE or add…
-
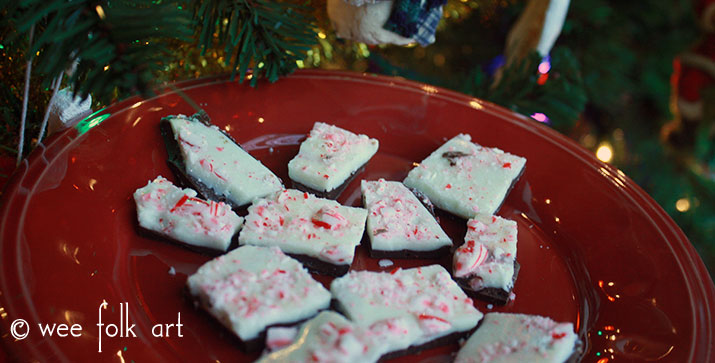
Layered Peppermint Bark with Salt
One of my family’s favorite treats at Christmas is Peppermint Bark. It is very easy to make, festive looking, and happily for Fairy-girl… gluten free. It also makes a nice gift to share with teachers…

Patterns & Crafts