Fall
At Wee Folk Art we delight in the change of seasons. We welcome the cool weather that autumns brings, enjoy mugs of spiced apple cider, and pots of steaming soup. Throughout the fall we find ourselves crafting more fervently and baking more frequently. Spend some time with us this fall crafting, baking, and enjoying the harvest. Knit our fall leaves scarf, bake some pumpkin muffins, craft a felt leaves garland with the kids, or sew a autumn tree banner. Enjoy our fall crafts collection!
-
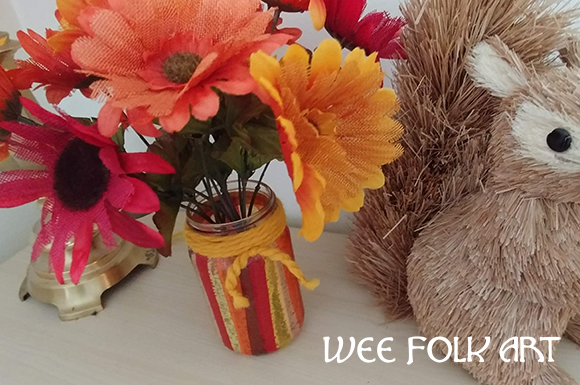
Striped Tissue Paper Mason Jar Project Vase
This striped tissue paper mason jar project can be used as either a vase or candle holder. Change the tissue paper colors to make lovely table top decorations for every season. Be sure to visit…
-
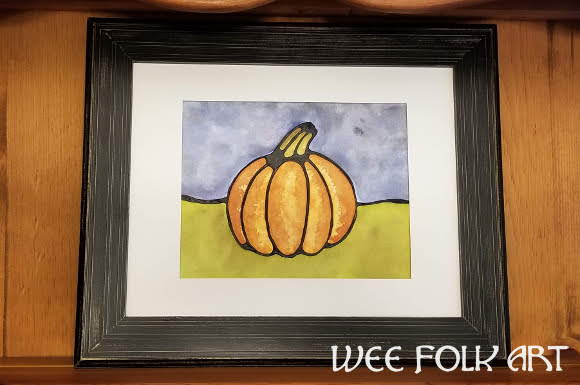
Pumpkin Glue Resist Painting Tutorial
I have a cabinet in our eating area that I use as a seasonal display area. I replace summer candles, with autumn candles, flowers with colorful leaves, and framed summer paintings with autumn ones. Most…
-
Fall Garland Craft from Toilet Paper Rolls
When you think of autumn, what is the first word that comes to mind? If you live somewhere that has deciduous trees, chances are you said “color”. When we see a palate of oranges, reds,…
-
Halloween T-shirt Designs :: Jack-o-Lantern Stencil Pattern
Every year at my girls’ dance studio, the kids perform a short Halloween dance in every class. This means that all week long, leading up to Halloween they dress up. They like to have a…
-
Mason Jar Leaf Candle Holder Project
If you have spent any time searching for fall crafts online, you have probably encountered several variations of this Mason Jar Leaf Candle Holder Project. Covering a canning jar with decoupage leaves creates a warm,…
-
Toilet Paper Roll Pumpkins Tutorial
We love decorating with pumpkins during Autumn, who doesn’t, right? Unlike “Halloween” decorations that really are only appropriate closer to the holiday, a hard working pumpkin will be with you in September, October and November.…
-
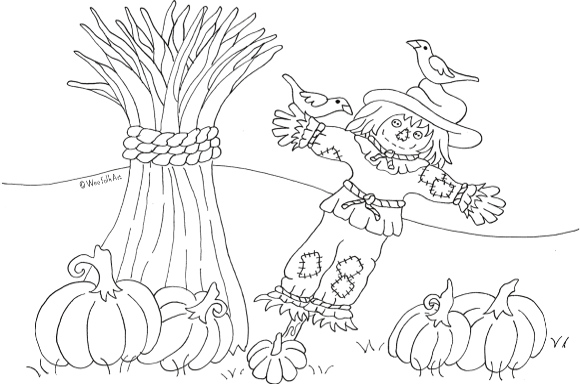
Pumpkin Patch Scarecrow Coloring Page
Now that it’s autumn, our happy little scarecrow’s job is over, and he has time to visit with friends, some of them are crows! Hanging out in the pumpkin patch is a perfect way to…
-
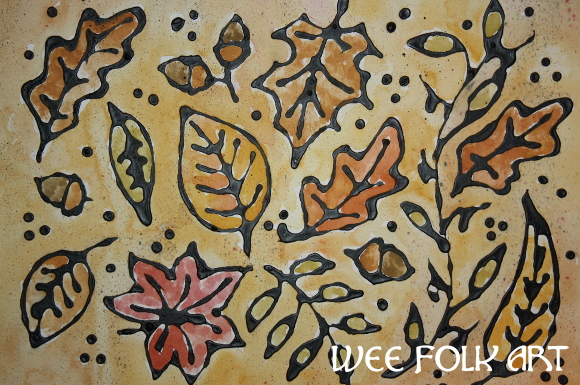
Autumn Leaves Craft – Black Glue Resist
Few things make me as happy as an autumn landscape… unless, of course, it is a huge pile of fall leaves to frolic in with wee ones or dogs! Our Autumn Leaves Craft brings the…
-
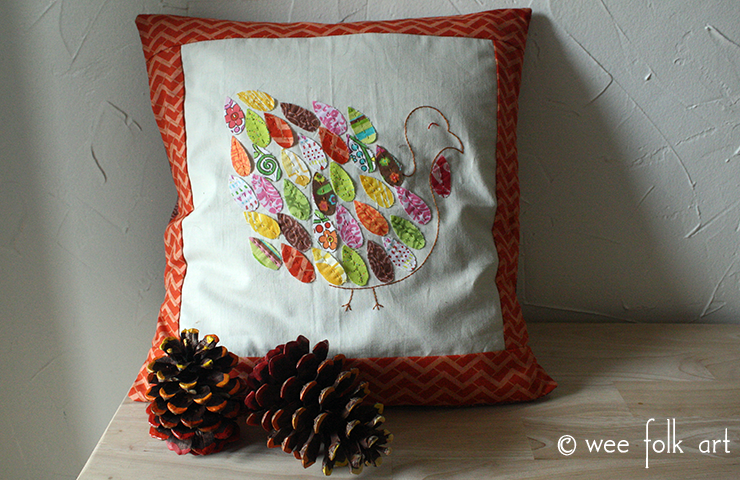
Patchwork Turkey Applique Pattern
Patchwork Turkey Applique Pattern and Thanksgiving Pillow Project This scrappy Thanksgiving Turkey pillow came together very quickly. It was a fun project that used up the littlest bits of fabric and some coordinating embroidery floss.…
-
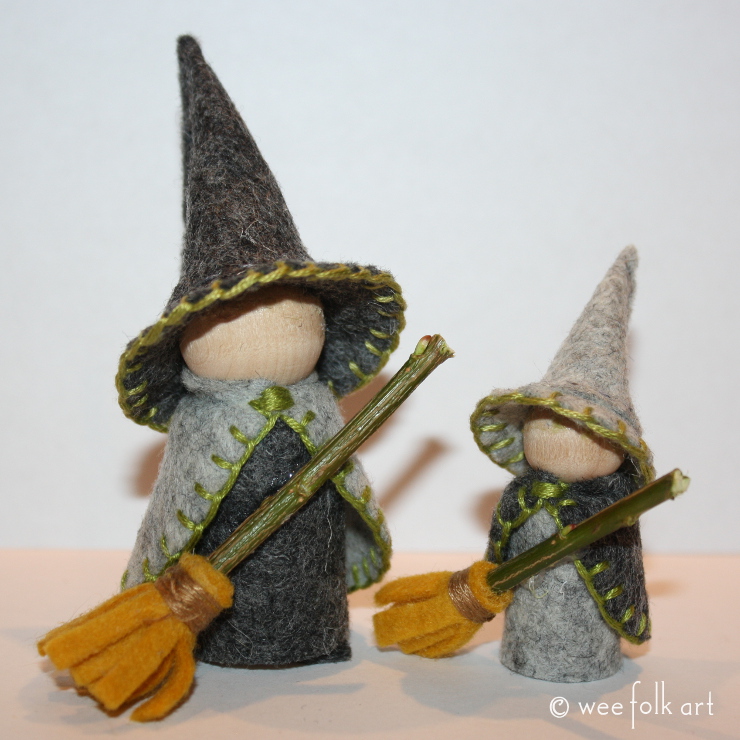
Peg Doll Witch Pattern :: Gnome Witch Costume
Whether your Gnomes have been invited to a Harvest Celebration or plan to go out for Trick or Treats, they are sure to be the friendliest witches around in their Gnome Witch Costume! The peg doll…
-
Fall Bookmarks Made From Water Color Painting
With a wee bit of water colors and a fine tipped pen you can create lovely Fall Bookmarks. Make enough for all the books piled on your table with left-overs to hand out to your…
-
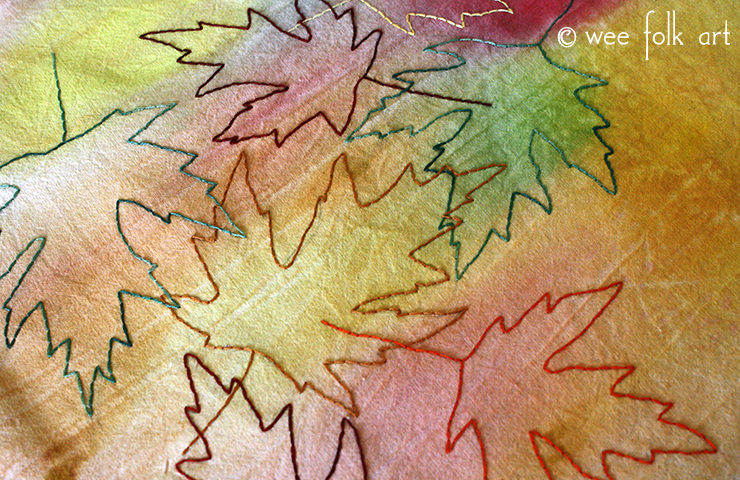
Watercolor Painted Fabric Tutorial Leaf Embroidery
The kids and I have had fun making our own watercolor painted fabric this week. We took ordinary flour sack towels and turned them into beautiful hand painted fabric squares that we are now been busily…
-
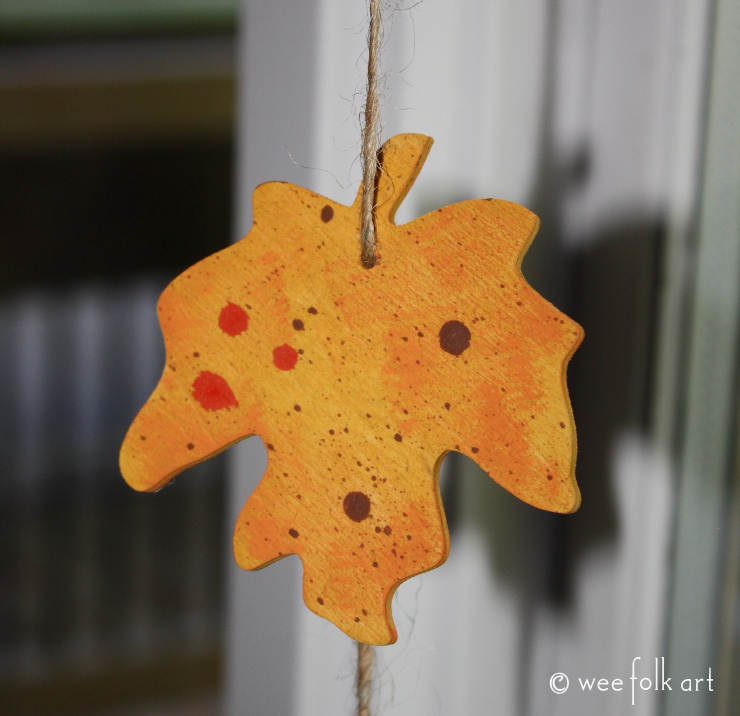
Painted Wooden Leaves Fall Decoration
Although our trees are just beginning to turn colors, I’m speeding the season along by hanging painted wooden leaves in my windows. They will look extra special beautiful when the trees in the background begin…
-
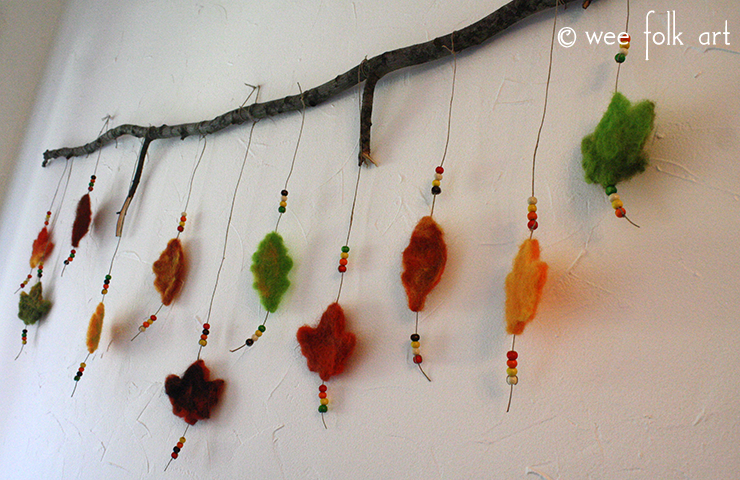
Felt Leaves Mobile Autumn Decoration
This week we turned our Needle Felted Leaves into a Felt Leaves Mobile. Follow our felt leaves mobile tutorial to make your own nature inspired mobile. Felt Leaves Mobile Materials: First you will need to…
-
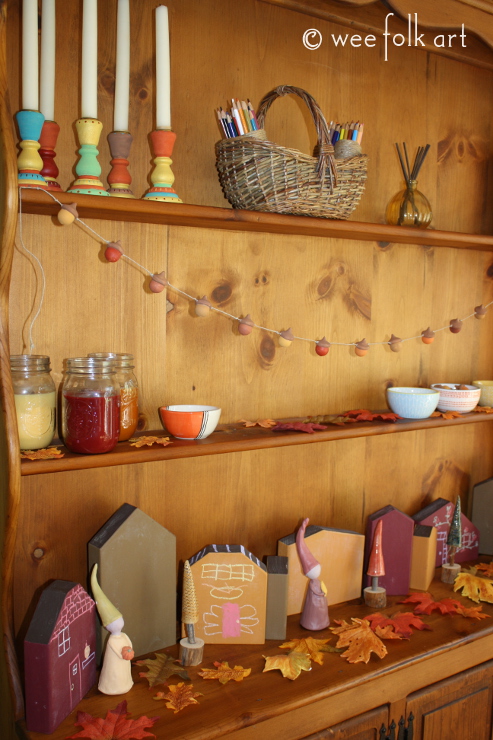
Wooden Acorn Garland Tutorial for Fall Decorating
Fall. That time of year when the world changes from greens and pastels to rich, earthy tones of gold, orange, red, and brown. Today on Wee Folk Art we are sharing a DIY for creating…
-
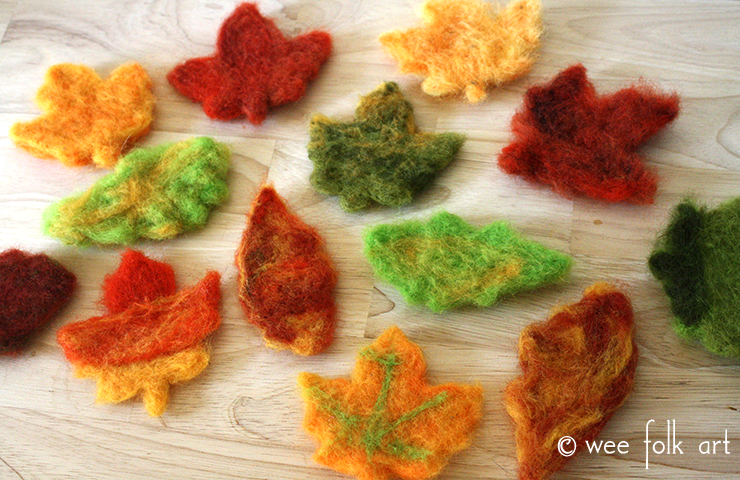
Needle Felted Leaves Wool Roving Fall Craft
This week the girls and I made a bunch of needle felted leaves for our fall craft. I’m not entirely sure what we are going to do with the completed wool leaves (I have several…
-
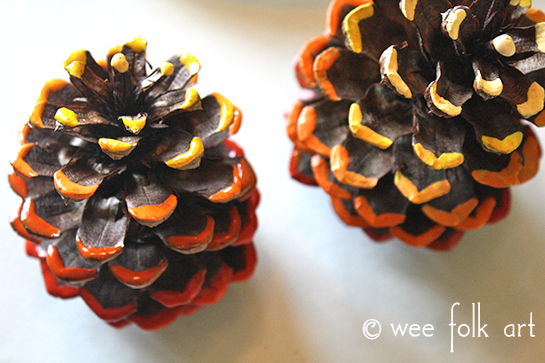
Ombre Painted Pinecones Fall Craft
Inspired by Wimzeecal’s Ombre Pinecone Tutorial, which we have link to before, we decided to kick off our fall crafting with some of our own Ombre Painted Pinecones. I complete one ombre painted pinecone myself,…
-
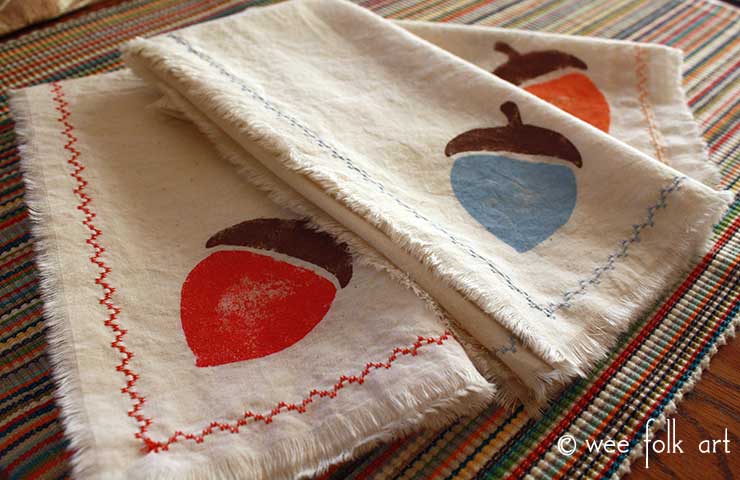
Stenciled Acorn Napkin Tutorial
For Thanksgiving this year, I am decorating the table with an acorn theme, complete with a cheeky squirrel. I made these simple muslin napkin following our basic rip and tear napkin tutorial and then embellished…
-
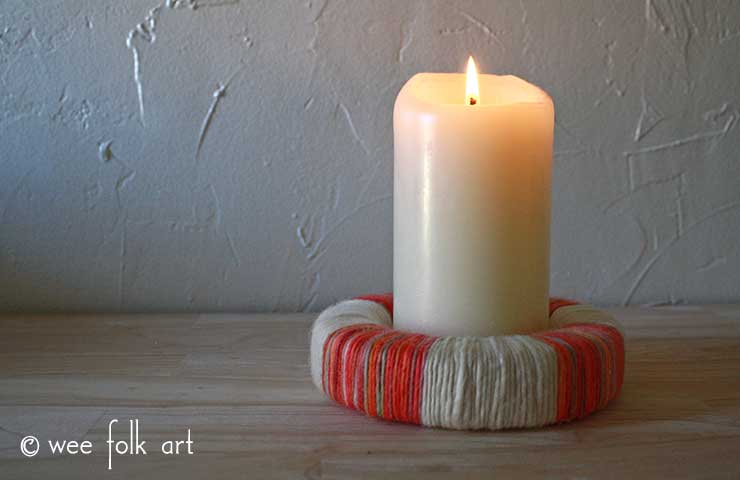
Yarn Wrapped Candle Wreath
We hope everyone had a fun filled Halloween. Although we are itching to start some holiday crafting here, we still have a few more autumn/Thanksgiving projects to finish up. Today I am sharing these yarn…
-
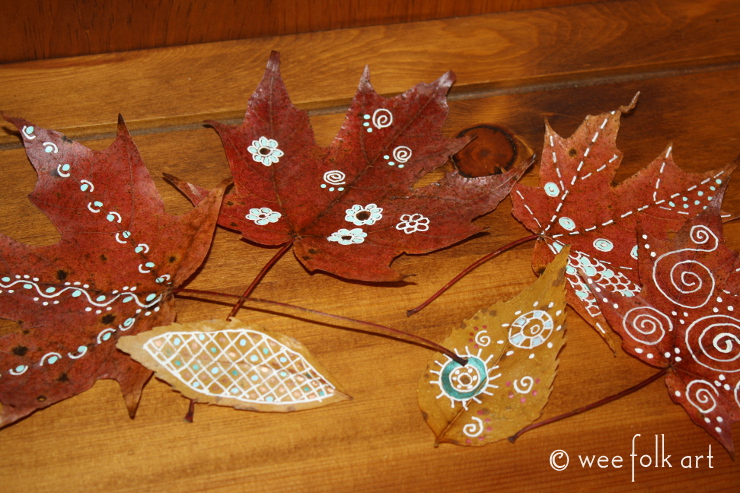
Painted Leaves
There is something so soothing about doodling… those small, unplanned, undesigned drawings where your pen meanders across the surface of a page taking leaps and turns like an Olympic figure skater on the ice. Since…
-
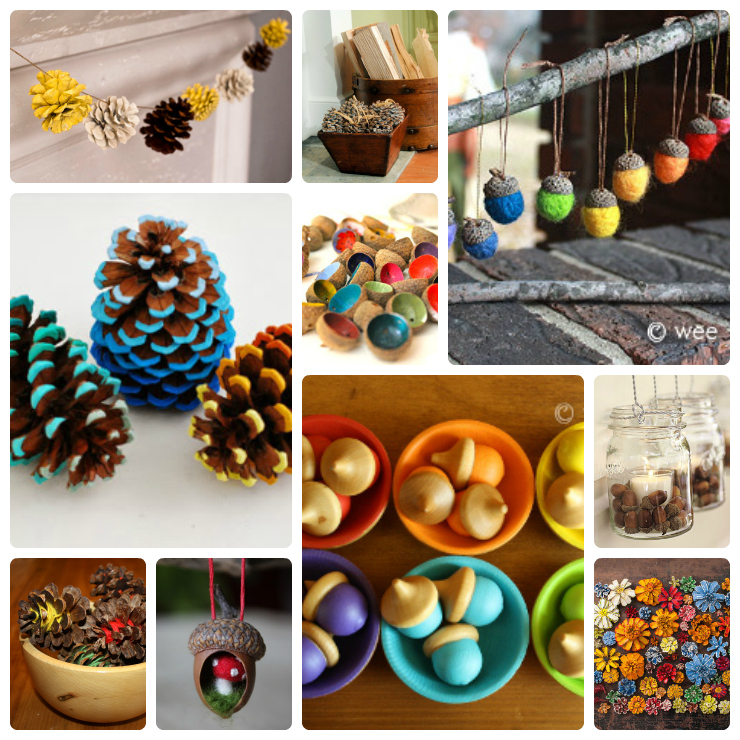
Pinecone and Acorn Crafts
What’s one of the very best things about autumn? Nature walks, of course. Whether your saunter through your backyard with a cup of coffee or take the family on a meander through a woods, you…
-
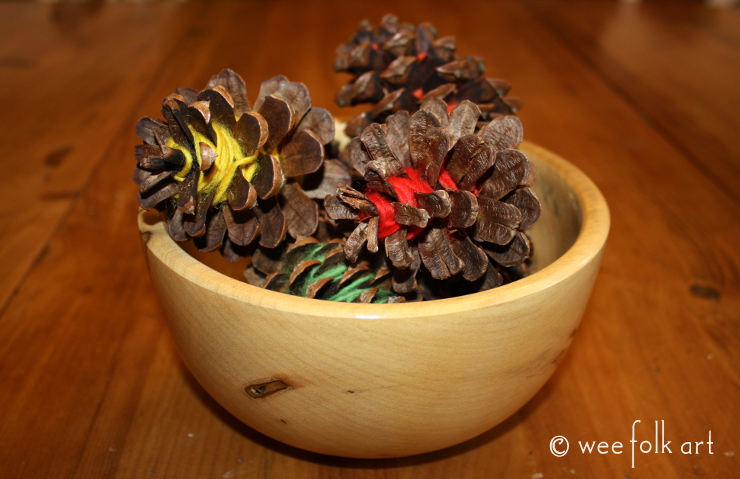
Yarn Wrapped Pinecones
Here’s a super easy, super adorable, and super fun craft for the whole family. Begins with a walk in the woods. Already a winner, right? Collect up some nicely shaped pinecones. Shake them out to…
-
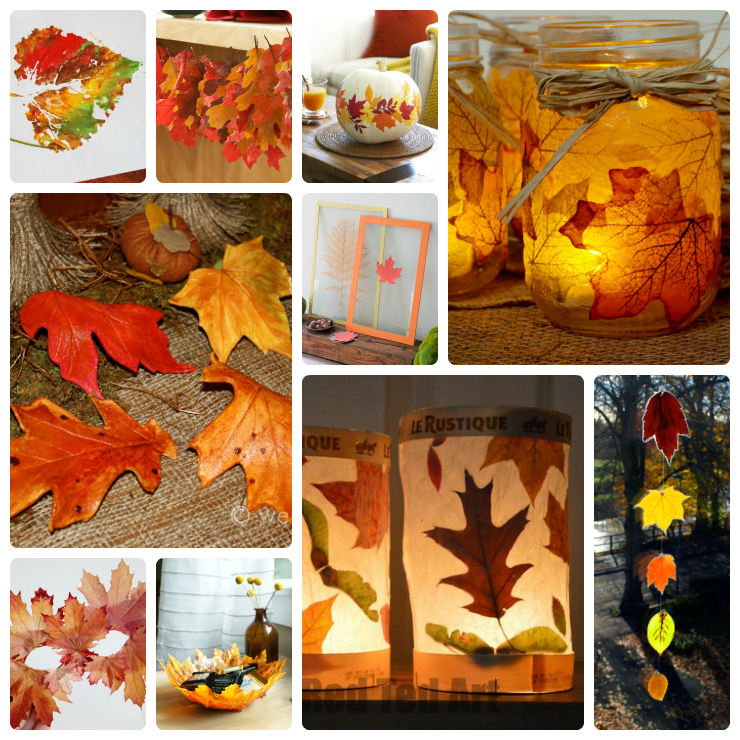
Leaf Crafts
What is it about autumn that makes it so many people’s favorite season? Is it the break from oppressive summer heat? Perhaps. If you have children, is it the return to school and “normal” routines.…
-
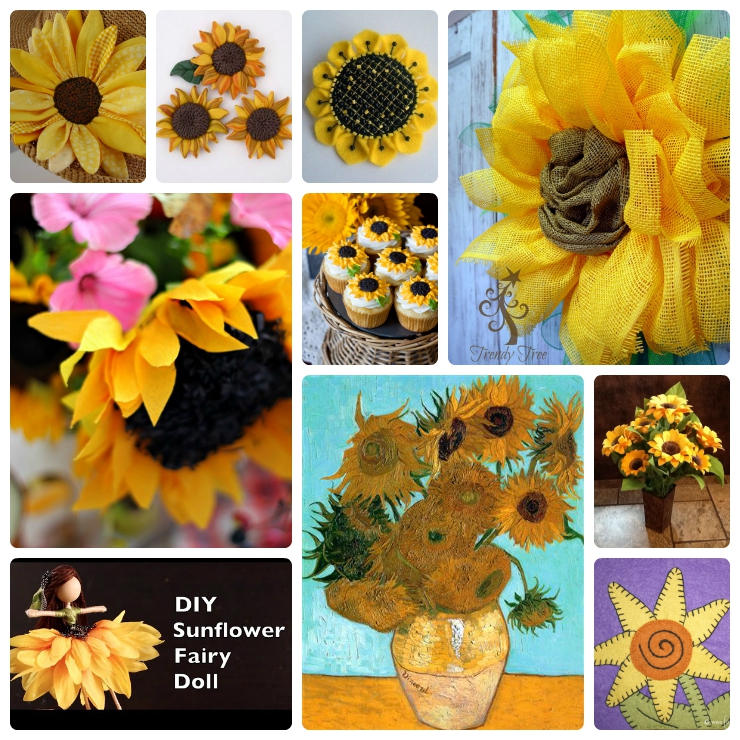
DIY Sunflower Showcase
Sunflowers are one of my all time favorite flowers. I love how big and bold their beauty is. I love the healthy seeds they provide us with. I love how they spend their day following…